ANNOUNCING: Change is part of life, and apparently, it's part of blogging, too. As of September 5, 2013, I'm merging The Virtual Goody Plate with Disco Mom Takes on the World and whatever else may henceforth spill from my fingertips (and kitchen), into one great new blog. I hope you'll join me there in exclaiming, "THIS IS AWESOMELAND."

Friday, December 31, 2010

VGP Bloopers: The Ones that Didn't Measure Up

I thought about ending the year with a Best and Worst of 2010 post, but that doesn't work because if I posted it, it was the BEST, and if I didn't, it was sub-par. But I did take pictures of some of those, since I didn't know they weren't good yet, so I thought it might be fun to show you what I didn't post.

Some, you can tell from the name or picture - what was I thinking? Others might look good, but trust me, I did you a favor holding it back. So just in case you think it's all perfect results in my kitchen, here are just a few of the disappointments of 2010:

Jamaican Banana Bread
Strawberry Silk Pie (bleh)

Jamaican Beef Patties (not nearly as good as the ones from street carts in Toronto)

"Ultimate" Cinnamon Rolls (yeahright)

Ginger Cocoa Biscotti

Chocolate Peanut Brownie Cake (next time I should use the right size pan and also not burn the caramel)

Lime Marshmallow Pie (so pretty but so sour!)

Chocolate Ricotta Muffins (just wrong)

Banana Macadamia Pie (trying too hard)

Dutch Apple Cheese Muffins (truly gross)

Banana Peanut Butter Chocolate Chip Cookies

Pecan Praline Muffins

Crockpot Chocolate Pudding Cake

Cranberry Pear Pie (just one in a lineup of Thanksgiving disappointments)

Two kinds of Strawberry Bread, both bad

Nasty Apple Cake (totally different from the good one I posted)

Light Lemon Bundt Cake

And the absolutely worst thing I made this year is this truly revolting Strawberry and Chocolate Jiggle-Fluff Pie. I watched Sunny Anderson make it on her show. I thought it looked so comfort-food good, and she sure seemed to like it. Did I do something wrong, or is it really supposed to be a chunky-slimy gag-reflex-inducing mess? I guess we'll never know. Because I've got a long list of new and promising recipes to try next year. And there will be no looking back.

Thursday, December 30, 2010

Chocolate Toffee Cookies

These are the kind of perfect-brownie-toffee-sticky-comfort-hoard-them-drool-yummyumyum cookies everyone should know about. In fact, I think everyone does know about them. I didn't until recently, but that was quickly remedied.

On December 1 I went to a cookie exchange where I didn't know anyone but the hostess, so it was a chance for lots of meeting and measuring up. I admit, the spread impressed me and exceeded my expectations. These cookies are the perfect example.

Lara was the first woman I met at the exchange. She couldn't stay long so we got right to it. She's a food blogger, I'm a food blogger. Exchange URLs. Her intended recipe didn't work out (been there a million times), so she had to scramble for something good but reliable for the exchange. And of course they were my favorite treat in the massive spread. So favorite, that while I divvied up the rest of my haul for give-away treat boxes, I snuck all of these into the back of my freezer and ate them slowly over the month. And no one else got a crumb.

THAT
is how I feel about these cookies.

Also, Lara's the one that told me how to do printable recipes. I think we can all thank her for that!

Chocolate Toffee Cookies
1/2 cup all purpose flour
1 teaspoon baking powder
1/2 teaspoon salt
1 pound bittersweet (not unsweetened) or semisweet chocolate, chopped
1/4 cup (1/2 stick) unsalted butter
1 3/4 cups (packed) brown sugar
4 large eggs
1 tablespoon vanilla extract
5 1.4-ounce chocolate-covered English toffee bars (such as Heath), coarsely chopped
1 cup walnuts, toasted, chopped
Flaky sea salt for sprinkling (optional)

1. Combine flour, baking powder and salt in small bowl; whisk to blend. Stir chocolate and butter in top of double boiler set over simmering water until melted and smooth. Remove from over water. Cool mixture to lukewarm.

2. Using electric mixer, beat sugar and eggs in bowl until thick, about 5 minutes. Beat in chocolate mixture and vanilla.

3. Stir in flour mixture, then toffee and nuts. Chill batter until firm, about 45 minutes.

4. Preheat oven to 350°F. Line 2 large baking sheets with parchment or waxed paper. Drop batter by spoonfuls onto sheets, spacing two inches apart. Sprinkle with a pinch of flaky sea salt, if you’re using it. Bake just until tops are dry and cracked but cookies are still soft to touch, about 12 to 15 minutes. Cool on sheets. (Can be made 2 days ahead. Store airtight at room temperature.) Makes about 4 1/2 dozen

5. I know that it will be impossible to let them cool completely, but they really taste a lot better cool, as they continue baking once they come out of the oven.

Slice and bake option: After struggling a bit to scoop these cookies, I rolled the dough into a log 1.5 inches in diameter and chilled it. When I was ready to bake the cookies, I cut it into 1/2-inch slices. You can store the dough log in the freezer, wrapped in waxed paper and then two layers of plastic wrap for up to a month, just baking the cookies off as you need. Cookies baked straight from the freezer may need an additional minute or two in the oven, depending on their thickness.

Recipe from Lara at Recipe Shoebox, who got it from Smitten Kitchen, who adapted it from Bon Apetit. Like I said, these cookies get around.

Click here for printable recipe

Wednesday, December 29, 2010

Apricot Almond Cookies

These cookies are so fabulous - sweet, chewy, chunky, but not too many flavors. They have become one of my friend Shanna's regulars, and you know it takes a lot to become a regular, in anyone's kitchen, and especially Shanna's. When you need something that's not too heavy, not too rich, but still sweet and satisfying, this is it!
Apricot-Nut Cookies with Almond Icing
Cookies:

1/2 cup (1 stick) unsalted butter, at room temperature
1/2 cup plus 2 tablespoons sugar
1 teaspoon pure vanilla extract
1/4 teaspoon ground cinnamon
1/4 teaspoon fine sea salt
1 large egg
1 1/4 cups all-purpose flour
1/2 cup dried apricots, coarsely chopped
1/4 cup slivered almonds, toasted
2 tablespoons pine nuts, toasted
-OR- for chunkier cookies, use chopped almonds instead of sliced and pine nuts

Icing:
1 3/4 cups confectioners' sugar
5 to 7 tablespoons almond flavored liqueur OR a little water and almond extract, to achieve spreading consistency

1. For the Cookies: In a large bowl, beat the butter, sugar, vanilla, cinnamon, and salt with an electric mixer until light and fluffy, about 2 minutes. Beat in the egg. Stir in the flour until just blended. Mix in the apricots, almonds, and pine nuts.

2. Transfer the dough to a sheet of plastic wrap and shape into a log, about 12-inches long and 1 1/2-inches in diameter. Wrap the dough in the plastic and refrigerate for 2 hours.

3. Preheat the oven to 350 degrees F. Line 2 heavy baking sheets with parchment paper.

4. Cut the dough log crosswise into 1/4 to 1/2 inch-thick slices. Transfer the cookies to the prepared baking sheets, spacing evenly apart. Bake until the cookies are golden around the edges, about 15 minutes*. Transfer the cookies to a wire rack to cool completely before icing.*The longer they cook, the crunchier they will be. Slightly undercook for a soft, chewy cookie.

5. For the Icing: Place the confectioners' sugar in a medium mixing bowl. Gradually whisk in the almond flavor (and water, if using) until the mixture is of drizzling consistency.

6. Place the wire rack over a baking sheet. Using a spoon or fork, drizzle the cookies with the icing, allowing any excess icing to drip onto the baking sheet. Allow the icing to set before serving, about 30 minutes.

Recipe adapted from Giada De Laurentiis, 2008

Cookies made by Shanna S.
Click here for printable recipe

Monday, December 27, 2010

Lavender-Vanilla Pillows

Now these were unexpected. And light and fragrant and fun. Barely sweet, perfect for afternoon tea.

Of course, the question is, "Where do I find dried lavender?" Well, you could grow your own. We checked Whole Foods, they didn't have it. Shanna got hers at that mecca of aromatics, Penzeys. (They're so awesome they can have a lame website and still boom. But it wouldn't hurt for them to hire a techie.) While you're there you could pick up some vanilla beans, they have at least two kinds. If you don't have a Penzeys, start calling around, get creative, or order some online. I like to just stick my nose in the jar and inhale. But the cookies are good too.

Lavender-Vanilla Pillows
1 tsp dried lavender
1 T water
1 cup butter, softened
1/2 cup powdered sugar
1 vanilla bean, split in half and scraped, or 1 tsp vanilla extract
2 cups all-purpose flour
Powdered sugar

1. Preheat oven to 325. Using a mortar and pestle, grind and crush the 1 tsp lavender. In a small bowl, combine lavender and the water. Set aside for 10 minutes.

2. In a large bowl, beat butter on medium to high speed for 30 seconds. Add the 1/2 cup powdered sugar. Beat until combined, scraping bowl occasionally. Beat in lavender mixture and vanilla bean seeds. Gradually add flour, beating on low until combined.

3. Divide dough into 36 equally portions (each about 3 tsp.) With lightly floured fingers, press each portion of dough evenly into bottom of an ungreased 1 3/4 inch muffin cup.

4. Bake in the preheated oven about 20 minutes or until edges are very lightly browned and toothpick inserted in the center comes out clean. Cool in muffin cups on a wire rack for 10 minutes. Using a thin knife, loosen edges and remove. Transfer to wire rack to cool completely.

5. Lightly sprinkle cookies with powdered sugar just before serving. Makes 36 cookies

Recipe from Better Homes & Gardens Christmas Cookies magazine, December 2010

Cookies made by Shanna S.

Click here for printable recipe

Sunday, December 26, 2010

Root Beer Cookies

Say what? I know. It was one of those things. I couldn't resist; I just had to try them! So when I recently went to Fran's for my cream horn molds I also picked up a bottle of root beer concentrate, with these in mind.

They're kind of weird. Not bad, just odd to have that delicious root beer flavor that I love in a fizzy, frosty drink, in a soft frosted cookie. It's like eating a root beer float in cookie form. This is really a cookie just for that root beer enthusiast in your life. Or the insatiably curious baker.

And don't think the rest of my (or your) bottle of concentrate will go to waste! I might use the rest to make Root Beer White Chocolate Chip Cookies. Or Root Beer Pinwheel Cookies. Maybe Root Beer Float Bars or a Root Beer Bundt Cake. Requests?

Root Beer Cookies
Cookies:

1 cup packed dark brown sugar
4 ounces canola oil margarine
1/2 stick (4 tablespoons) unsalted butter, at room temperature
1 large egg
1 teaspoon vanilla extract
1/2 teaspoon baking soda
1/2 teaspoon salt
1 3/4 cups flour
2 teaspoons root beer concentrate, such as McCormick's brand

Icing:

2 cups confectioners' sugar
2/3 stick (5 1/3 tablespoons) unsalted butter, at room temperature
2 to 4 tablespoons water
1 teaspoon root beer concentrate

1. For the cookies: In a large bowl, using a stand mixer or an electric hand mixer on medium speed, beat the brown sugar, margarine, butter and egg for several minutes until well blended and fluffy. Reduce the speed to low and add the vanilla extract, baking soda, salt, the flour in increments, and the root beer concentrate. The batter will be stiff. Cover and refrigerate for 1 hour.

2. Preheat the oven to 375 degrees. Line several large baking sheets with parchment paper. Drop the dough by teaspoonfuls, spaced about 2 inches apart (the cookies will spread), onto the prepared sheets. Bake for 6 to 8 minutes. Transfer to a wire rack to cool completely.

3. For the icing: In a medium bowl, combine the confectioners' sugar with the butter and mix well. In a measuring cup, combine the water and root beer concentrate; add to the sugar-butter mixture and mix well, adding more water as needed to reach the desired consistency. Spread on the cooled cookies. Let set for about 30 minutes before serving.

Recipe from The Washington Post, December 13, 2006

Click here for printable recipe

Saturday, December 25, 2010

Chewy Chocolate Gingerbread Cookies

These were among my top 3 favs at Dessert Club this month. Bittersweet chocolate enrobed in a crackly chewy comforting ginger cookie. When I ate it, it was just a little melty. Wow. But when I had another one the next day the chocolate had cooled to a fudgy consistency. I was delirious.

I was caused to question, why do I try so many cookie recipes? And why do I insist on giving at least four different kinds of things away on goody plates? Wouldn't someone just rather have a dozen of something AWESOME like these? Or maybe these and these? Is it even possible for me to go "quality-simple"? Because if it is, these are how I'd do it.
Chewy Chocolate-Gingerbread Cookies

7 ounces best-quality semisweet chocolate
1 1/2 cups plus 1 tablespoon all-purpose flour
1 1/4 teaspoons ground ginger
1 teaspoon ground cinnamon
1/4 teaspoon ground cloves
1/4 teaspoon ground nutmeg
1 tablespoon unsweetened Dutch-process cocoa powder
8 tablespoons (1 stick) unsalted butter
1 tablespoon freshly grated ginger
1/2 cup dark-brown sugar, packed
1/4 cup unsulfured molasses
1 teaspoon baking soda
1/4 cup granulated sugar

  1. Line two baking sheets with parchment. Chop chocolate into 1/4-inch chunks; set aside. In a medium bowl, sift together flour, ground ginger, cinnamon, cloves, nutmeg, and cocoa.
  2. In the bowl of an electric mixer, fitted with the paddle attachment, beat butter and grated ginger until whitened, about 4 minutes. Add brown sugar; beat until combined. Add molasses; beat until combined.
  3. In a small bowl, dissolve baking soda in 1 1/2 teaspoons boiling water. Beat half of flour mixture into butter mixture. Beat in baking-soda mixture, then remaining half of flour mixture. Mix in chocolate; turn out onto a piece of plastic wrap. Pat dough out to about 1 inch thick; seal with wrap; refrigerate until firm, 2 hours or more.
  4. Heat oven to 325 degrees. Roll dough into 1 1/2- inch balls; place 2 inches apart on baking sheets. Refrigerate 20 minutes. Roll in granulated sugar. Bake until the surfaces crack slightly, 10 to 12 minutes. Let cool 5 minutes; transfer to a wire rack to cool completely.
Recipe from Martha Stewart Living, December/January 1997/1998

Cookies made by Dessert Club member Juli B.

Click here for printable recipe

Friday, December 24, 2010

Vanilla-Spice Nuts

Here is yet another treat I had never made before - homemade spiced nuts. If I'd known it was this easy I wouldn't have waited so long. But more than easy, this recipe is special because it really has the flavor proportions perfect. The vanilla is there, but not overpowering. The cinnamon, allspice and cardamom are delicious but not too strong. And go ahead, take the leap and add 1/4 tsp ground red pepper for the slightest bit of heat. I promise, it's not too much, it just adds that extra oomph that you will love.

I put these nuts in my give-away goody boxes this year because it's a nice reprieve from cookies - they're festive but snacky, and oh-so-crunchy. Follow the recipe exactly to keep from over toasting the nuts.
Vanilla-Spice Nuts
1 T vanilla extract
1 large egg white
1 cup sliced almonds
1 cup pecan halves
1 cup macadamia nuts
1/4 cup sugar
1 tsp kosher salt
3/4 tsp ground cinnamon
3/4 tsp ground allspice
1/4 tsp ground cardamom
1/4 tsp ground red pepper, optional


1. Preheat oven to 325°.

2. Combine 1 tablespoon vanilla extract and egg white in a large bowl, stirring with a whisk until foamy. Stir in nuts. Combine sugar and the remaining ingredients in a small bowl, and sprinkle sugar mixture over nuts, tossing to coat. Place nut mixture on a baking sheet lined with parchment paper. Bake at 325° for 15 minutes. Remove pan from oven. Turn off oven. Toss nuts, and break large pieces apart. Return pan to oven, and leave pan in oven for 10 minutes. Cool to room temperature.

Recipe from Cooking Light, December 2010

Click here for printable recipe

Thursday, December 23, 2010

Peanut Butter Whoopie Pies

I know that when it comes to whoopie pies, peppermint is the "seasonal" thing. And I know I already made a chocolate-peanut-butter-something this month. But these were what I was in the mood for. Don't even pretend you don't want one right now.

I've made a couple of whoopie pie attempts over the years, and a surprising number have been unsuccessful. Just unluckily bad recipes, I guess. But I keep at it because whoopie pies are awesome. Because they are just the best parts of cupcakes, rearranged. Two cupcake tops and a generous helping of frosting, but since it's in the middle we call it filling and make it creamier. They are genius!

So I recently did some serious whoopie pie research, mostly on the astoundingly extensive food blog network. And I came up with what should hopefully be the best recipes for a bunch of different kinds of whoopie pies. Eventually I will be making all of them, but I just had to make these first. Not especially Christmasy, but dang good anyway. Did I say dang good? I meant DIVINE.

Peanut Butter Whoopie Pies
For the Cookies:

1 3/4 cups all-purpose flour
3/4 cup unsweetened cocoa powder, not Dutch-process
1 1/2 teaspoons baking soda
1/2 teaspoon coarse salt
1 tablespoon unsalted butter, softened
1/4 cup vegetable shortening
1/2 cup granulated sugar
1/2 cup packed dark-brown sugar
1 large egg
1 cup whole milk
1 teaspoon pure vanilla extract

For the Filling:

2/3 cup natural, creamy peanut butter
1/2 cup (1 stick) unsalted butter, softened
3/4 cup confectioners' sugar
Coarse salt, optional
  1. Make cookies: Preheat the oven to 375 degrees. Sift together flour, cocoa powder, baking soda, and salt into a small bowl; set aside.
  2. Put butter, shortening, and sugars into the bowl of an electric mixer fitted with the paddle attachment. Mix on high speed until smooth, about 3 minutes. Add egg; mix until pale and fluffy, about 2 minutes. Mix in half the flour mixture, then the milk and vanilla. Mix in remaining flour mixture.
  3. Drop rounded tablespoons of dough onto baking sheets lined with parchment paper, spacing 2 inches apart. Bake until cookies spring back when lightly touched, 12 to 14 minutes. Let cool on sheets on wire racks 10 minutes. Transfer cookies to wire racks using a spatula; let cool completely.
  4. Make filling: Put peanut butter and butter in the bowl of an electric mixer fitted with the paddle attachment. Mix on high speed until smooth. Reduce mixer speed to low. Add confectioners' sugar; mix until combined. Raise speed to high, and mix until fluffy and smooth, about 3 minutes. Season with salt, if desired.
  5. Assemble cookies: Spread 1 scant tablespoon filling on the bottom of 1 cookie. Sandwich with another cookie. Repeat with remaining cookies and filling. Cookies can be refrigerated in single layers in airtight containers up to 3 days. Bring to room temperature before serving.
Makes about 18 to 24 sandwiches

Recipe from Martha Stewart Holiday Cookies 2005

Click here for printable recipe

Wednesday, December 22, 2010

Orange Almond Bars

So these are what my Mom made for Dessert Club, and they were among my favorites. They're similar to biscotti - handy dunkable shape, refreshing almond flavor, great with any beverage - except there's no second bake so instead of crunchy they are gorgeously soft and chewy. I could easily eat a whole plateful with a mug of cocoa and a good book (currently reading Catching Fire, the middle book in the Hunger Games trilogy - totally engrossing - I digress.)

And that orange glaze! It figuratively and literally tops the cookie. I love easy things that are awesome!

Orange Almond Bars
Cookie:

1/2 cup butter, softened
1 1/2 cups all-purpose flour
1 cup sugar
1 egg
2 tsp baking powder
1 T finely grated orange peel
1/2 tsp almond extract
1/4 tsp salt
Milk for brushing
1/2 cup sliced almonds

Orange Glaze:
1/2 cup powdered sugar
1/4 tsp almond extract
1/2 tsp orange extract
1 T orange juice

1. Preheat oven to 325. Prepare two baking sheets by lining them with parchment paper.

2. In mixer bowl, beat butter until light, about a minute. Ad din half the flour, all the sugar, egg, baking powder, orange peel, almond extract and salt. Beat until combined, then add in the rest of the flour.

3. With your hands, form into a ball and move over to a floured board. Divide dough into four balls. make each into a roll about 8 inches long, then flatten it with a rolling pin to about 2 inches wide. Put them 4 inches apart onto the two prepared cookie sheets. Brush with milk and sprinkle with almonds.

4. Bake for about 22 minutes or until light brown. While still warm and on the sheets, cut diagonally into slices about 1 inch wide. Transfer to wire cooking racks with something underneath to catch the drips. When cool, drizzle with the orange glaze.

Recipe adapted from 100 Best Cookies magazine, 2009

Cookies made by Dessert Club member Carol Y. (Mom)

Click here for printable recipe

Tuesday, December 21, 2010

Samoas

One of many delectables from Dessert Club this month, this is the homemade version of the Girl Scout favorite, Samoas. Cookie, caramel, coconut, chocolate. If only it were that easy. According to these cookies' maker Rebecca, and the author from whom she got the recipe, these are a bit time consuming to make. BUT, they can easily be broken into steps that you can do over time - do the cookies one time, make the topping later, assemble the next day. Just plan ahead. And according to everyone, including me, they are worth it.
Samoas

Cookies:

1 cup butter, soft
1/2 cup sugar
2 cups all purpose flour
1/4 tsp baking powder
1/2 tsp salt
1/2 tsp vanilla extract
up to 2 tbsp milk

1. Preheat oven to 350F.

2. In a large mixing bowl, cream together butter and sugar. Mix in flour, baking powder and salt at a low speed, followed by the vanilla and milk, adding in the milk as needed to make the dough come together without being sticky (it’s possible you might not need to add milk at all). The dough should come together into a soft, not-too-sticky ball. Add in a bit of extra flour if your dough is very sticky.

3. Roll the dough (working in two or three batches) out between pieces of wax paper to about 1/4-inch thickness (or slightly less) and use a 1 1/2-inch cookie cutter to make rounds. Place on a parchment lined baking sheet and use a knife, or the end of a wide straw, to cut a smaller center hole. Repeat with remaining dough. Alternatively, use scant tablespoons of dough and press into an even layer in a mini donut pan to form the rounds.

4. Bake cookies for 10-12 minutes, until bottoms are lightly browned and cookies are set. If using a mini donut pan, bake for only about 10 minutes, until edges are light gold.
Cool for a few minutes on the baking sheet then transfer to a wire rack to cool completely.

Topping:
3 cups shredded coconut (sweetened or unsweetened)
12-oz good-quality chewy caramels
1/4 tsp salt
3 tbsp milk
8 oz. dark or semisweet chocolate (chocolate chips are ok)

1. Preheat oven to 300. Spread coconut evenly on a parchment-lined baking sheet (preferably one with sides) and toast 20 minutes, stirring every 5 minutes, until coconut is golden. Cool on baking sheet, stirring occasionally. Set aside.

2. Unwrap the caramels and place in a large microwave-safe bowl with milk and salt. Cook on high for 3-4 minutes, stopping to stir a few times to help the caramel melt. When smooth, fold in toasted coconut with a spatula. Using the spatula or a small offset spatula, spread topping on cooled cookies, using about 2-3 tsp per cookie. Reheat caramel for a few seconds in the microwave if it gets too firm to work with.

3. While topping sets up, melt chocolate in a small bowl. Heat on high in the microwave in 45 second intervals, stirring thoroughly to prevent scorching. Dip the base of each cookie into the chocolate and place on a clean piece of parchment paper. Transfer all remaining chocolate (or melt a bit of additional chocolate, if necessary) into a piping bag or a ziplock bag with the corner snipped off and drizzle finished cookies with chocolate. Let chocolate set completely before storing in an airtight container.

Makes about 3 1/2-4 dozen cookies

Recipe from http://bakingbites.com

Cookies made by Dessert Club member Rebecca Y.

Monday, December 20, 2010

Cardamom Cream-Filled Snaps

I was so excited to make these for Dessert Club because I've never made a molded cookie like this. And it required a special trip to Fran's to get the molds (and I love any excuse to go to Fran's.) Although now that I know what they are, you can get the molds lots of places, like Amazon.

Because I'd never made them before, there was a learning curve, and they didn't start turning out well until halfway through. Unfortunately I didn't take step-by-step pictures - I never understand how people can do that! They must not have three demanding kids underfoot, making every second count.

These won the vote at Dessert Club, though I disqualified myself by being the hostess and providing the prize. So everyone loved them and you know they're amazing, filled with cardamom sweetened mascarpone (or cream cheese.) Here's the main thing to keep in mind. Don't undercook the cookies, that was my mistake. They need to be pliable, yes, but not falling apart as you wrap them around the metal cone. If they fall apart, cook them another minute or two. Then let them cool for 2 to 4 minutes, then wrap them on the cone.

These don't keep well, once filled. The filling softens them up, so fill no longer than one hour before serving. Right before serving is best.

Also. Did you buy cardamom for this or another recipe and not really sure what to do with the rest of it? Throw a pinch or two into your hot cocoa. It's delicious!

Cardamom Cream-Filled Snaps
1/4 cup packed brown sugar
3 T butter, melted
1 T light corn syrup
2 tsp rum, bourbon or rum extract (I did a combo of vanilla, almond and rum extracts)
1/3 cup all-purpose flour
1/4 tsp ground cinnamon
1/4 tsp ground nutmeg, plus more for garnish
1/2 of an 8-ounce container mascarpone cheese or cream cheese, softened
1/2 cup powdered sugar
1 tsp vanilla
1/4 tsp ground cardamom

1. Preheat oven to 350. Line a cookie sheet with greased foil or parchment. In a small bowl stir together brown sugar, butter, corn syrup and rum. Stir in flour, cinnamon and nutmeg until combined.

2. Drop batter by scant teaspoons 4 inches apart on prepared baking sheets. Do not bake more than for at a time. Spread each mound of batter evenly until 1 1/2 inches in diameter. (I used a 1 1/2 inch round cookie/fondant cutter to get them the right size and as round as possible.)

3. Bake for 5 to 7 minutes or until bubbly and golden. Let stand for about 3 to 4 minutes on cookie sheet. Using the end of a metal cone, quickly shape cookies, one at a time, into small cones. If cookies harden before you can shape them, return them to the oven about 1 minute or until softened. Cool on a wire rack.

4. For filling, in a small mixing bowl, beat mascarpone cheese, powdered sugar, vanilla and cardamom with an electric mixer on medium speed until mixture thickens slightly. Pipe cheese into each cookie cone. If desired, dust cheese mixture with grated nutmeg.

Do not freeze or store cookies. Can be refrigerated up to one hour.

Recipe from The Ultimate Cookie Book


Click here for printable recipe

Sunday, December 19, 2010

Gingerbread Muffins with Lemon Glaze

I have never been to Standard Baking Co. in Portland, Maine. It's a sore spot because Ed and I would love to live in Maine, or at least visit more often. And since I made these muffins, courtesy of SBC, all I can think about is tasting what else they make. And I even kind of messed them up!

Not too bad. Molasses just isn't an ingredient I use or check on a lot. When I run out, I get more, but I don't have a constant awareness of the amount left, like I do with flour and sugar. So I was making the muffins and realized I didn't have 3/4 cup molasses in my jar. I only had about half that. So I increased the spice amounts a little, and also sprinkled a little ginger sugar on top before baking to pump up the flavor. And they were AWESOME! Gorgeous texture, almost like a cupcake but still a muffin (because I want to eat it for breakfast!) Fabulous lemon pop on top as well.

Note to self: Make again for sure. And maybe toss a bit of candied ginger in the muffin and lemon zest in the glaze. And for sure the full amount of molasses. Not that they need improving; I'm just curious.
Gingerbread Muffins with Lemon Glaze
Muffins:
2 3/4 cups all purpose flour
2 1/2 teaspoons baking soda
1 tablespoon plus1/2 teaspoon ground ginger
1 teaspoon ground cinnamon
1/8 teaspoon ground cloves
1/2 teaspoon salt
1/2 cup (1 stick) unsalted butter, room temperature
1/2 cup plus 2 tablespoons sugar
2 large eggs
3/4 cup mild-flavored light molasses
1 1/3 cups cold water
Lemon glaze:
3/4 to 1 cup powdered sugar
2 to 2 1/2 tablespoons fresh lemon juice
Whipped cream (optional)

1. Preheat oven to 350°F. Lightly butter 16 standard (1/3-cup) muffin cups. Whisk flour, baking soda, ginger, cinnamon, cloves and salt in medium bowl to blend.

2. Using electric mixer, beat unsalted butter and sugar in large bowl to blend. Add large eggs and beat to blend. Beat in light molasses. Add half of dry ingredients, beating until blended. Beat in remaining dry ingredients. Gradually add 1 1/3 cups cold water and beat until incorporated. Divide batter equally among 16 prepared muffin cups.

3. Bake gingerbread until tester inserted into center comes out clean, about 20 to 25 minutes. Transfer to rack and cool 10 minutes. Remove muffins from pan and place on rack over sheet of foil.

4. For lemon glaze, whisk powdered sugar and lemon juice in small bowl until smooth. Add more sugar or juice until you reach a nice glazing consistency. Spoon or brush lemon glaze over tops of warm muffins. Serve muffins warm with whipped cream, if desired, or at room temperature. Makes 16 muffins.

Recipe adapted from Standard Baking Co., Portland, ME via Bon AppƩtit December 2000

Click here for printable recipe

Saturday, December 18, 2010

MINTY Week #7 Peppermint Kiss Cookies

These are just what you want from a holiday cookie. Dense and rich but soft and seriously generous on flavor. Ed said the chocolate was too dark for him. Which means it's just right.

Careful when you put the kisses on these ones. The peppermint kisses seem to be a bit softer than regulars so they kinda melt down if you put them on the cookies hot out of the oven. Let them cool for 2 or 3 minutes before setting them on. (This one was perfect before I slightly smashed it setting up the shot!)

Peppermint Kiss Cookies
1/2 cup butter, softened
1/2 cup shortening
1 cup sugar
3/4 cup unsweetened Dutch-process cocoa powder
2 tsp baking powder
1 egg
2 T milk
1 tsp peppermint extract
1 1/2 cups all-purpose flour
42 peppermint swirl candy kisses

1. Preheat oven to 350. In a large bowl, combine butter and shortening. Beat with an electric mixer on medium to high speed for 30 seconds. Add sugar, cocoa powder, and baking powder. Beat until combined, scraping bowl occasionally. Beat in egg, milk and peppermint extract until combined. Beat in flour. Cover and chill about 1 hour or until dough is easy to handle.

2. Shape dough into 1-inch balls. Place balls 2 inches apart on an ungreased cookie sheet. Bake in the preheated oven for 10 to 12 minutes or until edges are firm.

3. Allow cookies to sit 2 to 3 minutes, then press a candy kiss into the center of each cookie. The white chocolate in the candy cane kisses does not hold its shape when it melts as well as milk or dark chocolate do, so watch the first few you do. If the kiss melts into a puddle, allow the cookies to cool another minute or two before placing the candy. Transfer cookies to a wire rack and cool completely. Makes about 42 cookies.

Recipe from Better Homes and Gardens Christmas Cookies magazine, 2010
Cookies made by Shanna S.

Click here for printable recipe

Friday, December 17, 2010

MINTY Week #6 Peppermint Pinwheels

Pinwheels are just downright pretty cookies. I'd like to take a moment to reflect on previously posted pinwheels: Cranberry-Orange Pinwheels and Chocolate-Almond-Apricot Cookies. Now these pretty little minty buttery sugar-cookie-esque bites join their ranks.

They are straightforward; all you have to do is try to roll them nice and tight. Rolling the doughs between wax paper is a key step - that way, they are not over-floured, a mistake I have made with past pinwheels, and which keeps them from sticking to each other. Also, try to get the reddest red food coloring you can for a true red color. Michael's or specialty cake supply stores sell food coloring paste which gets you closer than McCormick's or whatever they sell at the grocery store.

Thanks to Shanna S. yet again for this MINTY Week contribution; tomorrow's is from her as well. She has been a baking machine this last month. Reminds me of someone...Peppermint Pinwheels
3/4 cup butter, softened
3/4 cup sugar
1 egg yolk
1 tsp vanilla
2 cup flour
1/2 tsp baking powder
1/2 tsp salt
1/2 tsp peppermint extract
1/4 tsp red food coloring

1. In a mixing bowl, cream butter and sugar. Beat in egg yolk and vanilla. Combine flour, baking powder and salt. Add to creamed mixture; mix well. Divide in half; add extract and food coloring to one portion.

2. Roll out each portion of dough between waxed paper into a 16x 10 inch rectangle. Remove paper. Place red rectangle over plain rectangle; roll up tightly jelly roll style, starting with long side. Wrap in plastic wrap. Refrigerate overnight until firm. (To keep from flattening on one side, lay in a drinking glass on its side, or two end-to-end.)

3. Preheat oven to 350. Unwrap the dough and cut into 1/4 inch slices. Place 2 inches apart on lightly greased baking sheets. Bake 12 to 14 minutes or until set. Cool for 2 minutes before removing to wire racks to cool completely. Makes about 4 dozen.

Recipe from Taste of Home Annual Recipes 2004
Cookies made by Shanna S.

Click here for printable recipe

Thursday, December 16, 2010

MINTY Week #5 Dipped Mint Chocolate Cookies

Do you know what today is? My bet is if you are eating chocolate-covered Cheerios for breakfast you do. Chocoholics, rejoice! It is National Chocolate Covered Anything Day! Aah, I love December.

So today I have for you chocolate-mint dipped cookies. Basically Thin Mints, those timelessly tempting sirens of the Girl Scout line-up. They taste and look just like 'em. Even better, actually. And they are fun, fun, fun to make. If you consider dipping things in chocolate as therapeutic as I do.

How do you like my swirly top? At first they were flat and smooth, and since I didn't feel like sprinkling them with crushed candy canes (although you certainly could), I took a toothpick and made them twirly-swirly. 
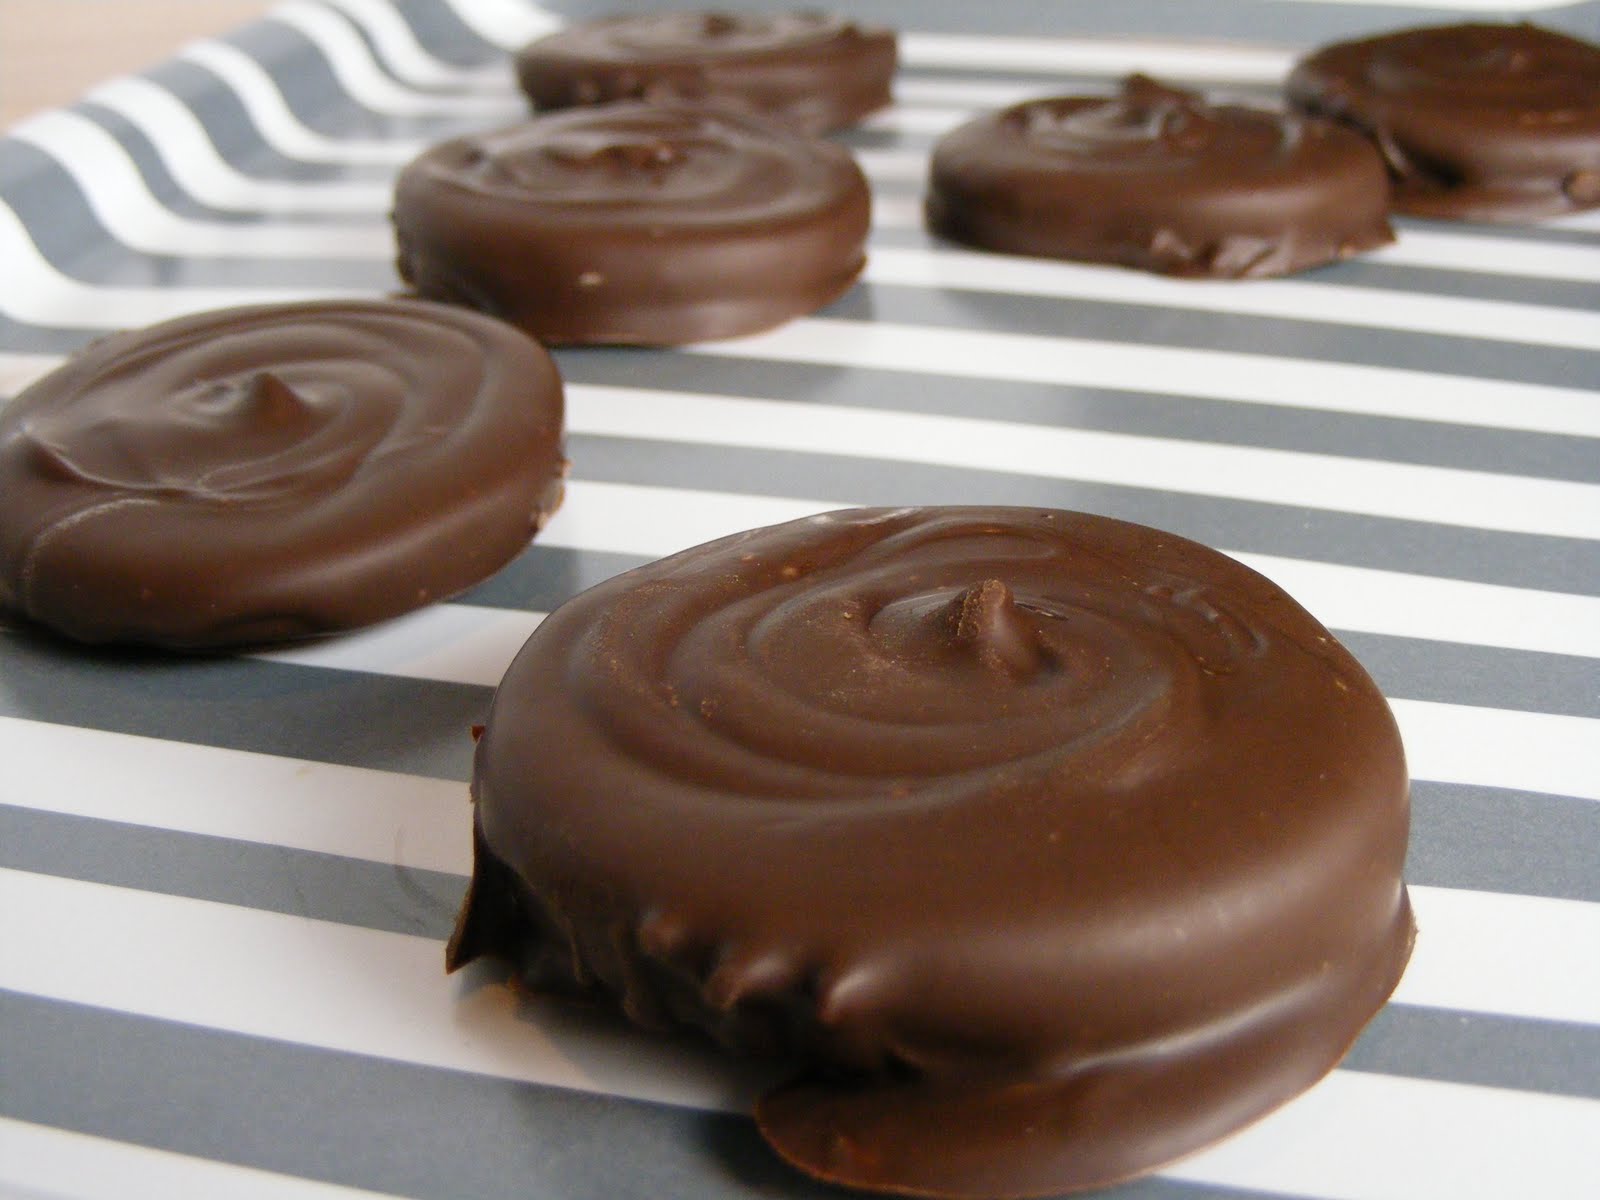
Hey, I knew these would be a home run, and since they happen to fit into MINTY Week AND Chocolate Covered Anything Day, I stayed up extra late to get these posted today. But if you're a little tired of mint, or curious about your chocolate-dipping options, CDKitchen has a nice list of recipes for you. And don't forget my serendipitously timed Dipping Tutorial.

Dipped Mint Chocolate Cookies

1 cup butter, softened
1 cup sugar
1/2 cup unsweetened cocoa powder
1 1/2 tsp baking powder
1/2 tsp salt
1 egg
1 tsp vanilla extract
2 1/2 cups all-purpose flour
Chocolate-Peppermint Coating (see below)

1. In a large bowl, beat butter with an electric mixer on medium to high speed for 30 seconds. Add sugar, cocoa, baking powder, and salt. Beat until combined, scraping bowl occasionally. Beat in egg and vanilla until combined. Beat in as much of the flour as you can with the mixer (I did it all.) Beat in remaining flour with wooden spoon if your mixer isn't tough enough.

2. Divide dough in half. Shape each half into a 10-inch roll. Wrap each roll in waxed paper or plastic wrap. Chill at least 1 hour or until dough is firm enough to slice.

3. Preheat oven to 375. Cut rolls into 1/4-inch slices (envision the thickness of a Thin Mint.) Place slices 1 inch apart on an ungreased cookie sheet (they do not spread much.)

4. Bake in preheated oven for 6 to 8 minutes or until edges are firm. Transfer cookies to a wire rack; cool.

5. Dip each cookie into Chocolate-Peppermint Coating, turning to coat all sides of cookie. Using a thin metal spatula or fork, scrape or shake off excess coating so cookie is covered with a thin layer. Reheat coating as necessary. Place cookies on cookie sheets lined with wax paper, not touching. If desired, sprinkle with crushed peppermint candies while coating is still wet. Or make yours swirly like mine with a toothpick. Chill until coating is set, about 30 minutes. Makes about 68 cookies.

Chocolate-Peppermint Coating
24 oz. semisweet chocolate pieces or chopped dark chocolate
1/4 cup (4 T) shortening
1/2 tsp peppermint extract

In a medium saucepan, combine chocolate, shortening and extract. Cook and stir over medium-low heat until chocolate and shortening are melted.

To Store: Layer cookies between sheets of waxed paper in an airtight container; cover. Store in refrigerator for up to 3 days or freeze for up to 3 months.

Recipe from Better Homes and Gardens Christmas Cookies magazine, December 2010

Click here for printable recipe

Wednesday, December 15, 2010

MINTY Week #4 Peppermint Cream Bars with White Chocolate Ganache

Raise your hand if you've ever had white chocolate ganache. Hello, welcome to my repertoire. What a keeper this entire recipe is! Gorgeous, check. Easy (all done in one batch), check. Festive and flavorful, check, check. Chewy and creamy, check. Melty in your minty mouthy, CHECK!!! Definitely, definitely permanent additions to the goody plate rotation.

Peppermint Cream Bars with White Chocolate Ganache
1 17.5 oz. package sugar cookie mix
2 T all-purpose flour
1/2 cup butter
4 egg yolks
1 14 oz. can sweetened condensed milk
1/2 to 1 tsp peppermint extract (depending on your taste)
1/2 cup crushed peppermint candies
White Chocolate Ganache (see below, oh yeah)

1. Preheat oven to 350. Line a 9 x 13 baking pan with foil, extending foil over edges of pan. Lightly grease foil; set pan aside.

2. For crust, in a large bowl, stir together cookie mix and flour. Using a pastry blender, cut in butter until mixture resembles fine crumbs. Press mixture evenly onto the bottom of the prepared baking pan. Bake in the preheated oven for 12 to 15 minutes or until edges are lightly browned.

3. For filling, in a medium bowl, whisk together egg yolks, sweetened condensed milk, and peppermint extract. Stir in crushed candies. Carefully pour filling over hot crust. Bake for 15 to 20 minutes more or until filling is set. Cool in pan on a wire rack for 1 hour. Cover; chill for 30 minutes or until cool.

4. Pour White Chocolate Ganache over top of baked mixture, spreading evenly. Cover and chill again about 1 hour or until firm. Using the edges of the foil, lift cookies out of pan. Cut into bars. Makes 36.

White Chocolate Ganache
1/4 cup whipping cream
6 oz. chopped white baking chocolate (the good stuff, with cocoa butter, not pretend white mystery bars)

In a medium saucepan, bring whipping cream just to boiling over medium-high heat. Remove from heat. Add white chocolate (do not stir.) Let stand 5 minutes. Stir until smooth. Cool about 5 minutes before using.

TO STORE: Layer bars between sheets of waxed paper in an airtight container; cover. Store at room temperature for up to 3 days or freeze for up to 3 months. 

Recipe from Better Homes and Gardens Christmas Cookies magazine, 2010
Bars made by Shanna S.

Click here for printable recipe

Tuesday, December 14, 2010

MINTY Week #3 Chocolate Mint Marvels

Let me tell you all the things I love about these cookies. If that is even possible.
1. They are mint and chocolate.
2. They have a swirly top which makes them pretty, but it is set so it's not messy in transit. An important quality in goody plate items!
3. They taste like Andes mints!!!
4. The recipe is soooooper easy and no-fuss. Look how short the directions are! Talk about cookie bang for effort buck.
5. They come from my friend Julia (via Dessert Club), who has also brought us such amazing recipes as Mrs. June's Heavenly Coconut Cake and Peanut Butter and Chocolate Crispy Squares. Plus she's one of my favorite people and yummy things from people I like makes me like them even more.So you should like me even more after making these yourself.

Chocolate Mint Marvels
3/4 c butter
1 1/2 cups brown sugar
2 cups chocolate chips
2 eggs
2 1/2 cups flour
1 1/4 tsp baking soda
3-4 packages of Andes mints

1. Preheat oven to 350. Melt butter and brown sugar in saucepan over low heat. Add chocolate chips and stir to melt; put mixture into a bowl and let cool.

2. Add eggs, and then mix in flour and baking soda. Chill dough for 1 hour. Roll into balls and place on baking sheet with parchment paper or silpat covers.

3. Bake for 9 min. Remove cookies from oven and place an Andes mint on each one. As the candy melts, spread it across the top of the cookie with a butter knife. Makes 3 dozen.

Recipe from Dessert Club member Julia M.


Click here for printable recipe

Monday, December 13, 2010

MINTY Week #2 Candy Cane Marshmallows

Have you ever made homemade marshmallows? They're super easy! Kinda. Actually, I didn't even make these. But two different friends did so I have drawn on their knowledge to bring you these minty delights. Kids love 'em (number one lunchbox dessert request.) I put one in my hot chocolate and it was melty mint chocolate heaven.

The pictures come from some marshmallows I picked up at a cookie exchange. She followed Martha Stewart's recipe and made them in an 8x8 pan, which makes pretty but strangely tall mallows. Then my friend Shanna made them, a single recipe but in a 9x13 pan, and that made more regular size marshmallows, which I prefer.Pay close attention to the notes in step 4. Those marshmallows set up fast so either skip the food coloring or keep consistency in mind if you want to use it. Maybe beat for a little less time so they are not quite so set to allow for swirling, or try swirling coloring in before pouring into pan. Just something to be aware of.

Candy Cane Marshmallows
Vegetable-oil cooking spray
2 cups sugar
1 tablespoon light corn syrup
4 packages (1/4 ounce each) unflavored gelatin
3/4 teaspoon peppermint extract
2 large egg whites
2 teaspoons red food coloring
Powdered sugar for dusting

1. Coat a 9x13 pan with cooking spray; line bottom with parchment paper. Coat the parchment with cooking spray, and set pan aside. Put sugar, corn syrup, and 3/4 cup water in a small saucepan. Cook over medium heat, stirring, until sugar is dissolved. Stop stirring; let mixture come to a boil. Raise heat to medium-high; cook until mixture registers 260 degrees on a candy thermometer.

2. Meanwhile, sprinkle gelatin over 3/4 cup water in a heatproof bowl; let stand 5 minutes to soften. Set the bowl with the gelatin mixture over a pan of simmering water; whisk constantly until gelatin is dissolved. Remove from heat, and stir in extract; set aside.


3. Beat egg whites in the bowl of an electric mixer fitted with the whisk attachment until stiff (but not dry) peaks form. Whisk gelatin mixture into sugar mixture; with mixer running, gradually add to egg whites. Mix on high speed until very thick, 12 to 14 minutes.
P

4. Pour mixture into lined pan. Working quickly, drop dots of red food
coloring across surface of marshmallow. Using a toothpick, swirl food coloring into marshmallow to create a marbleized effect. *Shanna found this tricky because the marshmallows were already too "set" to swirl food coloring in. If yours seems very thick and set, try dropping a few dots of food coloring into the mixture in the bowl, folding a few times with a rubber spatula to swirl, and then pouring into lined pan. Or you can just skip the food coloring.* Let marshmallow stand, uncovered, at room temperature until firm, at least 3 hours or overnight. Cut into squares.

5. The cut sides will be sticky, so we recommend a light toss in powdered sugar to dry them. Pour some powdered sugar on a plate and gently roll/press cut sides into the sugar. Then toss the marshmallow between your hands a few seconds to shake excess off. This extra step is worth it if you are not immediately using your marshmallows. Makes about 4 dozen yummies.
Recipe adapted from Martha Stewart Living, December 2004
Marshmallows made by Shanna S.

Click here for printable recipe

Sunday, December 12, 2010

MINTY Week #1 Peppermint-Surprise Brownie Bites

As the recipe collection for this month has grown, there has been a definite mint trend. So hey, I decided to put them all together and have MINTY Week.

Why is mint such a popular holiday flavor? Is it the cold feeling it gives you, reminding one of winter? Is it because it's the flavor of iconic candy canes? I'd love to hear your thoughts.

But facts are facts and mint is IN. One of my favorite winter treats is peppermint hot chocolate from Starbucks. And if you haven't had a (limited time) peppermint chocolate chip milkshake from Chik-Fil-A, you haven't lived.

Mint's natural partner is chocolate of course so about half the recipes this week feature the duo, but hopefully you will still be happily surprised by some of the treats we've cooked up. So go out and stock up on peppermint extract, Andes candies, York peppermint patties, candy cane Hershey's kisses, red food coloring, and anything else that looks the part. It's going to be a minty fresh week!!!Starting with these bad boys. Easy peasy lemon squeezey! Brownie layer, minty layer from York peppermint patties, brownie layer. Cut into bite-size squares. Relish in the minty cool dark chocolate deliciousness.

Look, this one's smiling at me:
Peppermint Surprise Brownie Bites
8 T unsalted butter
2 oz. unsweetened chocolate
3/4 cup all-purpose flour
1/2 tsp baking powder
1/4 tsp table salt
1 cup sugar
2 large eggs
1 tsp vanilla extract
16 (1 1/2 inch) York Peppermint Patties

1. Prepare pan: Adjust oven rack to middle position and heat oven to 350 degrees. Line 8-inch-square baking pan with heavy-duty aluminum foil, making sure that foil is tucked into all corners and that at least 1 inch overhangs top on all sides.

2. Make batter: Melt butter and chocolate together. Set aside to cool slightly. Combine flour, baking powder, and salt in small bowl. Whisk sugar and eggs together in large bowl. Stir chocolate mixture and vanilla into egg mixture. Stir in flour mixture until just incorporated.

3. Assemble: Set 1 cup brownie batter aside. Pour remaining batter into prepared baking pan. Arrange Peppermint Patties on top of batter, leaving about 1/2 inch between each piece. Smooth reserved 1 cup batter over candy.

4. Bake: Bake until just set in center, 30 to 35 minutes. (Cake tester won’t work because of candy.) Cool completely in pan on wire rack, about 2 hours. Grasp overhanging foil on sides of pan and transfer brownies to cutting board. Cut into 36 pieces and serve. (Cut the cooled brownies into squares or use a cookie cutter for alternate shapes like stars and crescents. Brownies will keep at room temperature in airtight container for up to 3 days. )

Recipe from Cook's Country, October 2005

Click here for printable recipe
Related Posts Plugin for WordPress, Blogger...