ANNOUNCING: Change is part of life, and apparently, it's part of blogging, too. As of September 5, 2013, I'm merging The Virtual Goody Plate with Disco Mom Takes on the World and whatever else may henceforth spill from my fingertips (and kitchen), into one great new blog. I hope you'll join me there in exclaiming, "THIS IS AWESOMELAND."
Showing posts with label sandwich cookies. Show all posts

Wednesday, July 20, 2011

Build-Your-Own-Ice-Cream-Sandwich Party

I have been so excited about this, I moved it to the front of the queue! On Sunday, National Ice Cream Day, we hosted an ice cream sandwich party, inspired by this California ice cream shop, which I saw on this jaw-dropping wedding feature (yes, yes, yes, go through all the pictures. You will be astounded, as I was, and wish you could be, or at least know, people that cool.)

My friend Ashely and I collaborated on the menu, and we both spent all week baking and churning. The goal was to have at least two ice creams that could go with each cookie, and at least two cookies that could go with each ice cream. You gotta have options. The lineup:

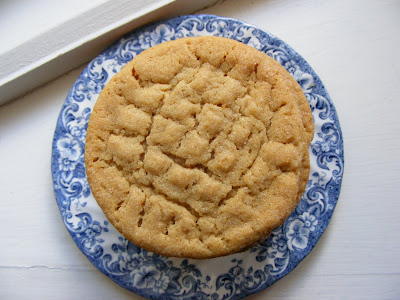
COOKIES (clockwise from top): Peanut Butter, Lime Meltaways, Double Chocolate, Caramel-Stuffed Snickerdoodles (recipe coming), Chocolate Chip
ICE CREAM
(clockwise from top): Salted Caramel, Strawberry-Buttermilk Sherbet, Toasted Marshmallow (wait for it), Toasted Coconut, Chocolate

TOPPINGS (for rolling your edges in): chopped smoked almonds, mini chocolate chips, toasted coconut, black & white krispies, graham cracker crumbs, rainbow sprinkles
We had twenty-one people over. And, putting my college credits to use, we had 150 possible combinations. Or 750 if you use two different kinds of cookies on the top and bottom. Which many did.

Here's the one I made: peanut butter cookie, toasted marshmallow ice cream, caramel-stuffed snickerdoodle, rolled in smoked almonds.
Unfortunately, it's hard to be mom, hostess and photographer all at once (plus my camera batteries died), so there are no more pictures of the party, or the glorious sandwiches it produced. But it was SO much fun, and something I'd like to try again, of course with new flavors.

So. Two questions for you:
1. What unique combination would you make from the options above?
2. If you were throwing your own BYOICS Party, what cookies and ice creams would you include?

Monday, February 14, 2011

Red Hot Red Velvet Whoopie Pies

Phew, made it in time for looove day. I've been hanging onto this one, waiting for Valentine's Day but with all the birthdays around here, plus Bread Week, it kind of snuck up on me!

Last year I posted Red Velvet Cookies which were sooo good because, hello, they had chocolate chips in them and cream cheese frosting on top! And this year, well, I've got a thing for whoopie pies and one cannot ignore the association they must have with Valentine's Day. Plus these ones are red and chocolate and sweet and spicy.

Speaking of, are you having a red hot shortage where you live or is it just here? I went to three different stores, NO red hots! I finally went to World Market, where I got the manager to sell me their last bag out of a pre-packaged gift basket. Pretty sure I got the last bag in the DC metro area.

Just for you - XOXOXO!
Red Hot Red Velvet Whoopie Pies (print recipe)
Cookies:

1 oz. semisweet chocolate, chopped
1/2 oz. milk chocolate, chopped
12 T unsalted butter, melted
1/2 cup sour cream
2 large eggs
1 1/2 tsp apple cider vinegar
1/2 tsp vanilla extract
1 T red food coloring*
2 1/4 cups all-purpose flour
1 cup granulated sugar
1/4 cup unsweetened cocoa powder
2 tsp baking powder
1/4 tsp baking soda
1/2 tsp salt

Red Hot Filling:
8 oz. cream cheese, room temperature
3 T unsalted butter, room temperature
2 1/2 cups confectioners' sugar, sifted
1/4 cup red hot cinnamon candies, crushed**

*1 T is for regular grocery store food coloring. If you use intense-colored paste coloring, about 1/2 tsp is sufficient.

**Crush candies by sealing in a plastic bag, placing on a cutting board, and carefully smashing with a hammer. Good fun! If you prefer vanilla filling instead of red hot, substitute the seeds scraped from one halved vanilla bean for the cinnamon candies

1. Make the cookies: Preheat to the oven to 375. Line 2 large baking sheets with parchment. Combine the semisweet and milk chocolates in a microwave-safe bowl and microwave until melted, 30 seconds at a time, stirring in between. Whisk until smooth.

2. Whisk the melted butter, sour cream, eggs, vinegar and food coloring in a bowl until combined. In another bowl, whisk the flour, sugar, cocoa powder, baking powder, baking soda and salt. Add the flour mixture to the butter mixture in four equal batches, whisking each batch completely before adding the next. Stir in the melted chocolate.

3. Scoop heaping tablespoonfuls of batter onto the prepared baking sheets and smooth the tops with a damp finger. Bake until the cookies spring back when lightly pressed, 8 to 10 minutes. Let cool 10 minutes on the baking sheets, then transfer to racks to cool completely.

4. Meanwhile, make the filling: Beat the cream cheese and butter with a mixer until smooth. Beat in the confectioners' sugar and crushed candies. Sandwich a heaping tablespoonful of filling between 2 cookies; repeat with the remaining cookies and filling. Refrigerate 30 minutes before serving. Makes 18 pies

Recipe adapted from Food Network Magazine

Thursday, December 23, 2010

Peanut Butter Whoopie Pies

I know that when it comes to whoopie pies, peppermint is the "seasonal" thing. And I know I already made a chocolate-peanut-butter-something this month. But these were what I was in the mood for. Don't even pretend you don't want one right now.

I've made a couple of whoopie pie attempts over the years, and a surprising number have been unsuccessful. Just unluckily bad recipes, I guess. But I keep at it because whoopie pies are awesome. Because they are just the best parts of cupcakes, rearranged. Two cupcake tops and a generous helping of frosting, but since it's in the middle we call it filling and make it creamier. They are genius!

So I recently did some serious whoopie pie research, mostly on the astoundingly extensive food blog network. And I came up with what should hopefully be the best recipes for a bunch of different kinds of whoopie pies. Eventually I will be making all of them, but I just had to make these first. Not especially Christmasy, but dang good anyway. Did I say dang good? I meant DIVINE.

Peanut Butter Whoopie Pies
For the Cookies:

1 3/4 cups all-purpose flour
3/4 cup unsweetened cocoa powder, not Dutch-process
1 1/2 teaspoons baking soda
1/2 teaspoon coarse salt
1 tablespoon unsalted butter, softened
1/4 cup vegetable shortening
1/2 cup granulated sugar
1/2 cup packed dark-brown sugar
1 large egg
1 cup whole milk
1 teaspoon pure vanilla extract

For the Filling:

2/3 cup natural, creamy peanut butter
1/2 cup (1 stick) unsalted butter, softened
3/4 cup confectioners' sugar
Coarse salt, optional
  1. Make cookies: Preheat the oven to 375 degrees. Sift together flour, cocoa powder, baking soda, and salt into a small bowl; set aside.
  2. Put butter, shortening, and sugars into the bowl of an electric mixer fitted with the paddle attachment. Mix on high speed until smooth, about 3 minutes. Add egg; mix until pale and fluffy, about 2 minutes. Mix in half the flour mixture, then the milk and vanilla. Mix in remaining flour mixture.
  3. Drop rounded tablespoons of dough onto baking sheets lined with parchment paper, spacing 2 inches apart. Bake until cookies spring back when lightly touched, 12 to 14 minutes. Let cool on sheets on wire racks 10 minutes. Transfer cookies to wire racks using a spatula; let cool completely.
  4. Make filling: Put peanut butter and butter in the bowl of an electric mixer fitted with the paddle attachment. Mix on high speed until smooth. Reduce mixer speed to low. Add confectioners' sugar; mix until combined. Raise speed to high, and mix until fluffy and smooth, about 3 minutes. Season with salt, if desired.
  5. Assemble cookies: Spread 1 scant tablespoon filling on the bottom of 1 cookie. Sandwich with another cookie. Repeat with remaining cookies and filling. Cookies can be refrigerated in single layers in airtight containers up to 3 days. Bring to room temperature before serving.
Makes about 18 to 24 sandwiches

Recipe from Martha Stewart Holiday Cookies 2005

Click here for printable recipe

Thursday, December 2, 2010

Molasses Spice Lemon Sandwich Cookies

Oh dear, these are so wonderful! They are delicate but sturdy, spicy, sweet, buttery, lemony, and fabulously soft. And they make your house smell EXACTLY like Christmas. I want to make them over and over; they are perfect for the season!

But, granted, slightly labor intensive. It just takes a long time to roll all those little balls of dough, so if you can pull in an extra pair of hands or two for that step, it will go faster and you will be glad. But just do what you can, and your audience, be they family, neighbors, classmates, etc. will exclaim at their delightful flavor and undeniable melt-in-your-mouthness.

Molasses Spice Lemon Sandwich Cookies
2 cups all-purpose flour
2 tsp baking soda
1 tsp ground cinnamon
1 tsp ground ginger
Table salt
1/4 tsp ground cloves
2 cups granulated sugar, divided
1/4 cup dark molasses
1 large egg
15 T unsalted butter, divided (12 T melted and cooled for cookies, 3 T softened for frosting)
3 T lemon juice
2 cups confectioners' sugar

1. Whisk flour, baking soda, cinnamon, ginger, 3/4 tsp salt, and cloves together in medium bowl. In separate bowl, stir 1 1/2 cups granulated sugar, molasses, egg and melted butter together until combined. Add dry mixture to butter mixture in three batches, stirring after each addition. Cover bowl with plastic and refrigerate until dough is firm, about 1 hour.

2. Adjust oven racks to middle-upper and lower-middle positions and heat oven to 375. Line 2 baking sheets with parchment paper.

3. Place remaining 1/2 cup sugar in small bowl. Shape dough into 3/4-inch balls (this is smaller than you think but just the right size; they spread out a lot while baking.) Roll balls in granulated sugar, then transfer to prepared baking sheets, spacing balls 2 inches apart. Bake until tops are just beginning to crack, 8 to 10 minutes, rotating rack position and direction of baking sheets halfway through baking time. Cool cookies on baking sheets for 3 minutes, then transfer to wire rack to cool completely. Use remaining dough the same way.

4. Whisk remaining 3 T butter, lemon juice, and pinch of salt together in medium bowl. Whisk in confectioners' sugar until smooth. Turn half of cooled cookies over (bottom side up) and spread each with 1 tsp lemon filling. Sandwich with another cookie. Makes 3 to 4 dozen sandwiches

Recipe from Cook's Country, December 2005

Sunday, June 20, 2010

Raspberry-Lemon Whoopie Pies

Every issue of Everyday Food has a cookie recipe on the last page. Of course there are a million cookie recipes on Martha Stewart's website, but something about having its own page in the magazine makes the monthly recipes stand out as something special.

I have a small fascination with whoopie pies, and not just because the name is funny. They just sound and look so good, yet the 2 or 3 times I've tried to make them, not so impressive. Which is why I've never posted my attempts until now. Usually whoopie pies are chocolate cakey cookies with some kind of creamy-to-marshmallowy filling. I've seen variations, with mint, pumpkin or peanut butter filling. The only ones I've made that were any good were Paula Deen's "Two Brothers' Chocolate Gobs" but they have so much shortening I was embarrassed to admit loving them (I know, serious double standard.)

ANYWAY, these ones are really good and a fun variation for the flavors of summer - lemon cookies with raspberry whipped cream filling. Fun for kids to help with, stirring the raspberries in and making the sandwiches. On super hot days, wrap individually and freeze for an "ice cream sandwich" treat! Raspberry-Lemon Whoopie Pies
1/2 cup butter, room temperature
1 cup plus 3 T light brown sugar
1 T grated lemon zest
1 tsp vanilla extract
1 large egg
2 1/4 cups all-purpose flour
1/4 tsp baking powder
1/4 tsp baking soda
1/2 tsp coarse salt
1 cup whole milk
3/4 cup heavy cream
1 cup fresh raspberries (4 ounces)

1. Preheat oven to 350. In a large bowl, using an electric mixer, beat butter, 1 cup brown sugar, and lemon zest until light and creamy. Add vanilla and egg and beat to combine, scraping down bowl as needed. In a medium bowl, whisk together flour, baking powder, baking soda and salt. With mixer on low, beat in flour mixture in 3 additions, alternating with milk and ending with flour mixture (scrape bowl as needed.) Beat well to combine.

2. Drop batter in 2-tablespoon mounds about 2 inches apart, onto two parchment-lined baking sheets. Bake until puffed and pale golden around edges, 17 to 19 minutes, rotating sheets halfway through. Let cakes cool completely on sheets on wire racks.

3. In a large bowl, whip cream and 3 T brown sugar to soft peaks. In a small bowl, mash raspberries with a fork, then fold into whipped cram. Divide raspberry cream evenly among bottoms of half the cakes, then sandwich with remaining cakes.

Recipe from Everyday Food, May 2010

Friday, January 22, 2010

Peanut Butter Melts

Here's the next treat from Hannah Swensen's Cookie Jar (in Blueberry Muffin Murder.) Apparently the mayor of her town (I forget his name) just loves these cookies. In fact he melts for them. Ha. Ha.

I wish you could be here to taste one so I could grin and ask you to guess the secret ingredient. It's molasses, which I've never heard of putting in a peanut butter cookie. But then I thought about it, and using white sugar and molasses is basically the same as using brown sugar, which I have heard of in peanut butter cookies, so it's not that crazy.

These cookies came out a little flatter than I expected, but I was also using suspect baking powder (my cake a few days earlier completely failed to rise); I have since replaced it. But thinness aside, these were delicious - slightly crispy on the outside, gorgeously soft and chewy on the inside, even after several days in a Tupperware. Total comfort cookies and I found myself snacking on them way more than I should have. So I gave some away. But not all of them, of course. I'm not quite that disciplined.

Peanut Butter Melts
1 cup melted butter (2 sticks)
2 cups white sugar
2 tsp vanilla
1/8 cup molasses (2 T)
1 1/2 tsp baking soda
1 tsp baking powder
1/2 tsp salt
1 cup peanut butter (smooth or crunchy)
2 beaten eggs (whip with a fork)
2 1/2 cups all-purpose flour
Sugar for rolling, optional

1. Preheat oven to 375. Place oven rack in middle position.

2. Microwave the butter to melt it. Add the sugar, vanilla and molasses. Stir until it's blended, then add the baking soda, baking powder, and salt. Mix well.

3. Measure out the peanut butter. (Spray the inside of the measuring cup with Pam so it won't stick - I do the same with the molasses.) Add it to the bowl and mix it in. Pour in the beaten eggs and stir. Then add the flour, and mix until all the ingredients are thoroughly blended.

4. Form the dough into walnut-sized balls and arrange them on a cookie sheet lined with parchment or silicone. (These spread a lot so keep it to 12 for a standard jelly roll pan.) Roll in sugar if desired (but I tried both ways and I think they're plenty sweet without the extra roll.) Flatten slightly in a criss-cross pattern with fork.

5. Bake for 8 to 10 minutes, or until the edges are just beginning to turn golden. Cool on cookie sheet for 2 minutes, then transfer to wire rack to finish cooling. Makes about 3 1/2 to 4 dozen

*For PBJ cookies, spread jam on one cookie and use another to make a sandwich. Or go for it and use fudge frosting or Nutella in the middle.

Recipe from Blueberry Muffin Murder by Joanne Fluke

Tuesday, April 21, 2009

Carrot Cake Cookies

More like inside-out carrot cake cookies, with the delectably creamy cream cheese frosting on the inside. These cookies are one of the few exceptions I make to include raisins in a cookie. Like white chocolate and a few other suspect ingredients, they do have their place in the baking world, and this is one of them. The cookies are so bendy soft, sweet and spicy, and the filling so creamy. You can wrap these individually and freeze them for a frozen summer treat as well, or just to make them last longer.

Be sure to read ahead - you need your butter and eggs room temperature, and the dough chills for an hour so make sure you have enough time.

Cookies:
1 cup (2 sticks) unsalted butter, room temperature
1 cup packed light brown sugar
1 cup granulated sugar
2 large eggs, room temperature
1 tsp vanilla extract
2 cups all purpose flour
1 tsp baking soda
1 tsp baking powder
1/4 tsp salt
1 tsp ground cinnamon
1/2 tsp freshly grated nutmeg
1/2 tsp ground ginger
2 cups old fashioned rolled oats
1 1/2 cups finely grated carrots (about 3 large)
1 cup raisins
Cream Cheese Frosting (see below)

1. Line 2 baking sheets with parchment. In an electric mixer beat butter and both sugars on medium speed until light and fluffy, 3 to 4 minutes. Add eggs and vanilla, and beat on medium until well combined.

2. Sift together flour, baking soda, baking powder, salt, cinnamon, nutmeg and ginger; stir to combine. Gradually add flour mixture to butter mixture; mix on low until just blended. Mix in oats, carrots, and raisins. Chill until firm, at least 1 hour.

3. Preheat oven to 350. Place balls of dough on prepared sheets, 2 inches apart (they really spread!) Bake 12 to 15 minutes, rotating halfway through, until brown and crisp. Transfer to wire rack to cool completely. Spread about 2 tsp frosting onto flat sides of half the cookies. Sandwich together with remaining cookies. Can be stored in refrigerator in airtight container up to 3 days.

Cream Cheese Frosting:
8 oz. cream cheese, room temperature
1/2 cup (1 stick) unsalted butter, room temperature
1 cup confectioners' sugar
1 tsp pure vanilla extract

Beat cream cheese and butter until smooth and well blended. Sift in confectioners' sugar and continue beating until smooth. Add vanilla and stir to combine.


Recipe from Martha Stewart's Cookies

Saturday, March 14, 2009

Pink Grapefruit Sandwich Cookies


I absolutely LOVE the invigorating taste and smell of grapefruit - it's my favorite hand soap or shower gel scent, and it's great to eat, especially paired with something sweet. So I really felt lucky when I happened upon this recipe on Martha Stewart's website. You hear of plenty of cookies made with lemon, orange and even lime. But I'd never had a grapefruit cookie, and that made it a must-try.

There's grapefruit zest and juice in the cookies, and more juice in the super pretty peachy-pink filling. Oh, and plenty of butter and sugar to balance it all out. After zesting it, just juice the whole fruit, and after making the filling drink whatever is leftover with your first cookie - WOWZER! I love the step that has you toss the fresh zest with sugar before adding to the dough - I think it helps distribute the zest and grapefruit flavor more thoroughly throughout the dough.

But while I've said before that Martha doesn't make mistakes, and I hold that that is almost always true, I've had to fix a few details in her recipe, like cutting the cooking time in half, and totally revamping the proportions in the filling. So here's my tried and true version for a truly unique winter citrus goody plate treat.

Cookies:
Grated zest of 1 Ruby Red grapefruit, plus 1/4 cup freshly squeezed juice
1 cup sugar
1 1/2 cups all-purpose flour, plus more for work surface
3/4 cup cake flour (not self-rising)
1 tsp baking powder
1/2 tsp salt
1/2 cup (1 stick) unsalted butter, softened
2 large egg yolks

Filling:
2 T unsalted butter, softened
2 1/4 cups powdered sugar
2 to 3 T freshly squeezed Ruby Red grapefruit juice

1. Zest and juice the grapefruit. In a small bowl, combine zest with 1 T sugar; set aside. In a medium bowl, whisk together both flours, baking powder, and salt; set aside.

2. In an electric mixer bowl, beat butter and remaining sugar on med-high speed until light and fluffy, 2 minutes. Add egg yolks, and beat until combined. Beat in reserved zest-sugar mixture. Add flour mixture in two batches, alternating with the juice, and beat to combine.

3. Turn out half the dough onto a piece of plastic wrap, and shape into a 1-inch-thick disk. Wrap in plastic. Repeat with the remaining dough. Refrigerate disks until firm, about 30 minutes to 1 hour.

4. Preheat oven to 350. Line baking sheets with parchment or silicone. On a lightly floured surface, roll out one disk to 1/8 inch thick. Cut out 2-inch rounds and place on prepared sheet. Bake 10 to 12 minutes, rotating sheet halfway through if cooking unevenly. Allow to cool 2 minutes on baking sheet before removing to wire rack to cool completely.

5. Place butter and powdered sugar in a mixing bowl and mix slightly. Add 1 to 2 tablespoons grapefruit juice and continue to beat until frosting is formed. Add slightly more butter, sugar or juice to taste and to desired consistency, beating well. Don't let it get too soft or runny. Spread 1 tablespoon filling onto flat side of cookie; top with another cookie, flat side down. Once filled, cookies can be kept in an airtight container in the refrigerator for up to 3 days.

Makes 2 dozen sandwiches

Thursday, December 4, 2008

VGP #4 Raspberry Almond Cookies

Bridget of Manly, Iowa, came in as a Cook's Country cookie runner-up with this traditional recipe from her mother-in-law. My favorite jam is seedless black raspberry so that's what I use for the glue. And, since I had it, I rolled the edges in Penzey's vanilla sugar - such a sweet treat and very pretty!2 cups all purpose flour
1 1/4 cups slivered almonds (or 1 1/2 cups sliced almonds)
1 cup sugar, divided
16 T (2 sticks) unsalted butter, cut into 1/2-inch pieces and chilled
1 tsp vanilla extract
1/2 cup raspberry jam

1. Preheat oven to 350. Line baking sheets with parchment paper. Process 1 cup flour and almonds in food processor until finely ground. Add 1/2 cup sugar and remaining flour and process until combined. Add butter and vanilla to food processor and pulse until dough forms.

2. On lightly floured surface, roll dough to 1/4 inch thickness. Using 2-inch round cookie cutter, cut out cookies, gathering and rerolling dough as necessary. Place cookies 2 inches apart on prepared baking sheets and bake until light brown around edges, about 15 minutes. Cool 5 minutes on sheets, then transfer to wire rack.

3. Transfer remaining sugar to bowl. Working quickly, spread 1 tsp jam on bottom half of warm cookies, then press remaining cookies onto jam to form sandwiches. Roll cookies in sugar to coat. Cool completely on wire rack.
Related Posts Plugin for WordPress, Blogger...