ANNOUNCING: Change is part of life, and apparently, it's part of blogging, too. As of September 5, 2013, I'm merging The Virtual Goody Plate with Disco Mom Takes on the World and whatever else may henceforth spill from my fingertips (and kitchen), into one great new blog. I hope you'll join me there in exclaiming, "THIS IS AWESOMELAND."
Showing posts with label peppermint extract. Show all posts

Thursday, January 10, 2013

Mint Chocolate Popcorn

I hope you have already had the distinct pleasure of encountering those pink-and-white peppermint marshmallows they sell around Christmastime.  They make seriously delightful rice crispy treats, add minty fun-lovin' to a mug of chocolate, and, at least at our house, are very persuasive when it comes to bribes.
 This year, I actually flipped the bag over, to discover an intriguing and super easy recipe for peppermint chocolate popcorn, which we immediately made and took to a big post-Thanksgiving family party.  Dang good, people.  Tiny bit of salt, lots of marshmallow and chocolate, with the trademark crispy crunch you always want from a popcorn snack.  When melted with chocolate, I have to say, the mallow mint is very subtle, but with a dash of peppermint extract, equilibrium is restored.

Mint Chocolate Popcorn (print recipe)
Makes about 12 cups

1/2 tsp salt, divided
12 cups warm air popped popcorn
4 oz. semisweet chocolate
1/2 cup unsalted butter
40 Jet-Puffed Mini Peppermint Mallows
1/4 to 1/2 tsp peppermint extract, optional

1.  Heat oven to 275 degrees.  Sprinkle 1/4 tsp salt over popcorn in a large bowl; toss to coat.  Set aside.

2.  Melt chocolate and butter in a medium saucepan on low heat, stirring frequently.  Add marshmallows; stir until completely melted.  Remove from heat; stir in remaining 1/4 tsp salt and peppermint extract, if using.

3.  Pour chocolate over popcorn; toss to coat well.  Spread onto a greased baking sheets.  Bake 20 to 25 minutes or until crisp, stirring after 15 minutes.  Cool on wax paper.  Store in an airtight container for up to 3 days.

Recipe from the back of the peppermint marshmallow bag


1 year ago:  Sticky Toffee Pudding

Thursday, March 8, 2012

Thin Mint Cheesecake Swirl Brownies

 Where the time goes.  How long I have been trying to put this post together.  How many freaking things have kept me from doing so. 

Pardon the mini therapy session here.  I am seriously baffled.  I have the same number of kids as a few months ago.  Same hours in a day.  Basically the same amount of stuff to do from week to week.  Maybe slightly lower energy levels (allergies are kicking my butt.)  But for some reason I have not been on top of this blog like before.  I know it doesn't matter that much to you, but it is ticking me off.  On to brownies, therapy is over.

Girl Scout cookie season!!!  Sing it with me - GIRL SCOUT COOKIE SEASON!  I know that probably if you've got a box of Thin Mints around, you are going to eat them.  Or maybe freeze half for a treat in the summer.  But if you happen to have extra Thin Mints - we only do because we both ordered cookies from different scouts without knowing it, and ended up with quite the stack of boxes! but even so, I ordered an extra box just for this recipe - you might consider making these luscious treats. 

I made them a few weeks ago while visiting my sister in Vermont.  They actually have only certain nights designated as dessert nights, so luckily I was there for one.  And here's me playing with the focus on my new camera.
 This is one happy Thin-Mint-Cheesecake-Swirl-Brownie eater.


Oh my gosh.


Thin Mint Cheesecake Swirl Brownies (print recipe)
1/2 cup unsalted butter
3/4 cup granulated sugar
1 package (8 oz) cream cheese, softened
3/4 cup confectioners' sugar
1 3/4 teaspoons vanilla extract
1/4 teaspoon peppermint extract
1 cup flour
1/2 cup unsweetened dark cocoa powder
1/2 teaspoon salt
2 eggs
1 1/3 cups coarsely chopped Thin Mint Cookies
  1. Preheat oven to 350 degrees F. Butter the bottom and sides of a 8 inch metal baking pan. Put a long piece of parchment paper in the bottom of the pan, letting the parchment extend up two sides of the pan and overhang slightly on both ends. (This will make it easy to remove the bars from the pan after they have baked.) Butter the parchment.
  2. In a small saucepan over medium heat, melt butter. Whisk in sugar and bring to a boil, whisking frequently; boil 1 minute. Set aside to cool for 5 minutes.
  3. In the bowl of a stand mixer fitted with the paddle attachment, beat together cream cheese, confectioners' sugar, vanilla extract and peppermint extract until combined, about 1 minute.
  4. In a medium bowl, sift together flour, cocoa powder and salt; whisk until combined.
  5. In a large bowl, whisk together eggs until combined. Whisk in melted butter-sugar mixture until well combined. Stir in flour mixture until just combined,followed by Thin Mint Cookies.
  6. Spread half of brownie batter into the prepared baking dish, followed by cream cheese layer. Distribute the remaining brownie mixture in 8 dollops over the cheesecake layer and spread evenly. Swirl in with a knife or spatula.
  7. Bake for 24-28 minutes, until brownies and cheesecake are set. A knife inserted into the cheesecake mixture should come out clean and the edges will be lightly browned.
  8. Let cool completely in pan on a cooling rack before lifting out the parchment paper to remove the brownies.
Yields: 16 large brownies or 24 small brownies

Wednesday, December 14, 2011

Peppermint Brownie Pie

 That's right.  It's brownie-in-a-pie.  When I came across this recipe, it called to me.  I was like, "I KNOW I'm making that this month."  It was the other pie I made for Lefse Day.  And I loooved it.

What is not to like?  Delicious dark chocolate homemade brownie.  In a great pie crust.  And there are a couple ways to make it pepperminty.  If you can find mint chocolate chips, it's a great way to go.  I've seen them around, especially this time of year.  Also I saw at Target Andes makes Andes mints baking squares, basically chopped up Andes mints.  Another great option.  If you can't find anything like that, it will taste the same if you use regular chocolate chips and peppermint extract.  And definitely don't forget to garnish with whipped cream and crushed candy canes - just the perfect minty crunch to top these off.  And if you really want over-the-top - I mean, it is indulgence season - use this pie as a base for an awesome sundae.  Peppermint ice cream, hot fudge, chopped Candy Cane Joe-Joe's, etc.  You get the idea. 
 Peppermint Brownie Pie (print recipe)
1/2 cup butter
3 ounces unsweetened chocolate, chopped
Pastry for a Single-Crust Pie
3 eggs, lightly beaten
1 1/2 cups sugar
1/2 cup all-purpose flour
1 tsp vanilla
1 cup mint-flavor semisweet chocolate pieces - OR - 1 cup semisweet chocolate chips and 1/2 tsp peppermint extract
Whipped cream, for serving
Crushed candy canes, for serving

1.  In a small saucepan, combine butter and chocolate.  Cook and stir over low heat until melted; cool slightly.

2.  Meanwhile, preheat oven to 350.  Prepare pastry for a single-crust pie in a 9-inch pie dish.

3.  For filling, in a large bowl, combine eggs, sugar, flour and vanilla.  Stir in melted chocolate and the chocolate pieces (and pepper mint extract if substituting.)  Pour filling into the pastry-lined pie plate.

4.  Bake in the preheated oven about 55 minutes or until filling is evenly puffed and edge of filling is slightly cracked.  Cool on a wire rack about 20 minutes or until slightly warm (center will sink slightly as pie cools.)  Top each serving with whipped cream and, if desired, garnish with a mini candy cane or crushed candy canes.  Makes 8 servings.
Recipe from Better Homes & Gardens Holiday Baking magazine, December 2010

Thursday, December 8, 2011

Chocolate Chip Peppermint Kisses

 I had never made meringues.  Still haven't; these came from Dessert Club member J.B., who is notorious for successful experimentation.  I love the minty essence and rich chocolate chips that stud these extremely easy but really fun cookies. 
Chocolate Chip Peppermint Kisses (print recipe)
2 egg whites
1/8 tsp salt
1/8 tsp cream of tartar
1/2 cup sugar
1 pkg chocolate chips
1/4 tsp peppermint extract

Heat oven to 300 degrees.  Beat egg whites til foamy, then add salt and cream of tartar and continue beating until whites are stiff enough to hold up in peaks (but not dry).  Add sugar, two Tbsp. at a time, beating thoroughly after each addition.  Fold in chocolate chips and peppermint, and drop from tsp onto cookie sheets lined with heavy paper.  Bake for 25 minutes or until slightly brown -- just barely visible.  Remove from paper while cookies are slightly warm.  Makes about three dozen. 

Wednesday, March 16, 2011

Mint Chocolate Chip Cake

Alrighty, here is your St. Patrick's Day recipe for tomorrow. It's green, it's minty, it's slathered with the most silky buttercream I've ever made (melted chocolate is the secret!) And it is impressive as heck. The color might be a little washed out by the light in the picture, but follow the recipe - 5 drops of coloring is just right for a bold-but-not-disgusting green!

The obvious pairing here is mint chocolate chip ice cream, if you've got some mint lovers in your midst. But if not all you really need is a big glass of milk. And a clean finger, to swipe some extra frosting!

Last year: Luck o' the Irish Gold Bricks
Mint Chocolate Chip Cake (print recipe)
2 1/4 cups cake flour, plus more for dusting pans
1 cup whole milk, at room temperature
6 large egg whites, at room temperature
2 tsp vanilla extract
1 1/2 tsp mint extract
5 drops green food coloring
1 3/4 cups sugar
4 tsp baking powder
1 tsp table salt
12 T unsalted butter, softened but still cool
1 cup mini chocolate chips

1. Adjust oven rack to middle position and heat oven to 350 degrees. Spray three 8-inch round cake pans with nonstick cooking spray, dust with flour, and tap pans to remove excess flour. Mix milk, egg whites, vanilla, mint and food coloring together in 2-cup measuring cup. (If you forgot to bring them to room temperature, place measuring cup in a sink of warm water until mixture is cool, not cold, about 65 degrees.)

2. Mix flour, sugar, baking powder, and salt together in bowl of electric mixer at low speed. Add butter and beat at low speed until mixture resembles moist crumbs, with no powdery streaks remaining.

3. Add all but 1/2 cup of milk mixture to crumbs and beat at medium speed (or high speed if using handheld mixer) for 1 1/2 minutes. Add remaining 1/2 cup of milk mixture and beat 30 seconds more. Stop mixer and scrape sides of bowl. Return mixer to medium (or high) speed and beat 20 seconds longer. Stir in 1 cup mini chocolate chips.

4. Divide batter evenly between three prepared cake pans and using rubber spatula, spread into even layer. Arrange pans at least 3 inches from the oven walls and 3 inches apart. (If oven is small, place pans on upper middle and lower middle racks in staggered fashion to allow for air circulation.) Bake until thin skewer or toothpick inserted in the center comes out clean, 21 to 25 minutes.

5. Rest cakes in pans 10 minutes, then loosen from sides of pans with a knife. Invert onto large plate, reinvert onto wire racks. Cool completely, about 1 1/2 hours.

Luscious Chocolate Buttercream Frosting
20 T (2 1/2 sticks) unsalted butter, cut into 20 pieces and softened
8 oz. bittersweet chocolate, melted and cooled
1 tsp vanilla extract
1/8 tsp salt
2 cups confectioners' sugar
1 1/2 cups mini chocolate chips

1. With electric mixer fitted with whisk attachment, beat butter, melted chocolate, vanilla, and salt on medium-high speed until combined. Reduce speed to medium-low. With machine running slowly, add confectioners' sugar and mix until smooth, about 1 minute. Increase speed to medium-high and beat until light and fluffy, 3 to 5 minutes.

2. To assemble: Place 1 cake round on serving platter. Spread 3/4 cup frosting over cake, then top with second cake round. Spread another 3/4 cup frosting over cake, then top with third cake round. Spread remaining frosting evenly over top and sides of cake. Press mini chocolate chips onto sides of cake. Serve.

Recipe from Cook's Country, February 2011

Saturday, December 18, 2010

MINTY Week #7 Peppermint Kiss Cookies

These are just what you want from a holiday cookie. Dense and rich but soft and seriously generous on flavor. Ed said the chocolate was too dark for him. Which means it's just right.

Careful when you put the kisses on these ones. The peppermint kisses seem to be a bit softer than regulars so they kinda melt down if you put them on the cookies hot out of the oven. Let them cool for 2 or 3 minutes before setting them on. (This one was perfect before I slightly smashed it setting up the shot!)

Peppermint Kiss Cookies
1/2 cup butter, softened
1/2 cup shortening
1 cup sugar
3/4 cup unsweetened Dutch-process cocoa powder
2 tsp baking powder
1 egg
2 T milk
1 tsp peppermint extract
1 1/2 cups all-purpose flour
42 peppermint swirl candy kisses

1. Preheat oven to 350. In a large bowl, combine butter and shortening. Beat with an electric mixer on medium to high speed for 30 seconds. Add sugar, cocoa powder, and baking powder. Beat until combined, scraping bowl occasionally. Beat in egg, milk and peppermint extract until combined. Beat in flour. Cover and chill about 1 hour or until dough is easy to handle.

2. Shape dough into 1-inch balls. Place balls 2 inches apart on an ungreased cookie sheet. Bake in the preheated oven for 10 to 12 minutes or until edges are firm.

3. Allow cookies to sit 2 to 3 minutes, then press a candy kiss into the center of each cookie. The white chocolate in the candy cane kisses does not hold its shape when it melts as well as milk or dark chocolate do, so watch the first few you do. If the kiss melts into a puddle, allow the cookies to cool another minute or two before placing the candy. Transfer cookies to a wire rack and cool completely. Makes about 42 cookies.

Recipe from Better Homes and Gardens Christmas Cookies magazine, 2010
Cookies made by Shanna S.

Click here for printable recipe

Friday, December 17, 2010

MINTY Week #6 Peppermint Pinwheels

Pinwheels are just downright pretty cookies. I'd like to take a moment to reflect on previously posted pinwheels: Cranberry-Orange Pinwheels and Chocolate-Almond-Apricot Cookies. Now these pretty little minty buttery sugar-cookie-esque bites join their ranks.

They are straightforward; all you have to do is try to roll them nice and tight. Rolling the doughs between wax paper is a key step - that way, they are not over-floured, a mistake I have made with past pinwheels, and which keeps them from sticking to each other. Also, try to get the reddest red food coloring you can for a true red color. Michael's or specialty cake supply stores sell food coloring paste which gets you closer than McCormick's or whatever they sell at the grocery store.

Thanks to Shanna S. yet again for this MINTY Week contribution; tomorrow's is from her as well. She has been a baking machine this last month. Reminds me of someone...Peppermint Pinwheels
3/4 cup butter, softened
3/4 cup sugar
1 egg yolk
1 tsp vanilla
2 cup flour
1/2 tsp baking powder
1/2 tsp salt
1/2 tsp peppermint extract
1/4 tsp red food coloring

1. In a mixing bowl, cream butter and sugar. Beat in egg yolk and vanilla. Combine flour, baking powder and salt. Add to creamed mixture; mix well. Divide in half; add extract and food coloring to one portion.

2. Roll out each portion of dough between waxed paper into a 16x 10 inch rectangle. Remove paper. Place red rectangle over plain rectangle; roll up tightly jelly roll style, starting with long side. Wrap in plastic wrap. Refrigerate overnight until firm. (To keep from flattening on one side, lay in a drinking glass on its side, or two end-to-end.)

3. Preheat oven to 350. Unwrap the dough and cut into 1/4 inch slices. Place 2 inches apart on lightly greased baking sheets. Bake 12 to 14 minutes or until set. Cool for 2 minutes before removing to wire racks to cool completely. Makes about 4 dozen.

Recipe from Taste of Home Annual Recipes 2004
Cookies made by Shanna S.

Click here for printable recipe

Thursday, December 16, 2010

MINTY Week #5 Dipped Mint Chocolate Cookies

Do you know what today is? My bet is if you are eating chocolate-covered Cheerios for breakfast you do. Chocoholics, rejoice! It is National Chocolate Covered Anything Day! Aah, I love December.

So today I have for you chocolate-mint dipped cookies. Basically Thin Mints, those timelessly tempting sirens of the Girl Scout line-up. They taste and look just like 'em. Even better, actually. And they are fun, fun, fun to make. If you consider dipping things in chocolate as therapeutic as I do.

How do you like my swirly top? At first they were flat and smooth, and since I didn't feel like sprinkling them with crushed candy canes (although you certainly could), I took a toothpick and made them twirly-swirly. Hey, I knew these would be a home run, and since they happen to fit into MINTY Week AND Chocolate Covered Anything Day, I stayed up extra late to get these posted today. But if you're a little tired of mint, or curious about your chocolate-dipping options, CDKitchen has a nice list of recipes for you. And don't forget my serendipitously timed Dipping Tutorial.

Dipped Mint Chocolate Cookies

1 cup butter, softened
1 cup sugar
1/2 cup unsweetened cocoa powder
1 1/2 tsp baking powder
1/2 tsp salt
1 egg
1 tsp vanilla extract
2 1/2 cups all-purpose flour
Chocolate-Peppermint Coating (see below)

1. In a large bowl, beat butter with an electric mixer on medium to high speed for 30 seconds. Add sugar, cocoa, baking powder, and salt. Beat until combined, scraping bowl occasionally. Beat in egg and vanilla until combined. Beat in as much of the flour as you can with the mixer (I did it all.) Beat in remaining flour with wooden spoon if your mixer isn't tough enough.

2. Divide dough in half. Shape each half into a 10-inch roll. Wrap each roll in waxed paper or plastic wrap. Chill at least 1 hour or until dough is firm enough to slice.

3. Preheat oven to 375. Cut rolls into 1/4-inch slices (envision the thickness of a Thin Mint.) Place slices 1 inch apart on an ungreased cookie sheet (they do not spread much.)

4. Bake in preheated oven for 6 to 8 minutes or until edges are firm. Transfer cookies to a wire rack; cool.

5. Dip each cookie into Chocolate-Peppermint Coating, turning to coat all sides of cookie. Using a thin metal spatula or fork, scrape or shake off excess coating so cookie is covered with a thin layer. Reheat coating as necessary. Place cookies on cookie sheets lined with wax paper, not touching. If desired, sprinkle with crushed peppermint candies while coating is still wet. Or make yours swirly like mine with a toothpick. Chill until coating is set, about 30 minutes. Makes about 68 cookies.

Chocolate-Peppermint Coating
24 oz. semisweet chocolate pieces or chopped dark chocolate
1/4 cup (4 T) shortening
1/2 tsp peppermint extract

In a medium saucepan, combine chocolate, shortening and extract. Cook and stir over medium-low heat until chocolate and shortening are melted.

To Store: Layer cookies between sheets of waxed paper in an airtight container; cover. Store in refrigerator for up to 3 days or freeze for up to 3 months.

Recipe from Better Homes and Gardens Christmas Cookies magazine, December 2010

Click here for printable recipe

Wednesday, December 15, 2010

MINTY Week #4 Peppermint Cream Bars with White Chocolate Ganache

Raise your hand if you've ever had white chocolate ganache. Hello, welcome to my repertoire. What a keeper this entire recipe is! Gorgeous, check. Easy (all done in one batch), check. Festive and flavorful, check, check. Chewy and creamy, check. Melty in your minty mouthy, CHECK!!! Definitely, definitely permanent additions to the goody plate rotation.

Peppermint Cream Bars with White Chocolate Ganache
1 17.5 oz. package sugar cookie mix
2 T all-purpose flour
1/2 cup butter
4 egg yolks
1 14 oz. can sweetened condensed milk
1/2 to 1 tsp peppermint extract (depending on your taste)
1/2 cup crushed peppermint candies
White Chocolate Ganache (see below, oh yeah)

1. Preheat oven to 350. Line a 9 x 13 baking pan with foil, extending foil over edges of pan. Lightly grease foil; set pan aside.

2. For crust, in a large bowl, stir together cookie mix and flour. Using a pastry blender, cut in butter until mixture resembles fine crumbs. Press mixture evenly onto the bottom of the prepared baking pan. Bake in the preheated oven for 12 to 15 minutes or until edges are lightly browned.

3. For filling, in a medium bowl, whisk together egg yolks, sweetened condensed milk, and peppermint extract. Stir in crushed candies. Carefully pour filling over hot crust. Bake for 15 to 20 minutes more or until filling is set. Cool in pan on a wire rack for 1 hour. Cover; chill for 30 minutes or until cool.

4. Pour White Chocolate Ganache over top of baked mixture, spreading evenly. Cover and chill again about 1 hour or until firm. Using the edges of the foil, lift cookies out of pan. Cut into bars. Makes 36.

White Chocolate Ganache
1/4 cup whipping cream
6 oz. chopped white baking chocolate (the good stuff, with cocoa butter, not pretend white mystery bars)

In a medium saucepan, bring whipping cream just to boiling over medium-high heat. Remove from heat. Add white chocolate (do not stir.) Let stand 5 minutes. Stir until smooth. Cool about 5 minutes before using.

TO STORE: Layer bars between sheets of waxed paper in an airtight container; cover. Store at room temperature for up to 3 days or freeze for up to 3 months. 

Recipe from Better Homes and Gardens Christmas Cookies magazine, 2010
Bars made by Shanna S.

Click here for printable recipe

Monday, December 13, 2010

MINTY Week #2 Candy Cane Marshmallows

Have you ever made homemade marshmallows? They're super easy! Kinda. Actually, I didn't even make these. But two different friends did so I have drawn on their knowledge to bring you these minty delights. Kids love 'em (number one lunchbox dessert request.) I put one in my hot chocolate and it was melty mint chocolate heaven.

The pictures come from some marshmallows I picked up at a cookie exchange. She followed Martha Stewart's recipe and made them in an 8x8 pan, which makes pretty but strangely tall mallows. Then my friend Shanna made them, a single recipe but in a 9x13 pan, and that made more regular size marshmallows, which I prefer.Pay close attention to the notes in step 4. Those marshmallows set up fast so either skip the food coloring or keep consistency in mind if you want to use it. Maybe beat for a little less time so they are not quite so set to allow for swirling, or try swirling coloring in before pouring into pan. Just something to be aware of.

Candy Cane Marshmallows
Vegetable-oil cooking spray
2 cups sugar
1 tablespoon light corn syrup
4 packages (1/4 ounce each) unflavored gelatin
3/4 teaspoon peppermint extract
2 large egg whites
2 teaspoons red food coloring
Powdered sugar for dusting

1. Coat a 9x13 pan with cooking spray; line bottom with parchment paper. Coat the parchment with cooking spray, and set pan aside. Put sugar, corn syrup, and 3/4 cup water in a small saucepan. Cook over medium heat, stirring, until sugar is dissolved. Stop stirring; let mixture come to a boil. Raise heat to medium-high; cook until mixture registers 260 degrees on a candy thermometer.

2. Meanwhile, sprinkle gelatin over 3/4 cup water in a heatproof bowl; let stand 5 minutes to soften. Set the bowl with the gelatin mixture over a pan of simmering water; whisk constantly until gelatin is dissolved. Remove from heat, and stir in extract; set aside.


3. Beat egg whites in the bowl of an electric mixer fitted with the whisk attachment until stiff (but not dry) peaks form. Whisk gelatin mixture into sugar mixture; with mixer running, gradually add to egg whites. Mix on high speed until very thick, 12 to 14 minutes.
P

4. Pour mixture into lined pan. Working quickly, drop dots of red food
coloring across surface of marshmallow. Using a toothpick, swirl food coloring into marshmallow to create a marbleized effect. *Shanna found this tricky because the marshmallows were already too "set" to swirl food coloring in. If yours seems very thick and set, try dropping a few dots of food coloring into the mixture in the bowl, folding a few times with a rubber spatula to swirl, and then pouring into lined pan. Or you can just skip the food coloring.* Let marshmallow stand, uncovered, at room temperature until firm, at least 3 hours or overnight. Cut into squares.

5. The cut sides will be sticky, so we recommend a light toss in powdered sugar to dry them. Pour some powdered sugar on a plate and gently roll/press cut sides into the sugar. Then toss the marshmallow between your hands a few seconds to shake excess off. This extra step is worth it if you are not immediately using your marshmallows. Makes about 4 dozen yummies.
Recipe adapted from Martha Stewart Living, December 2004
Marshmallows made by Shanna S.

Click here for printable recipe

Friday, December 25, 2009

Mrs. Hise's Mint Chocolate Brownies (by Maren)

This recipe was the dependable treat brought by our next-door-neighbors when we were kids. It's delicious.

It was something to look forward to every year. I still love them to this day! (-Kari)

Mrs. Hise's Mint Chocolate Brownies
1/2 c butter
1 c sugar
1 tsp vanilla
2 eggs
2 squares unsweetened baking chocolate, melted
3/4 c flour

Cream butter and sugar. Add vanilla, eggs and cooled chocolate. Add flour and mix well. Pour into greased 8x8 or 9x9 square pan. Bake at 350Āŗ for 30 minutes.

Frosting:
1 c powdered sugar
2 Tbsp butter
1 Tbsp cream 1/4 tsp peppermint flavor
a few drops green food coloring

Cream together and spread on cooled brownies. This makes just enough for a thin layer of frosting.

Melt 1 more square of unsweetened or semisweet baking chocolate and drizzle over frosting. Cut into small squares or triangles. Makes about 20 to 25.

Wednesday, December 23, 2009

Candy-Stripe Cookie Sticks (by Kat)

I was hunting for a "show cookie" and came across these babies from Martha. I like to have a variety of shapes and textures on a goody plate, and will on occasion sacrifice ease of baking for a fancy-looking gem. These are ADORABLE. And tasty. And do take a fair amount of time/effort, by which I mean that these are not cookies you can whip up, throw in the oven and then worry about later when the buzzer goes off. Block out a solid 2 hours to bust them out. But check out the cuteness and decide if they’re worth it – I think so.


Not worth it for some cookie exchange where you’re going to get stuck with refrigerator cornflake cookies in exchange, but they will really make a plate look great as part of a mix.


If you’ve had Pepperidge Farms pirouette rolled wafer cookies, you’ll have the idea. One of the commenters on Martha suggested filling with chocolate ganache. I just might have to try that.

Notes:

There is a video on Martha that shows step by step instructions. It could be helpful in understanding the process.


I made my template 3x5 instead of 3x6. The suggested size just looked too long to me, but whatever works for you. Take a minute and think about how you want to package them – you might want them longer if you were going to put them in a mug. If you have some contact paper, take a minute and cover your template – I cut mine out of a box of ‘Nemo fun fruits.’ Paper board works well. The contact paper made it easy to wipe off the dough that will definitely be getting up on the sides.

I had the best success when I spread the dough the height of the paper board. I know that sounds crazy thin, but this is a case where thicker is not better. The thick guys were too hard to roll.

This also sounds nuts, but bake 3 cookies MAX at a time. The first couple pans I tried 4, and I just couldn’t roll them fast enough – the window of rolling is pretty small. After they start to cool they crack when you roll.


You WILL burn your fingers. You will burn your fingers less if you flip the cooked cookies over on the sheet they baked on, and then place the one you’re rolling on a spare Silpat. I used a previous pan for the rolling, so that it was still warm but not smoking hot. After rolling each cookie, I pressed down gently on the pencil to ‘seal’ the seam. This kept them from unrolling.


Candy-Stripe Cookie Sticks

8 large egg whites

2 cups sugar

2 cups all-purpose flour

Pinch of coarse salt

10 tablespoons (1 1/4 sticks) unsalted butter, melted and cooled

1/4 cup plus 2 tablespoons heavy cream

1 teaspoon pure vanilla extract (I also added 2 tsp of mint, because I love mint!)

Red gel-paste food coloring


Preheat oven to 400 degrees. Beat egg whites and sugar in the bowl of an electric mixer fitted with the whisk attachment until foamy. Reduce speed to low. Add flour and salt; mix until just combined. Add butter, cream, and vanilla, and beat until combined.


Transfer 1 cup batter to a small bowl (set remaining batter aside). Stir in red coloring until desired color is reached. Transfer tinted batter to a pastry bag fitted with a small plain round tip (such as At

eco #2). Secure end of pastry bag with rubber band. Set aside.

Put a 3-by-6-inch rectangle (cut out a stencil to use as a guide) on a baking sheet lined with a Silpat baking mat. Spoon a heaping tablespoon of plain batter into the rectangle, and spread with a small offset spatula. Repeat. Pipe diagonal tinted stripes onto each rectangle. Bake cookies until pale golden, 6 to 8 minutes.

Immediately loosen edges with a spatula, and flip cookie over. Starting from one long side, roll cookie into a stick (I used a pencil). Place, seam side down, on a clean work surface; let cool until set. Quickly repeat with second cookie.

Repeat process, tinting and baking 2 or 3 cookies at a time. Cookies can be stored between layers of parchment in airtight containers at room temperature up to 1 week.


Recipe from Martha Stewart

Monday, December 21, 2009

Chocolate Orange Mint Patties (by Maren)

Wowzer. These came on a goody plate Maren gave me, and I was immediately ashamed I had ever given her a recipe to try. You might be surprised by these flavors, but they come together in a beautiful way.This comes from a cookbook called Who Wants Candy? by Jane Sharrock. It's a really good candy cookbook and includes recipes for all skill levels. It's an easy recipe that has never failed me. Makes about 100 mints, but easily halved.

Note: I've used part dark chocolate candy coating and part dark chocolate mint candy coating pieces with success. Also, I used Wilton food coloring to make the filling sort of peach-colored. I think it helps deliver the orange flavor, but it's optional.

Chocolate Orange Mint Patties
1/2 c soft butter
1 (14 oz) can of sweetened condensed milk
1 1/2 tsp pure orange extract
1/2 tsp mint extract
7 c powdered sugar
Food coloring, optional
18-20 oz dark chocolate candy coating (available at craft and candy supply stores)
4 to 6 oz semisweet baking chocolate

1. In a large mixing bowl, combine the butter, milk, orange extract and mint extract with an electric mixer till smooth. Gradually add powdered sugar 2 cups at a time blending thoroughly after each addition. Blend in food coloring if using. Cover and refrigerate 4 hours till firm or wrap tightly in several long rolls and freeze till needed, up to 3 months. Thaw 20 minutes before using if frozen.

2. Lay down 2-3 large sheets of waxed paper. In the top pan of a double-boiler over hot but not boiling water, melt the chocolates together, stirring until smooth. Or, place chocolates in a microwave-safe bowl and melt at half power for about 3 minutes, stirring every 30 seconds.

3. Shape mints into patties (or slice off a previously frozen log) and dip in chocolate using 2 forks or a special dipping spoon. Place on waxed paper to set. Store in layers separated by waxed paper. These mints may be refrigerated or frozen.

A nice way to package these on a goody plate is to wrap in squares of wax or parchment paper, with a sticker label telling what they are.

Friday, December 18, 2009

Peppermint Cream Bites (by Celeste)

These were delicious. SO delicious. I admit to adding food coloring to the filling (this might be against VGP rules) and some crushed peppermint on top; in my mind's eye, these had a pink filling to go with the peppermint theme. But plainer, these cookies will still be great.

Note: I think that a purchased Oreo cookie-crumb pie crust would work just as well for this recipe...maybe even better. I had trouble with my cookie bottoms crumbling off.Peppermint Cream Bites
Prep: 20 min Oven: 350 Bake: 8 min Freeze: 45 min Yield: 30 bites

1 1/2 cups crushed chocolate sandwich cookies (about 15)
3 T melted butter
2 cups powdered sugar
2 T softened butter
2 T milk
1 tsp peppermint extract
6 oz bittersweet chocolate bar, chopped
2 T shortening

1. Preheat oven to 350. Line an 8x8x2 baking pan with foil, extending foil over edges of pan.

(Tip from Kari: Easy way to line a cornered pan is to turn it over and shape the foil around the outside first so it takes the shape. Turn pan back over and simply drop shaped foil in.)

2. In medium bowl, mix cookie crumbs and butter together until evenly mixed. Press crumb mix into the bottom of the pan. Bake for 8 minutes. Cool slightly (about 15 minutes.)

3. Meanwhile, combine powdered sugar and softened butter in a food processor. Cover and process until butter is evenly distributed. With processor running, add milk and extract to make a thick paste. Spread peppermint mixture evenly over the prepared crust. Place in freezer for 45 minutes.
4. In microwave-safe bowl, combine chopped chocolate and shortening. Microwave 30 seconds; stir. Microwave another 30 seconds, stirring until melted. Let chocolate cool for 15 minutes, stirring occasionally. Pour chocolate over mint layer and spread evenly. (If you want to put crushed peppermint candy on, now's your chance.) Allow the chocolate to set for a few minutes before cutting. Use 1 1/2 inch round cookie cutter to make 30 bites. (Note: You need to choose cookie cutters that have pretty steep sides, or you'll be pressing mostly through one layer, not the whole cookie.)

Store in refrigerator in airtight container for up to 2 weeks or freeze for up to 3 months.Recipe from Better Homes and Gardens Christmas Cookies, December 2009

Friday, December 4, 2009

Peppermint-Twist Biscotti

Besides being yummy, biscotti makes a great giveaway treat because it doesn't really go stale, or at least not for a long time. It bakes once to bake and twice to make it hard and crunchy, which makes it a great cookie for dunking in hot holiday drinks. An added bonus is its long narrow shape, which makes it fun and easy to package in a canister, glass/mug, or gift treat bag. Take all these fabulous characteristics, add a bunch of crushed candy canes and peppermint flavor, and you've pretty much got the perfect goody plate treat.

Notes:
  • If you want all the taste with a little less work, skip the whole food coloring and twisted rope part of step 2. It's just for looks.
  • If you do want the twist and need red paste food coloring, try Michael's, a cake/candy supplier or I ordered mine on Amazon.

  • The peppermint icing is sweet, and makes the biscotti super yummy if you're eating it plain or dipping in something unsweetened like black coffee or tea. But if you're dunking in hot chocolate or something sweet, go light on the icing or leave it off completely.

  • If you want a mint-chocolate thing, no problem. Just melt some dark chocolate in the microwave with a tiny bit of shortening or butter, then drizzle or dip the biscotti.
Peppermint-Twist Biscotti
2/3 cup butter, softened
1 1/3 cups sugar
1 T baking powder
1/4 tsp salt
4 eggs
1/2 tsp peppermint extract
4 1/4 cups all-purpose flour
1 cup coarsely chopped peppermint candy canes or peppermint candies
Red paste food coloring
Peppermint Icing (see below)
Chopped peppermint candy cans, optional

1. Preheat oven to 375. Line a cookie sheet with foil; set aside. In a large mixing bowl beat butter with an electric mixer on medium to high speed for 30 seconds. Add sugar, baking powder, and salt. Beat until combined, scraping sides of bowl occasionally. Beat in eggs and peppermint extract until combined. Beat in as much of the flour as you can with the mixer. Stir in any remaining flour and the 1 cup chopped candy canes.
2. Divide dough in half. Tint one portion of dough with red food coloring. Divide each half of dough into three portions. On a lightly floured surface, roll each portion into a 14-inch-long rope. On prepared cookie sheet, place a rope of each color side by side. Twist pairs of ropes around each other several times. Flatten twists until 2 inches wide; place about 4 inches apart on the cookie sheet (they expand a lot while cooking.)

3. Bake for 20 to 25 minutes or until light brown and tops are cracked. Cool completely on cookie sheet on a wire rack. Carefully peel foil away from twists.

4. Reduce oven temperature to 300. Transfer twists to a cutting board. Using a serrated knife, cut twists diagonally into 1/2-inch slices. Place slices, cut side down, on an ungreased cookie sheet. Bake for 10 minutes. Turn slices over. Bake for 10 to 15 minutes more. Turn oven off and let biscotti sit in there for 30 to 40 minutes to complete drying. Transfer cookies to a wire rack and let cool.
5. Drizzle cooled cookies with Peppermint Icing. If desired, sprinkle with additional chopped candy canes. Let stand until set.

Peppermint Icing
In a medium bowl stir together 2 cups powdered sugar, 1 T milk and 1/4 tsp peppermint extract until smooth. Add enough additional milk (about 2 T) to make an icing of drizzling consistency.
Recipe adapted from Better Homes and Gardens The Ultimate Cookie Book

Monday, June 29, 2009

Lethal Peppermint Chocolate Cake

This was for the preschool fun fair cake walk. My friend's mom won it, got a knife from the school kitchen, brought it out to a picnic table, and starting cutting into it and serving it up to her grandkids on the spot. It was a beautiful, gratifying thing to watch from my nearby perch at the bake sale.

Below you've got three recipes: Chocolate Ganache for the outside, chocolate cake, and Peppermint Buttercream Frosting for between the layers. Make the ganache first so it can cool while the cake cooks. While the cake is cooking or cooling, make the peppermint frosting. Then be sure to inhale deeply while assembling (and lick your fingers - no one will know!)

Chocolate Ganache
3/4 cup heavy whipping cream
8 oz. semisweet chocolate, finely chopped
1 T Peppermint Schapps or 1/2 tsp peppermint extract

1. Place the cream in a small heavy saucepan over medium heat. Bring to a boil, stirring. Meanwhile, place the chopped chocolate (yum!) in a large mixing bowl. Remove the pan from the heat and pour the hot cream over the chopped chocolate (yum yum!) Stir until the chocolate is melted. Stir in the extract.

2. Let ganache stand at room temperature for 4 hours, or chill it until it thickens and is spreadable.

Chocolate Cake
Even with generous grease and flour, sometimes my layer cakes fall apart trying to get them out of a pan, so I usually do this extra step that's worth the effort. Trace cake pans on parchment paper, then cut out circles slightly smaller than the tracing. Place inside cake pan after greasing/flouring, and pour batter on top. Comes out every time, then all you have to do is peel the parchment off the cake.

1 pkg plain devil's food cake mix
3 T unsweetened cocoa powder
1 1/3 cups buttermilk
1/2 cup vegetable oil
3 large eggs
1 tsp vanilla extract

1. Place a rack in the center of the oven and preheat to 350. Grease two 9-inch round cake pans with shortening and dust with flour. Set aside.

2. Place cake mix, cocoa powder, buttermilk, oil, eggs, and vanilla in a large mixing bowl. Blend with an electric mixer on low for 1 minute. Stop, scrape sides, increase speed to medium and beat 2 minutes more until thick and well combined. Divide batter between prepared pans, smoothing it out with rubber spatula. Place pans in oven side by side.

3. Bake cakes until they spring back when lightly pressed with finger and just start to pull away from the sides of the pan, 28-30 minutes. Remove pans from oven and place them on wire racks to cool for 10 minutes. Run a dinner knife around the edge of each layer and invert each onto a rack, then invert them again onto another rack so that the cakes are right-side-up. Cool completely, 30 minutes more.

4. Prepare peppermint frosting.

Peppermint Buttercream Frosting
This recipe is just for filling between the layers; double it to frost a whole cake.

4 T (1/2 stick) butter, room temperature
1/4 cup finely crushed peppermint candy
1 1/2 cups confectioners' sugar, sifted
1 to 1 1/2 T milk
1/4 to 1/2 tsp peppermint extract

1. Place the butter in a large mixing bowl. Blend with electric mixer on low speed until fluffy, 30 seconds. Stop the machine and add the peppermint candy, sugar, milk and extract. Blend with the mixer on low speed until the sugar is well incorporated, 1 minute. Increase to medium speed and beat until frosting is light and fluffy, 1 minute more. Blend in more milk if frosting is too stiff.2. Place one cake layer, right side up, on serving platter or cake stand. Spread the top with peppermint frosting. Place the second layer, right side up, on top of the first layer and frost the top and sides of cake with chocolate ganache that has cooled and is spreadable. Work with clean, smooth strokes. Chill the cake until ready to serve.

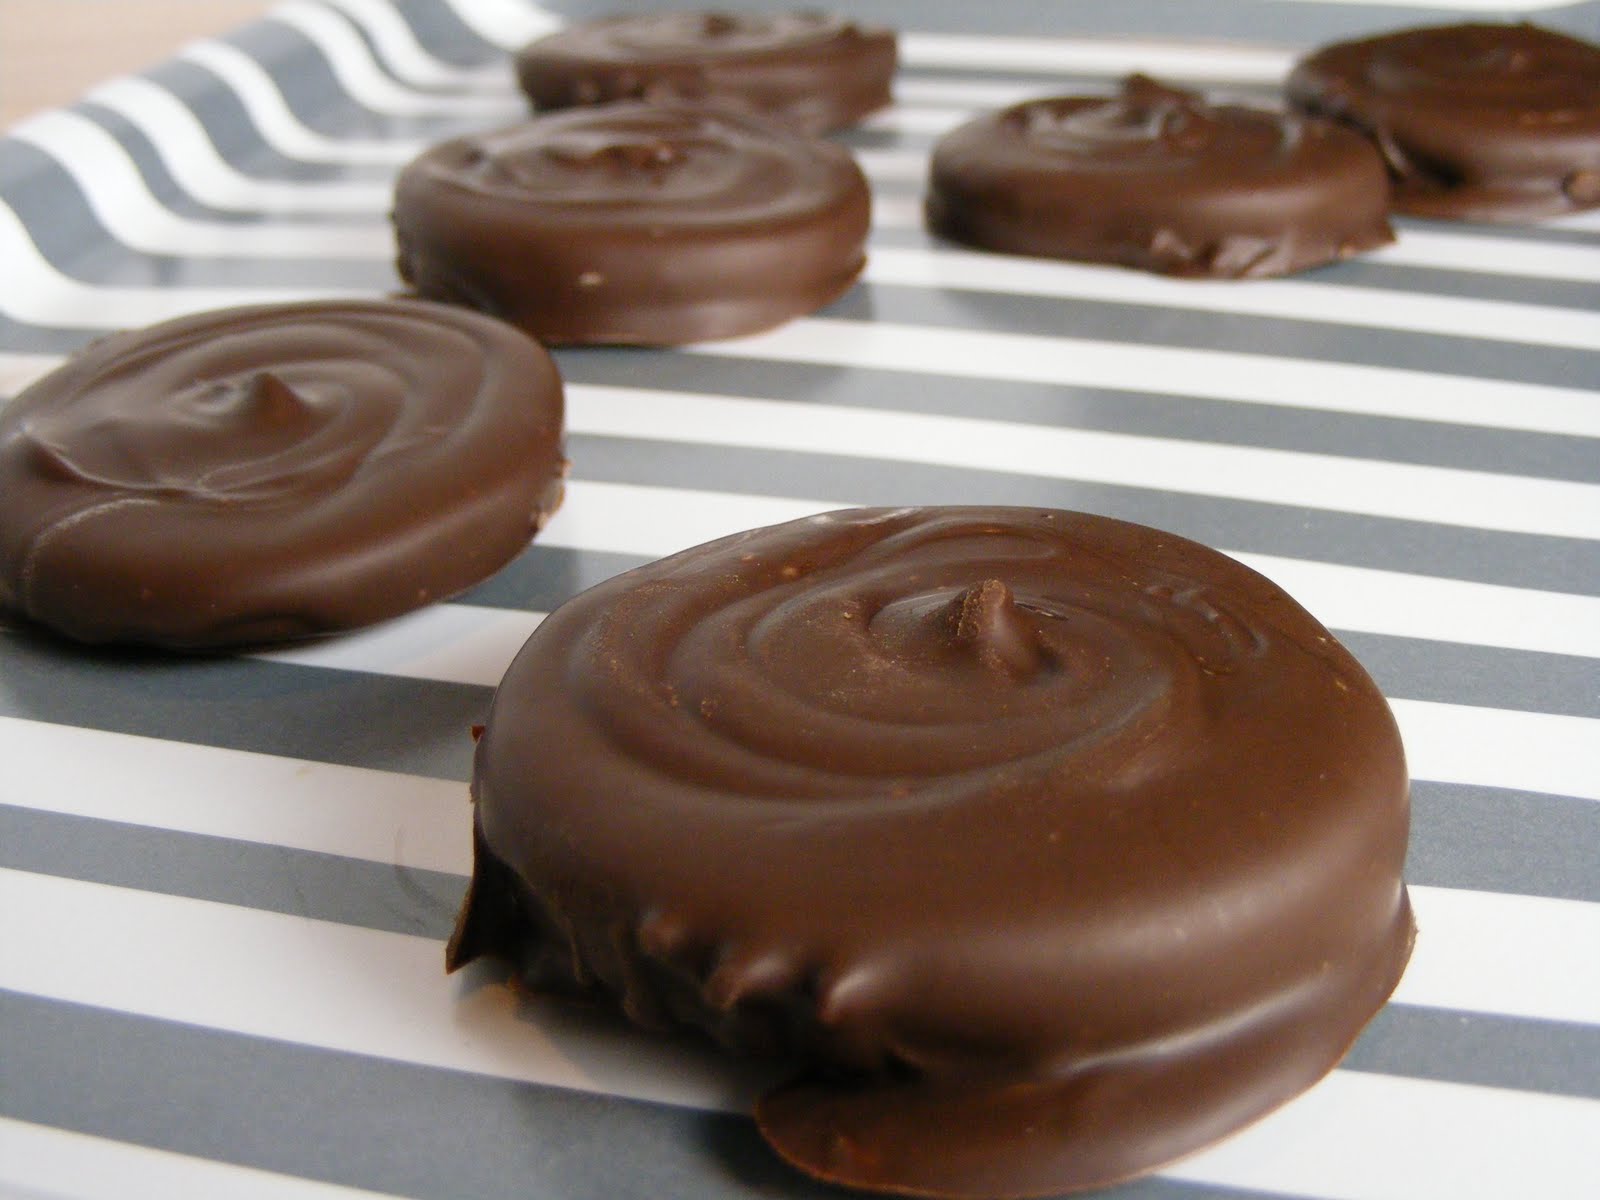
I decorated the top with Junior Mints left over from the surprise mint cookies I was also making for the bake sale. Other garnish ideas: more crushed peppermint candy, crushed regular or mint Oreos, York peppermint patties, fresh mint leaves, shaved chocolate, drizzled melted white chocolate. I don't usually get too creative decorating cakes, but an empty canvas like a ganached layer cake calls for something!Recipes from The Cake Mix Doctor by Anne Byrne

Monday, December 22, 2008

VGP #22 Peppermint Bonbon Cookies

I am SO in love with these cookies! They are only for the real chocolate lovers out there. I'm not talking about some token portion of cocoa powder; no, these start out with a hefty combo of melted bittersweet and unsweetened chocolates. Then later you add in some semisweet chocolate chips for good measure. Throw in crushed peppermint candy and peppermint extract and we have got a very serious confection. The kind that gave my eyes a minty tingle when I opened the oven, similar to the effect of walking into the peppermint room at Celestial Seasonings.
The chocolate is dark, the mint is sweet and fresh.
Merry Christmas to me.

8 oz. bittersweet or semisweet chocolate, chopped
1/2 cup unsalted butter
1 1/2 oz. unsweetened chocolate, chopped
1/2 cup finely crushed hard peppermint candies*
6 T sugar
3 large eggs
1 tsp vanilla extract
1 tsp peppermint extract
1 1/2 cups all-purpose flour
3/4 tsp baking powder
1/4 tsp salt
1/2 cup semisweet chocolate chips
Additional coarsely crushed hard peppermint candies, divided
1/2 cup powdered sugar, optional
2 1/2 tsp milk, optional
1/2 cup semisweet chocolate chips, melted, optional

1. Combine first 3 ingredients in large saucepan - this is the pan all the batter will be mixed in so make sure it is at least 2 quarts. Cook over low heat until chocolate melts and mixture is smooth, stirring occasionally. Remove from heat, and stir in 1/2 cup crushed peppermint candies and 6 T sugar. Let cool 30 minutes.

2. Add eggs to melted chocolate, 1 at a time, stirring well. Stir in extracts.

3. Combine flour, baking powder, and salt; add to chocolate mixture, stirring until combined. Stir in chocolate morsels. Cover and chill dough 2 hours or until firm enough to shape.

4. Heat oven to 325. Shape dough into balls (I kept them small to make them more like bonbons); place on parchment paper-lined baking sheets. Bake for 12 to 13 minutes or until cookies are puffed and cracked on top. Sprinkle coarsely crushed peppermints onto cookies; press candy lightly into cookies. Let cookies cool 5 minutes on baking sheets. Transfer to wire racks to cool completely.

5. Optional glazing: Whisk together powdered sugar and milk; drizzle over cooled cookies. Drizzle with melted chocolate. Sprinkle cookies again with chopped peppermint. Let cookies stand until glaze and chocolate are firm.

Makes about 4 dozen of the size in the picture

*The food processor trumps all as the best way to chop candies - thanks for the tip, Kat!

Recipe from Oxmoor House magazine, June 2007

Saturday, December 6, 2008

VGP #6 Peppermint Crunch Bark

Last year my friend Kristin Taylor gave me a gorgeous square box full of this bark for Christmas. Her mother-in-law works for the Pottery Barn family of stores so I was SURE she got a box from Williams-Sonoma and divided it among friends. No complaints here, so I thanked her profusely only to discover she MADE it herself! It was amazing, and this year she gave me - and you - the recipe, with her own tips and adjustments. Then she cursed me for asking for it because then it made her want to make and eat it. So sorry, Kristin.

10 oz. good quality white chocolate (such as Lindt, Ghiradelli or Baker's), finely chopped
30 red-and-white striped hard peppermint candies, coarsely crushed (about 6 oz.)*
8 oz. good quality semisweet chocolate, chopped
6 T whipping cream
3/4 tsp peppermint extract

1. Turn large baking sheet bottom-side-up. Cover securely with foil. Mark a 9x12-inch rectangle on foil. Stir semisweet chocolate, cream and peppermint extract in heavy medium saucepan over medium-low heat until just melted and smooth. Pour onto rectangle on foil. Using icing spatula, spread chocolate to fill rectangle. Chill until set, about 15 minutes.

2. Stir white chocolate in metal bowl set over saucepan of barely simmering water (do not allow bowl to touch water) until chocolate is melted and smooth and candy thermometer registers 110 degrees (chocolate will feel warm to touch.) Remove from over water. Cool to barely lukewarm, about 5 minutes. Pour white chocolate mixture in long lines over dark chocolate rectangle. Using icing spatula, spread white chocolate in even layer. Sprinkle with crushed peppermint candies. Chill until firm, about 20 minutes.

3. Lift foil with bark onto work surface; trim edges and EAT THEM! Cut bark into fancy squares or triangles or (my preferred method) break into random pieces. Store chilled in airtight container up to 2 weeks. Just lovely!

Makes 1 serving if you're me

*Tip: To easily crush peppermint candy, freeze them first. Then place them in double ziploc bags and smash with the flat side of a meat tenderizer. They'll shatter like glass.
Related Posts Plugin for WordPress, Blogger...