ANNOUNCING: Change is part of life, and apparently, it's part of blogging, too. As of September 5, 2013, I'm merging The Virtual Goody Plate with Disco Mom Takes on the World and whatever else may henceforth spill from my fingertips (and kitchen), into one great new blog. I hope you'll join me there in exclaiming, "THIS IS AWESOMELAND."

Wednesday, September 28, 2011

Cream Cheese Carrot Cake Muffins

Don't go away! These understated-looking muffins have a super special surprise for you! (You know I love surprise fillings...)Ta-da! Oh yes, just take a bite and it's like cream cheese frosting on the inside! But since it is not on top it is a muffin and you can (and should) eat it for breakfast. Handy-dandy for on-the-go breakfast, or snacks, too. No mess...if you eat it fast enough. And I know these are the flavors you're craving this time of year, too, because I am. Just a little something extra-special-er than a regular muffin. Also happens to be in my new MUFFINS cookbook (which I just made for fun.) You should get you one. Saves blog search time.

Either way, these are perfect for fall. And if you can't get enough carrot cake goodness, try the Carrot Cake Scones or Pancakes. Mmm...

Cream Cheese Carrot Cake Muffins (print recipe)
Filling:

8 ounces cream cheese
1/4 cup granulated sugar
a few drops of orange extract

Muffins:
2 1/4 cups all-purpose flour
1/2 cup granulated sugar
1/4 cup light brown sugar, firmly packed
1 1/2 tsp baking powder
1/4 tsp baking soda
1 1/2 tsp ground cinnamon
3/4 tsp ground ginger
3/4 tsp salt
2 large eggs
3/4 cup water
1/3 cup vegetable oil
1 cup grated carrots, lightly packed (about 2 medium-large carrots)

1. Preheat oven to 400. Lightly grease a standard 12-well muffin tin, or line with paper muffin cups and grease the cups.

2. To make the filling, place the cream cheese in a microwave safe bowl, and heat on low power for 40 seconds. Stir in the sugar and extract; set aside.

3. To make the muffin batter, in a medium bowl whisk together the dry ingredients (flour through salt). In a small bowl whisk together the eggs, water and oil. Stir the wet ingredients into the dry ingredients. Fold in the grated carrots, stirring to combine.

4. Drop about 2 T of batter into each muffin cup, spreading it to cover the bottom. Dollop a heaping Tablespoon of filling in. Cover with enough batter to fill the muffin cups quite full. Unless you have especially deep cups, you will have about 1/3 cup batter left over - bake it in a separate custard cup, if desired.

5. Bake the muffins until a toothpick inserted into the cake part comes out clean, about 20 minutes. The tops of muffins will feel firm to the tough. Remove the muffins from the oven and as soon as you are able to handle them, transfer to a rack. If you serve the muffins warm, the filling will be molten. If you wait for them to cool, it will firm up.

Recipe from King Arthur Flour

Sunday, September 25, 2011

Lemon-Scented Pull-Apart Bread

I found this recipe awhile back on one of the very few cooking blogs I frequent, 17andbaking.com. It was like one of those truly inspiring recipes, and I pondered it for a long time before making it. I wasn't curious; I KNEW it would be great. It was just...I was waiting for the right time. The right day. I would know it when it came. In the meantime I would make sure I had lemons and cream cheese around, just in case.

I decided to make this the day Hurricane Irene came through. My nephew had been evacuated from his college in southern VA, so he was staying with us. There was nothing to do, nowhere to go, and the power could go out at any moment. But we doubted it because it didn't hit us too hard. Hard enough, though, to not go out, and to feel a bit "hunkered down." So I baked.

It was fragrant and gorgeous and fun as I had expected. Easier, actually. The long instructions threw me; once you do it, you realize it's easy. My only regret is cooking it a bit too long so the outer crust was too dark. This being my first time, I just wanted to make sure it cooked through the middle. But no one minded and we all gobbled it up, one pull-apart at a time.

Lemon-Scented Pull-Apart Bread (print recipe)
Sweet Yeast Dough:

12 1/4 ounces (about 2 3/4 cups) all-purpose flour
1/4 cup (1 3/4 ounces) granulated sugar
2 1/4 tsp instant yeast
1/2 tsp salt
1/3 cup whole milk
4 T unsalted butter
1/4 cup water
1 1/2 tsp pure vanilla extract
1 tsp Buttery Sweet Dough Flavor, optional (from King Arthur Flour)
2 large eggs, at room temperature

Lemon Sugar Filling:
1/2 cup granulated sugar
3 T finely grated lemon zest (from 3 lemons)
1 T finely grated orange zest
4 T unsalted butter, melted

Tangy Cream Cheese Icing:
3 ounces cream cheese, softened
1/3 cup powdered sugar
1 T whole milk
1 T fresh lemon juice

Make the Sweet Yeast Dough
In the bowl of an electric mixer, combine 2 cups (9 ounces) flour, the sugar, yeast and salt. Meanwhile, in a small saucepan combine the milk and butter and heat until butter is melted. Remove from heat, add the water, and let resta minute until just warm (120 to 130 degrees F). Stir in the vanilla and Sweet Dough Flavor, if using.

Pour the milk mixture over the flour-yeast mixture and, using a rubber spatula, mix until the dry ingredients are evenly moistened. Attach the bowl to the mixer, and fit with the paddle attachment. With the mixer on low speed, add the eggs one at a time, mixing after each addition just until incorporated. Stop the mixer, add 1/2 cup of the remaining flour, and resume mixing on low speed until the dough is smooth, 30 to 45 seconds. Add 2 more Tablespoons flour and mix on medium speed until the dough is smooth, soft and slightly sticky, about 45 seconds.

Lightly flour a work surface and knead the dough gently until smooth and no longer sticky, about one minute. Add an additional 1 to 2 Tablespoons of flour only if the dough is too sticky to work with. Place the dough in a large bowl, cover with plastic wrap and let it rise in a warm place for 45 to 60 minutes or until doubled in size. An indentation made with your finger should keep its shape.

Make the Lemon Sugar Filling

Mix the sugar, lemon zest, and orange zest until the sugar is sandy and fragrant.

Assemble the Bread

Center a rack in the oven and preheat to 350. Grease a 9"x5" loaf pan.

Gently deflate the dough with your hand. Flour a work surface and roll the dough into a 20" by 12" rectangle. You should measure it and make it as accurate as possible. Use a pastry brush to spread the melted butter evenly and liberally over the dough. Use a pizza cutter to cut the dough crosswise in five strips, each 12" by 4". Sprinkle 1 1/2 T of the lemon sugar over the first buttered rectangle. Top it with a second rectangle, sprinkling that one with 1 1/2 T of lemon sugar. Continue to top with rectangles and sprinkle, so you have a stack of five 12" by 4" rectangles, all buttered and topped with lemon sugar.

Slice this new stack crosswise, through all five layers, into 6 equal rectangles, about 4" by 2" each. Carefully transfer these strips of dough into the loaf pan, cut edges up, side by side. This is easier if you prop the loaf pan up on its end. There will be some extra room, but the bread will expand during the second rise and baking. Loosely cover the pan with plastic wrap and let the dough rise in a warm place until puffy and almost doubled in size, 30 to 50 minutes. When you gently press the dough with your finger, the indentation should stay.
Bake the loaf until top is golden brown, 35 to 45 minutes. Check it at 30 with a cake tester to make sure the middle is done. I overcooked mine slightly trying to get it right. Cover the top with foil if it is browning too quickly. Transfer to a wire rack and let cool in the pan for 10 to 15 minutes.

Make the Cream Cheese Icing
Beat the cream cheese and powdered sugar in a medium bowl with a wooden spoon until smooth, then add the milk and lemon juice. Stir until creamy and smooth.

Finishing
Carefully run a thin sharp knife around the edges of the bread, and tap the pan on the table to release the loaf. Flip it over onto a cooling rack, then flip again so it is right side up. Spread the top of the warm bread with the cream cheese icing, using a pastry brush to fill in any cracks. Eat warm or at room temperature, pulling off pieces with your fingers. It's best the first day but if it lasts into a second, microwave the pieces to soften them up. Recipe from Baking for All Occasions by Flo Baker via 17andbaking.com

Thursday, September 22, 2011

Banana After-School Cake

Here's a picture of all my cookbooks. I mean, it's not bad. Only two shelves. But as you can see there is no extra space. So out of necessity I am very discriminating about acquiring new cookbooks. They have to be either very worthwhile, or they have to be obscenely cheap. I am a sucker for a bargain.

So when I was at Border's last week, and everything was 70% off (or more) for their last 10 days, I gave the cookbook section a look-see. I knew it would be picked over, and it was. But sometimes that's how you find the gems. So when I found Sticky, Chewy, Messy, Gooey Treats for Kids by Jill O'Connor (list price $19.95, Amazon price $9.43) for a whoppin' $1.60, I took the plunge. It was so cute looking, so inviting. I did flip through quickly, to make sure there was at least one interesting recipe, and I found at least five on one skim - sold! Sometimes "treats for kids" books are full of lame shortcuts and store bought frosting, so I just wanted to make sure these were real recipes. Oh, yes, I lucked out.

So on a recent afternoon when Ginger said she was bored and couldn't wait for Hazel to come home, I said, "Let's make a snack!" It was rainy and unseasonably cool, and a perfect warm-comfort-food day. So I took a quick inventory - browning bananas - and remembered something banana-y from SCMGTfK. Just so happens she calls it "Banana Montana After-School Cake." Perfect. I left out the "Montana" for obvious reasons.

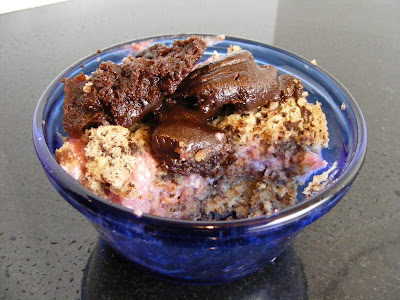
But despite the book's title, Ginger and I found this cake...a bit too plain. So we added cinnamon chips. And chocolate chips. And heck, a few marshmallows. You know. And it was awesome. And we ate it for after-school snack the rest of the week. The End.Banana After-School Cake (print recipe)
1 3/4 cups cake flour
1 tsp baking powder
3/4 tsp baking soda
1/2 tsp salt
1/2 cup unsalted butter, at room temperature
1/2 cup granulated sugar
1/2 cup firmly packed light brown sugar
2 eggs, room temperature
1 tsp vanilla extract
1 cup mashed very ripe banana (about 3)
1/4 cup buttermilk
3/4 cup diced toasted pecans, optional
A couple 4-yr-old-size handfuls of cinnamon chips and/or mini chocolate chips, optional

1. Preheat the oven to 350. Spray a 9-inch square cake pan with nonstick cooking spray.

2. In a medium bowl, sift together the flour, baking powder, baking soda, and salt. Set aside.

3. In a separate bowl, combine the butter, granulated sugar, and brown sugar. Using an electric mixer set at medium, beat together until light and fluffy, 3 to 4 minutes. Beat in the eggs, one at a time, and then beat in the vanilla, bananas, and buttermilk, just until combined.

4. With the mixer set at low speed, beat the flour mixture into the banana batter, in two additions, just until combined. Do not overbeat the batter. Using a rubber spatula, stir in the pecans and/or chips if using.

5. Spread the batter into the prepared pan in an even layer and bake until firm and golden brown and a skewer inserted into the center of the cake comes out clean, about 40 to 50 minutes. Transfer to a wire rack and let cool for 15 minutes. Sprinkle with confectioners' sugar and cut into squares. Serve warm.Recipe adapted from Sticky, Chewy, Messy, Gooey Treats for Kids by Jill O'Connor

Tuesday, September 20, 2011

Dessert Club - Virtual Goody Plate

In a way, this is a blog post about this blog. Or, as one Dessert Club member said, "It's like a competition of Kari against Kari." Kinda sounds bad when you put it like that, but to celebrate Dessert Club's 1-year birthday we chose my blog as our theme. Which guaranteed I would like everything. It was a pretty good night.


An improvisational fusion of Fresh Lime Chiffon Cake and Coconut Key Lime Pie


And of course you already know I made Devil's Food Cake with Boiled Black Pepper Icing. It was DIVINE (I love my torch) - the icing very marshmallowy, and yes, a bit peppery, the cake to die for. Actually the cake Bon Appetit provided fell apart so I saved it in the freezer for cake pops someday, and made my signature devil's food cake layers that I know always turn out well. Then I made the chocolate cream filling and boiled icing according to directions and it was wonderful...and SO FUN. And it WON the Dessert Club vote!

But. I did not get the prize because I was providing it and didn't need it - a collection of some of my favorite harder-to-find ingredients (cocoa nibs, cinnamon chips, vanilla sugar and lemon juice powder.) So we went to second place. Which was OF COURSE a tie, between:

Peppermint Cream Bars with White Chocolate Ganache
and Lemon Ginger Bars
...which is like comparing apples and oranges. We took a second vote, myself abstaining so there would be an odd number, and the lemon ginger bars won. They are SO GOOD. But talk about splitting hairs. The peppermint bars are also amazing. There was much ooh-ing and aah-ing over both of them, with pledges to make them for many Christmas give-away (or keep) plates this year. So yeah, it was a really fantastic night, catered perfectly to my palate.

Did you want a few more pics of my cake? Thought so.
(How do you like my cakestand? I got in on eBay awhile back...wish I'd thought to do that before vintage hobnail came back in style, though.)

Wednesday, September 14, 2011

Devil's Food Cake with Black Pepper Boiled Icing

Tee hee hee, this is me beating the system. Just a little. Dessert Club is tonight. The theme is "VGP" which means, make something off this blog. Most awesome theme ever. But I really really really wanted to try this cake from Bon Appetit, so here I am posting it like an hour before our meeting. I've made it but don't have a picture (hence the photo from their website) and I haven't brulee'd it yet because I bought the wrong fuel for my *NEW* kitchen torch so I gotta run out super quick to Sur La Table and get some butane before our meeting! Busy evening. But this cake promises to be killer. Black Pepper Icing, are you kidding?

And not only did I get a torch just for the occasion (it will get plenty of use, hello, Toasted Marshmallow Ice Cream made easy) but I got to get two new ingredients, too - creme fraiche (Whole Foods) and cocoa nibs (The Spice House.) I love expanding my repertoire. Here's the recipe!

Devil's Food Cake with Black Pepper Boiled Icing (print recipe)
Filling:
3 1/2 oz. bittersweet chocolate (60%-64% cacao), chopped
1/4 tsp kosher salt
1 cup heavy cream, divided
1 tsp unflavored gelatin
2 T sugar, divided
3 large egg yolks
1/2 cup crème fraîche

Cake:
1 1/2 cups all-purpose flour
1 tsp baking soda
1/2 tsp baking powder
1/4 tsp salt
1 1/4 cups boiling water
4 oz. unsweetened chocolate, chopped
1/2 cup Dutch-process cocoa powder
1 tsp instant coffee or instant espresso, optional
10 T unsalted butter, softened
1 1/2 cups packed light brown sugar
3 large eggs, room temperature
1/2 cup sour cream, room temperature
1 tsp vanilla extract
2 T cocoa nibs

Black Pepper Icing:
1 cup sugar, divided
1/4 tsp kosher salt
3 large egg whites, room temperature
1/2 tsp freshly ground black pepper

1. Make the Filling: Combine chocolate and salt in the large bowl of an electric mixer; place a fine-mesh strainer over bowl and set aside. Pour 1 T cream into a small bowl. Sprinkle gelatin over and let stand until softened, about 10 minutes. Meanwhile, bring remaining cream and 1 T sugar to a simmer in a small saucepan, stirring to dissolve sugar. Whisk yolks and remaining 1 T sugar in a medium bowl. Gradually whisk in hot cream mixture; return to saucepan. Cook over medium heat until mixture thickens slightly and your finger leaves a path on the back of a spoon when drawn across, about 3 minutes. Remove from heat.

2. Add gelatin mixture to cream mixture; stir to dissolve. Pour through prepared strainer into chocolate. Let stand for 1 minute; whisk until chocolate is melted and mixture is smooth. Whisk in crème fraîche. Using an electric mixer, beat filling until well blended, about 2 minutes. Press a sheet of plastic wrap onto surface of filling; chill overnight.

3. Make the cake: Adjust oven racks to the upper-middle and lower-middle positions and heat the oven to 350. Grease three 8-inch round cake pans, then dust with cocoa powder and line the bottoms with parchment paper. Whisk the flour, baking soda, baking powder and salt together in a large bowl. In a medium bowl, whisk the boiling water, chocolate, cocoa powder, and instant espresso together until smooth.

4. In a large bowl, beat the butter and sugar together with an electric mixer on medium speed until light and fluffy, 3 to 6 minutes. Beat in the eggs, one at a time, until incorporated, about 30 seconds. Beat in the sour cream and vanilla until incorporated.

5. Reduce the speed to low and beat in one-third of the flour mixture, followed by half of the chocolate mixture. Repeat with half of the remaining flour mixture, and the remaining chocolate mixture. Beat in the remaining flour mixture until just incorporated.

6. Fold in cocoa nibs with a rubber spatula to make sure it is thoroughly combined. Scrape the batter into the prepared pans, smooth the tops, and gently tap the pans on the counter to settle the batter. Bake the cakes until a toothpick inserted in the center comes out with a few crumbs attached, 15 to 20 minutes, rotating and switching the pans halfway through baking.

7. Let the cakes cool in the pans for 10 minutes. Run a small knife around the edge of the cakes, then flip them out onto wire racks. Peel off the parchment paper, flip the cakes right side up, and let cool completely before assembling, about 2 hours.

8. Place 1 cake layer on a plate. Stir filling to loosen. Spread half of filling over cake in an even layer. Place second cake layer on top of filling. Spread remaining filling over in an even layer. Place remaining cake layer on top. Chill cake for 1 hour.

9. Make the black pepper icing: Mix 1 T sugar and salt in a small bowl; set aside. Attach a candy thermometer to side of a small saucepan; add remaining sugar and 1/2 cup water to pan. Stir over medium-low heat until sugar dissolves. Increase heat and boil without stirring, occasionally swirling pan and brushing down side with a wet pastry brush, until thermometer registers 240 degrees, about 10 minutes.

10. Meanwhile, place egg whites in the bowl of a stand mixer fitted with a whisk attachment. Beat at medium speed until frothy. With machine running, gradually add reserved sugar and salt from small bowl. Gradually add hot syrup from saucepan to egg whites, beating at medium-high speed and allowing syrup to drizzle down sides of bowl. Continue beating whites until stiff and cool, about 20 minutes. Add pepper; beat until well blended. Immediately spoon topping onto cake. Smooth over top and sides. Working quickly, swirl icing decoratively. (Cake can be iced one day ahead. Cover with a cake dome; chill. Let stand at room temperature for 1 hour before serving. To brûlée the icing, use a kitchen torch to toast icing in spots.

Recipe adapted from Bon Appetit, September 2011

Sunday, September 11, 2011

Skillz, Part 2

Oh my gosh, what have I been doing? Everybody remember Heather from my cake deco class? Well we really did have a part 2, the next week, but it has just taken me three months to get around to posting it! But those buttercream roses were such a pain that I do definitely want credit for learning to make them.

So. In part 1 we did cupcakes and various beginner piping styles. In part 2 we took on cakes. Torting. Damming.
Filling.
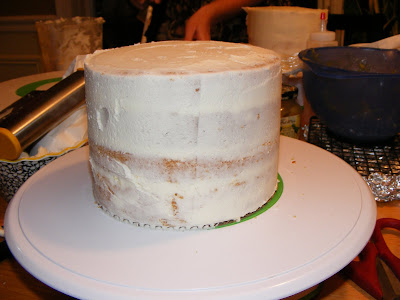
And the blasted crumb coat. I see the purpose but have a hard time justifying it for all the wasted frosting. So much wasted frosting!


Then the icing. Same as crumb coat, only thicker and more perfect. And Heather's special technique for smoothing it perfectly to look like fondant.

And finally, the buttercream roses. Which took about an hour to learn and were so hard. I will never take them for granted again. I managed to get about three decent ones. Plus some piped flowers I'd made ahead of time, and my cake actually looked pretty good.

Wow, telling about it goes a lot faster than doing it, go figure.
So it was a great night and I'm really glad to have gone through the training. But the reality is, I am not going into this professionally. And I am not a perfectionist in this kind of way. So I really won't be doing my cakes like this very much. The frosting is very dense, and it takes a TON, much of which goes to waste. I can't get over that. Plus I like soft, swirly frosting, or ooey, drippy glaze as much as anything.

But in August my niece turned 8 and requested a "Littlest Pet Shop" vanilla cake, so I figured I could do it. Got some LPS toys at Target, colored some icing to match. Putting the cake together was like torture because I had to go back and re-read and try to remember all the instructions. It took forever! So after all that I kept the piping pretty simple. Even so it was several hours. So while I might not actually be skilled, I do have at least a few more skillz than before.

Thursday, September 8, 2011

Buttermilk-Nutmeg Coffee Cake

You know what's so special about coffee cake, right? Besides being delicious, it's cake you are supposed to eat for breakfast. Oh, ouch! Twist my arm! And my kids' arms, too. I have only made this once, but Hazel keeps asking for it again. She's no dummy.

This cake has all those yummy flavors I love in a doughnut - nutmeg, brown sugar, cinnamon, etc. But of course it's way easier because it just bakes in a 9 x 13 pan. And if you're going to continue to compare it to doughnuts, it is waaay healthier because no frying! Just for that I am giving it my "healthy-ish" tag. Gotta love it, and now you can definitely eat it for breakfast!
Buttermilk-Nutmeg Coffee Cake (print recipe)
2 1/2 cups all-purpose flour
1 1/2 cups packed brown sugar
1/2 tsp salt
2/3 cup butter
2 tsp baking powder
1/2 tsp baking soda
1/2 tsp ground cinnamon
1/2 tsp ground nutmeg
2 eggs, beaten
1 1/3 cups buttermilk
1/2 cup chopped pecans, walnuts or almonds

1. Grease the bottom and 1/2-inch up the sides of a 9x13-inch baking dish; set aside. Preheat oven to 350 (for metal) or 325 (for glass.) In a large bowl combine flour, brown sugar, and salt. Using a pastry blender, cut in butter until mixture resembles coarse crumbs; set aside 1/2 cup of the crumb mixture. Stir baking powder, baking soda, cinnamon and nutmeg into the remaining crumb mixture.

2. In a medium bowl combine eggs and buttermilk. Add egg mixture all at once to cinnamon mixture, stirring just until moistened. Spoon batter evenly into prepared pan or dish. In a small bowl stir together the reserved 1/2 cup crumb mixture and the nuts; sprinkle over batter.

3. Bake for 35 to 40 minutes or until a toothpick inserted near the center comes out clean. Serve coffee cake warm or room temperature. Makes 18 servings
Recipe from 9x13: The Pan That Can

Tuesday, September 6, 2011

Dessert Club - Secret Exchange

Here's how it worked. At July's gathering we each brought a printed recipe and slipped it in a manilla envelope. Shuffle, exchange. Then, unless you got your own recipe, you had to make that one for August, and no one could say mum.

But of course we all did, just a little. Mostly there was grumbling. It's interesting what happens when folks passionate about dessert are told what they have to make. We all bristled a bit. Our Dessert Club members are like one big Venn diagram. We have tendencies and preferences in the things we like to make and eat. Our palates overlap but none match exactly. Which is why this was a tough challenge for our club, and for some more than others.

At our meeting, we dished, we nibbled, we confessed, we hugged and there was almost some crying. There were some lessons learned, especially about the devil named Phyllo dough. Most of us ended up liking what we made more than we thought we would, having had a month to mull it over. And there were some dang good dishes. As usual we had a tied vote and had to go around again to come up with a winner. In fact, this time there were two winners - both the maker and the provider of the winning dish got copies of my new self-made cookbook "MUFFINS." (You can get it on Blurb here.)

Now. On to the goodies:


"Stephanie's Cream Cake"...gone terribly wrong!

Peanut Butter Nougat Chocolatiers
White Chocolate Decadence
Pistachio Baklava with Cardamom Orange Syrup

Apple & Cranberry Purses with Warm Caramel Sauce (I think this one got my vote)

...and the winner of the evening....
Banana Cream Pudding Brulee with Gingersnap Crust (so. good.)

Oh, it was a good, good night!

Saturday, September 3, 2011

"Simply Sinful" Cinnamon Muffins

I'm pretty sure I don't have to say much about these. Pretty much the ultimate cinnamon muffin here, and everyone loves cinnamon. Or should. The recipe comes from King Arthur Flour, a recipe for using it's Baker's Cinnamon Filling Mix, but I just used the butter-sugar-cinnamon substitution and they were AMAZING. Then I started reading some of the reviews of the cinnamon filling mix...and I'm pretty sure I'm gonna have to get me somma dat. Can you imagine all the nosh-worthy things a high quality cinnamon filling could go in? Dang. Simply sinful. (Like these muffins...)
Simply Sinful Cinnamon Muffins (print recipe)
Topping
1/3 cup brown sugar, packed
1/4 cup diced pecans
1/4 cup rolled oats
1/2 cup King Arthur Unbleached All-Purpose Flour
3 tablespoons soft butter

Filling
1/2 cup King Arthur Baker's Cinnamon Filling mix*
3 to 4 tablespoons water*

*Or substitute 3 tablespoons butter, 1/2 cup brown sugar, and 1 1/2 tablespoons ground cinnamon for the Baker's Cinnamon Filling mix and water, which is what I did.

Batter
1/2 cup (1 stick) butter, melted
3/4 cup milk
2 large eggs
1 3/4 cups King Arthur Unbleached All-Purpose Flour
1/2 cup rolled oats
2 tablespoons Signature Secrets(r) Culinary Thickener or cornstarch
3/4 cup granulated sugar
1 tablespoon baking powder
1/2 teaspoon salt
1/4 teaspoon ground nutmeg
1/2 cup cinnamon chips or butterscotch chips
1. Preheat your oven to 400°F. Line a 12-cup muffin pan with cupcake papers, or grease it lightly.

2. Prepare the topping by mixing the ingredients together until crumbly. Set aside.

3. Prepare the filling by mixing the Baker's Cinnamon Filling with enough water to make filling with a soft, pudding-like consistency. Set it aside. (Or make the filling substitute.)

4. To make the batter: In a large bowl, whisk together the melted butter, milk, and eggs. In a separate bowl, whisk together the dry ingredients, including the chips. Add the dry mixture to the liquid, stirring just until combined.

5. Divide half the batter evenly among the muffin cups. Dollop 2 teaspoons cinnamon filling onto each muffin, then top with the remaining batter. Sprinkle with topping, pressing it in lightly.

6. Bake the muffins for 20 to 25 minutes, or until they're golden brown. Remove them from the oven, and wait 5 minutes before transferring them from the pan to a rack to cool. Makes 12 muffins
Recipe from King Arthur Flour
Related Posts Plugin for WordPress, Blogger...