ANNOUNCING: Change is part of life, and apparently, it's part of blogging, too. As of September 5, 2013, I'm merging The Virtual Goody Plate with Disco Mom Takes on the World and whatever else may henceforth spill from my fingertips (and kitchen), into one great new blog. I hope you'll join me there in exclaiming, "THIS IS AWESOMELAND."

Sunday, January 31, 2010

Pita Bread

Here's another gem from the kitchen of Joann Randall, my friend Shanna's mom. Joann of the Cinnamon Rolls and Buttermilk Donuts. This woman knows her stuff, so I went in feeling very optimistic.

I've made pitas one time before - a whole wheat recipe I got from Cooking Light. The pitas turned out OK but were kind of lacking in flavor and some didn't totally poof. It was a good first go but this time I wanted to try a different recipe. And now I shall look no further. As you can see below the recipe is completely simple. Make a dough, let it rise briefly. Cut into 12 pieces, let rise briefly. Roll into circles (*rolling from center out is key!*), cook briefly in screaming hot oven. Voila! Kind of like magic. They all poofed up to make roomy pockets but no tears.Pita Bread
4 1/2 to 4 3/4 cups flour
1 1/2 tsp sugar
1 1/2 tsp salt
1 T yeast
1 3/4 cups water
2 T olive oil

1. In a large bowl, mix 2 cups flour, sugar, salt and yeast. Mix well. Heat water and oil until warm but not hot. Add to flour mixture. Blend until moistened. Beat 3 minutes by hand (I used my mixer and dough hook.) Gradually stir in enough flour to make a firm dough. Knead until smooth and elastic.

2. Transfer dough to a greased bowl. Cover with plastic wrap and a towel. Let sit 20 minutes. Divide into 12 equal balls. Cover again with plastic and a towel for 30 minutes to rise.

3. Preheat oven to 550 degrees. Roll each ball into a 6" circle. Roll from center out - this helps it puff. Lay on wire cake racks and place in oven. I used my pizza pan (the kind with holes) and it worked great. Pitas will puff and brown in about 5 to 6 minutes. Do not over cook. Remove to cool on wire racks. Serve with favorite fillings. Makes 12 pitas

Recipe adapted from Joann Randall

I like to eat at least one warm from the oven with butter and honey or jelly on it - just delicious. Then I fill cooled fresh pitas with fillings like chicken or egg salad, hummus, falafel, cheese, deli turkey with greek salad, etc. Below is a picture of our favorite chicken salad. We fill pitas with it, wrap individually in plastic wrap, and freeze them. Take them out in the morning to take to work (or thaw at home) and they are just right by lunchtime. Then I freeze any leftover pitas and use them later for a quick pita-pizza lunch or dinner (spaghetti sauce, cheese, any toppings, microwave or heat in oven.) Not a one should go to waste!
Hickmans' Favorite Chicken Salad: 3 cups chopped cooked chicken (about the meat off a rotisserie chicken), 2/3 cup thinly sliced celery, 2 T chopped onion, 1/3 cup raisins (I like golden but purple are good too), 1/3 cup chopped dried apricot, just barely enough mayo to hold it together, salt and pepper to taste.

Thursday, January 28, 2010

Rainbow Cake

Saturday was my daughter's third birthday. She had a rainbow-themed party, which made me immediately think of the Rainbow Cake (a.k.a. Jello Poke Cake) my Grandma used to make when I was little. The recipe is simple. The process is so colorful and fun. Fun for kids to help with, or you can just do it yourself. The result is crowd-pleasing and super pretty.

Can a three-year-old's birthday cake get much better than cake, jello, pudding and Cool Whip? I'm not sure, but I don't think so. It felt a bit like something out of Willy Wonka making the different Jellos and pouring them into and onto the cake. And of course we served it with - what else? - rainbow sherbet.
Rainbow Cake
(a.k.a. Jello Poke Cake)
  • 1 white/yellow/vanilla cake mix (and the ingredients to make it - I substituted buttermilk for the water but otherwise followed the box instructions)
  • Several different flavors of gelatin (small boxes) - or just one if you're feeling monochromatic
  • Cool Whip or whipped cream for topping
  • Vanilla pudding, optional, prepared
  • Colored buttercream frosting for rainbow decoration, optional
1. Make the cake in a 9x13 pan according to box directions. Allow to cool for 15 minutes. Make lots of holes by poking cake with a the handle of a wooden spoon, or I prefer to use a straw.

2. Dissolve each flavor of gelatin in 1 cup boiling water. Drizzle all over cake, making sure it goes in the holes. You don't have to use all the gelatin but be fairly generous. Refrigerate at least 4 hours. Jello will set in the cake.
3. If desired, spread a layer of cooled vanilla pudding on the cake. Then spread with Cool Whip to complete. Decorate as desired. Serve. (Refrigerate leftovers.)Recipe from Grandma Cummings

Monday, January 25, 2010

White Chocolate Macadamia Muffins

I'm on a muffin kick. I have a huge stack of recipes to try. I had some good macadamia nuts in my cupboard so I moved these to the front of the queue. I took them to a church meeting and they all got eaten so whatever that's worth. People couldn't figure out what kind they were, though - almond? buttermilk? I think it's because the flavors are subtle - definite sweetness, definite nuttiness, but no obvious chunks (because they are the same color as the muffin.) But they're really, really good.White Chocolate Macadamia Muffins
1 3/4 cups all-purpose flour
3/4 cup sugar
2 1/2 tsp baking powder
1/2 tsp salt
1 egg
1/2 cup milk
1/4 cup butter, melted
3/4 cup white chocolate chips or chopped white chocolate
3/4 cup chopped macadamia nuts
Glaze:
1/2 cup white chocolate chips or chopped white chocolate
2 T heavy whipping cream

1. Preheat oven to 400. In a bowl, combine the flour, sugar, baking powder, and salt. In another bowl, whisk the egg, milk and melted butter; stir into dry ingredients just until moistened. Fold in the white chocolate and nuts.

2. Fill paper-lined muffin cups two-thirds full. Bake for 15 to 18 minutes or until a toothipick inserted comes out clean. Cool for 5 minutes before removing from pan to a wire rack.
3. For glaze, in a small microwave-safe bowl, melt chips with cream; stir until smooth. Drizzle over warm muffins. Makes 12 muffins
Recipe adapted from Taste of Home, Feb/Mar 2006

Friday, January 22, 2010

Peanut Butter Melts

Here's the next treat from Hannah Swensen's Cookie Jar (in Blueberry Muffin Murder.) Apparently the mayor of her town (I forget his name) just loves these cookies. In fact he melts for them. Ha. Ha.

I wish you could be here to taste one so I could grin and ask you to guess the secret ingredient. It's molasses, which I've never heard of putting in a peanut butter cookie. But then I thought about it, and using white sugar and molasses is basically the same as using brown sugar, which I have heard of in peanut butter cookies, so it's not that crazy.

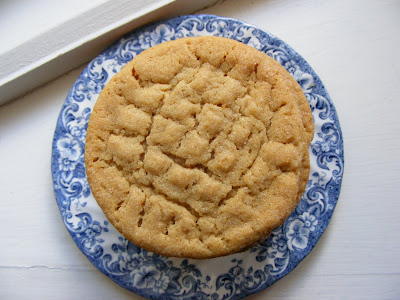
These cookies came out a little flatter than I expected, but I was also using suspect baking powder (my cake a few days earlier completely failed to rise); I have since replaced it. But thinness aside, these were delicious - slightly crispy on the outside, gorgeously soft and chewy on the inside, even after several days in a Tupperware. Total comfort cookies and I found myself snacking on them way more than I should have. So I gave some away. But not all of them, of course. I'm not quite that disciplined.

Peanut Butter Melts
1 cup melted butter (2 sticks)
2 cups white sugar
2 tsp vanilla
1/8 cup molasses (2 T)
1 1/2 tsp baking soda
1 tsp baking powder
1/2 tsp salt
1 cup peanut butter (smooth or crunchy)
2 beaten eggs (whip with a fork)
2 1/2 cups all-purpose flour
Sugar for rolling, optional

1. Preheat oven to 375. Place oven rack in middle position.

2. Microwave the butter to melt it. Add the sugar, vanilla and molasses. Stir until it's blended, then add the baking soda, baking powder, and salt. Mix well.

3. Measure out the peanut butter. (Spray the inside of the measuring cup with Pam so it won't stick - I do the same with the molasses.) Add it to the bowl and mix it in. Pour in the beaten eggs and stir. Then add the flour, and mix until all the ingredients are thoroughly blended.

4. Form the dough into walnut-sized balls and arrange them on a cookie sheet lined with parchment or silicone. (These spread a lot so keep it to 12 for a standard jelly roll pan.) Roll in sugar if desired (but I tried both ways and I think they're plenty sweet without the extra roll.) Flatten slightly in a criss-cross pattern with fork.

5. Bake for 8 to 10 minutes, or until the edges are just beginning to turn golden. Cool on cookie sheet for 2 minutes, then transfer to wire rack to finish cooling. Makes about 3 1/2 to 4 dozen

*For PBJ cookies, spread jam on one cookie and use another to make a sandwich. Or go for it and use fudge frosting or Nutella in the middle.

Recipe from Blueberry Muffin Murder by Joanne Fluke

Tuesday, January 19, 2010

Irish Oatmeal (by Tona)

What’s the only thing stopping you from starting a cold winter day with a bowl of hearty, fiber-rich, steel-cut oatmeal? I’m not talking about the pansy, rolled-oats stuff that turns into glue when cooked, or even that sawdust-with-dried apples that Quaker Oats sells in the little packets. No ma’am, I’m talking about the real Irish oatmeal, rich and chewy. The only thing stopping you is the hour it takes for it to cook, right? Who has that kind of time in the morning? Seriously, no one.

A few months ago I discovered frozen single servings of Irish oatmeal at Trader Joe’s , and those were great, but they only came in a 3-pack and for a family of 6 that could add up fast. I bet I could make them at home for less, and found it was really easy and delicious.

All you need is a can of McCann’s Steel Cut Oatmeal , and an hour – so do this ahead, while you’re making dinner or some afternoon when you’re already in the kitchen whipping up some other amazing VGP delicacy. The ratio is one cup of oats to 4 cups water – I like to double that because as long as I’m making it, why not make a lot, and I get 10 half-cup single servings out of a doubled batch.

Into a heavy Dutch oven or other stovetop pot, put 8 cups of water and bring to a boil (I add about 1 tsp of salt to the water as it comes to a boil). Then add 2 cups of the oats, and stir. Keep an eye on it, although you don’t have to stir it constantly, for about 5 minutes until the water starts to look creamy. Then lower the heat to med-low, and simmer for 30-40 minutes, stirring now and then to keep it from sticking to the bottom. I add about 2/3 cup of brown sugar and a drizzle of maple syrup while it cooks, to pre-sweeten it. You’ll know it’s done when it’s thick, all the liquid is absorbed, and it starts to make a skin on the top.

Remove the pot from heat, and prepare your bowls. I like to use a Texas muffin tin, which holds about ½ cup in each bowl. Or you can use small ramekins, or bowls, or mugs or cups or actually anything. Lightly spray them with nonstick spray, and ladle in about ½ cup of the cooked oatmeal. Then put them into the freezer and wait overnight.

Next day, run the muffin tin or cups under warm water until the frozen oatmeal pops out looking like a beige hockey puck. Wrap each one individually securely in plastic wrap and return it to the freezer.

Now you are completely set for some breakfast when you need something fast, hearty, healthy, and filling, in a jiffy. Just take one “hockey puck” of oatmeal, remove it from the plastic wrap and put it into a microwave-safe bowl, wave it for 3 minutes (I usually put the plastic wrap over the top of the bowl to prevent any spatters), and stir. Add toppings – the list is truly endless – you could add a little more sweetness with Demerara sugar, or syrup. Top with berries, chopped dried fruit, nuts (we like chopped pecans or walnuts), butter, whipped cream, milk, soymilk, half and half – anything depending on your tastes and how many calories you want to add (it’s about 150 calories unadorned). Enjoy!

Also, as this post over at pinchmysalt testifies, you don’t have to freeze it. We just do because we don’t eat Irish oatmeal every day, and want it to last a little longer. But putting them in single-serving containers in the fridge is easy too.

Saturday, January 16, 2010

Blue Blueberry Muffins

Ah, these will be fun to tell about. A few Saturdays ago our family went to the library. The girls were looking at movies and right by the kid-vid section is the "Popular Reading" section (= mindless paperbacks), so I was browsing those. Suddenly a set of brightly colored spines caught my eye, with names like Carrot Cake Murder, Lemon Meringue Murder, Strawberry Shortcake Murder and Blueberry Muffin Murder, all by Joanne Fluke. What, what? Sounded like my kind of murder mysteries. Not knowing the order, I chose Blueberry Muffin and checked it out.

Hannah Swensen is our heroine in the series. A la Nancy Drew she's just a normal smart girl who constantly happens upon dead bodies in and around her small northern Minnesota town, and takes it upon herself to solve the murders more quickly - and more cleverly - than the local police. But unlike Nancy Drew, Hannah is a career woman who owns and runs a bakery, The Cookie Jar, in town. So amidst her amateur sleuthing she is making cookie deliveries and catering orders, and has important conversations in her - and others' - kitchens. Naturally, people rave about her cooking, and occasionally at the end of a chapter, Hannah includes her recipe for the mentioned treat.

It's an adorable idea - murder mysteries flavored with recipes. I wanted badly to get hooked on the whole series. The characters are cute enough. But the writing is truly horrible. Contrived, predictable, I solved the murder myself well before the end. The dialogue was almost painful to read - nobody talks like that! - like a middle school play. But I managed to finish the book and copy all the recipes. And they're pretty good. I even checked out a few others from the library, just to copy the recipes.

So here are the title muffins - Hannah's "Famous" Blue Blueberry Muffins. The key, she tells her business partner Lisa - as if her partner wouldn't know the recipes of the bakery!!! - is to put blueberry pie filling in the batter. That way, the whole muffin tastes like blueberry, not just a few lucky bites. Not bad, Hannah. I'll give her this, she can make a muffin.

Blue Blueberry Muffins
3/4 cup butter, melted (1 1/2 sticks)
1 cup sugar
2 beaten eggs
2 tsp baking powder
1/2 tsp salt
1 cup fresh or frozen blueberries (no need to thaw if they're frozen)
1/2 cup blueberry pie filling
2 cups plus 1 T flour
1/2 cup milk

Crumb Topping:
1/2 cup sugar
1/3 cup flour
1/4 cup softened butter

1. Preheat oven to 375. Grease bottoms only of 12-cup muffin tin or line with paper liners. (This makes 18 muffins or 12 muffins and 1 mini loaf to prepare your pans depending on what you want.) Melt the butter. Mix in the sugar. Then add the beaten eggs, baking powder, and salt, and mix thoroughly.

2. Put 1 T flour in a plastic bag with your cup of blueberries. Shake gently to coat the berries, and leave them in the bag for now.

3. Add half the remaining flour (1 cup) to your bowl and mix it in with half the milk. Then add the rest of the flour and milk and mix thoroughly.

4. Add 1/2 cup blueberry pie filling to your bowl and mix it in. (Your dough will turn purpley-blue!) When your dough is thoroughly mixed, fold in the flour-coated blueberries.

5. Fill the muffin tins three-quarters full and set them aside. If you have leftover batter you can make one mini loaf (tea bread) or 6 more muffins in another pan.

6. For the crumb topping, mix the sugar, flour and butter in a small bowl with two knives, a pastry cutter or your clean fingers. Sprinkle crumb topping over your muffins and bake for 20 to 25 minutes (use toothpick to check if done in middle.) Tea bread should cook about 10 minutes longer than the muffins.

While your muffins are baking, divide the rest of the blueberry pie filling into 1/2 cup portions (in baggies or paper cups) and freeze for next time you want to make these!

Recipe from Blueberry Muffin Murder by Joanne Fluke

Wednesday, January 13, 2010

Chocolate Croissant Bread Pudding

This is definitely not one of the lighter recipes we've had on here. But it is lovely - very, very comforting and lovely. I had this tucked away to make for Christmas breakfast, but then my Mom said she was bringing over a Blueberry Bread Pudding for Christmas breakfast, and, well, you don't turn that down. (It was awesome by the way - I'll get the recipe.) So a few weeks after Christmas I was tired of working around a big box of croissants in my freezer, and it was time to make this.

If you can believe my irresponsibility I made this for a weekday breakfast, and man was it a treat, but really, honestly, this is a dessert. You could probably get away with it as a special occasion brunch - Valentine's? - but this is a dessert. The warmth of the cream, nutmeg, and chocolate on a palate of puddinged flaky croissants will make just about anyone feel special. Absolutely fabulous.Chocolate Croissant Bread Pudding
Unsalted butter for baking dish
6 large egg yolks
2 cups whole milk
1 cup heavy cream
1 cup granulated sugar
1 tsp vanilla extract
1/2 tsp kosher salt
1/2 tsp ground nutmeg
6 croissants, cut into 1-inch pieces
4 oz. bittersweet chocolate, cut into chunks1. Heat oven to 375. Butter an 8-inch square or other shallow 2-quart baking dish.

2. In a large bowl, whisk together egg yolks, milk, cream, sugar, vanilla, salt and nutmeg. Add the croissants and chocolate and mix to combine.

3. Using clean hands or a slotted spoon, transfer the bread and chocolate to the prepared baking dish.  DO NOT add the extra liquid.  Bake until set and a knife inserted in the center comes out clean, about 35 to 45 minutes. Serve warm or at room temperature.

Make ahead tip: Cut the croissants and chocolate, then store them at room temperature in separate plastic bags for up to 1 day.

Recipe from realsimple.com

Sunday, January 10, 2010

Texas Sheet Cake

This classic is sometimes called Chocolate Buttermilk Cake or Chocolate Cinnamon Cake, but I like "Texas Sheet Cake" because to me it gives the expectation of being BIGGER and BETTER than regular cakes. And sure enough, it is. Rich, slightly dense, warm from the cinnamon and super sweet from the icing, this is a crowd-pleaser. And it feeds one.

This won't fit in your 9x13 pan. You need a half-sheet pan ideally (about 12x16) but many of us don't have one. A 10x15 lasagna pan will work well, or I use my 11x17 jelly roll pan (which is my cookie sheet on other days.) Once I doubled the recipe and three 9x13's did the job well. Since pan sizes will not always be exact, just watch the clock as it cooks so you can learn how long it takes in your pan - somewhere between 15 to 20 minutes.
Every New Year's, my dad makes a huge pot of chili. I mean the kind of huge I have to stand on my tiptoes to see into when it's on the stove. The kind of huge that ten people can have several servings throughout the afternoon and it's still almost full to the top. TEXAS HUGE. So this New Year's, when we went over to play games, hang out, watch TV and eat chili, I brought this Texas Sheet Cake. What could be more fitting?

Texas Sheet Cake
2 cups all-purpose flour
2 cups sugar
1 cup (2 sticks) butter
1/4 cup unsweetened cocoa powder
1 cup water
1/2 cup buttermilk (or regular milk soured with a few teaspoons vinegar)
2 beaten eggs
1 tsp baking soda
1 tsp salt
1 tsp cinnamon
1 tsp vanilla

Chocolate Icing
1/2 cup (1 stick) butter
1/4 cup unsweetened cocoa powder
6 T (1/3 cup plus 1 T) milk
1 (16 oz.) box powdered sugar
1 tsp vanilla
Chopped pecans, optional

1. Preheat oven to 400. Grease and flour your pan (see pan discussion above.)

2. Sift flour and sugar into a large bowl of an electric mixer. In a saucepan, combine butter, cocoa and water. Bring to a boil and pour over the dry ingredients. Beat well.

3. Add the buttermilk, eggs, baking soda, salt, cinnamon and vanilla, mixing until combined. Pour into greased and floured pan. Bake for about 16 to 20 minutes (closer to 16 for more shallow pan like 11x17; closer to 20 for deeper pan like 10x15.) Allow to cool slightly on wire rack (10 to 20 minutes) while making the icing.

4. To make the icing, in the same saucepan, melt butter, cocoa and milk. Bring to a boil. Add a box of powdered sugar and vanilla; beat well for several minutes until smooth. Pour and spread over warm cake and sprinkle with nuts if you like.

Thursday, January 7, 2010

The Christmas Haul

I'm easy to shop for. I keep an extensive and current Amazon wishlist, but besides that get me a cookbook or kitchen item and you've done well. Which is why I feel like I made out like a bandit at Christmas. New food processor - thanks, Ed! Several kitcheny goods - new cake tester, onion goggles, pie dams, cookie scoop, etc. And a big stack of cookbooks.

I've been taking them to bed for my night reading, and they've inspired my dreams. The lists - so many lists! - have begun. It's just a matter of where to start, what to make when. So to let you know what we have to look forward to in 2010 (in addition to all the cookbooks and magazines I already have stacked up), here are my new sources:
The Great American Bake Sale by Alison Boteler - "Recipes for nearly 100 different taste-tempting delicacies you can't buy anywhere...except at a bake sale."

How Baking Works by Paula Figoni - Looks and reads like a textbook for a college food science course, but I really needed something like this. So when those darn Double Maple Cupcakes I've tried three times still aren't right, I can look to the science and make some educated attempts to correct them. I'd love - LOVE - to someday understand enough to make my own recipes.

Artisan Bread in Five Minutes a Day by Jeff Hertzberg and Zoe Francois - I've heard lots of raves about this one and now I can try it myself! Too bad for Ed he's cutting back on carbs.

Williams-Sonoma Muffins - This one I've read cover-to-cover at least five times since Christmas. It has mostly simple muffins, but great reviews so I have high expectations.

Field Guide to Cookies by Anita Chu - "How to identify and bake virtually every cookie imaginable." A tall claim; we'll see if it lives up.

Chocolate Epiphany by Francois Payard - "Exceptional cookies, cakes and confections for everyone." Many of the recipes look more intense than I usually like to go but we'll see; I haven't delved deeply into it yet.

Ratio by Michael Ruhlman - "The simple codes behind the craft of everyday cooking." Again, help on the science side of how to make what without totally depending on recipes.

All Cakes Considered by Melissa Gray - "A year's worth of weekly recipes tested, tasted and approved by the staff of NPR's All Things Considered." And "how to keep your co-workers happy, friendly and fatter than you!" I'm on page 30. Read the foreword, introduction and first recipe with unabetted delight. I like this girl - I can relate to her - and I can't wait to dig in! And on top of all that, the book design, food styling and photography are all stunning. You WILL be seeing cakes from this book on here soon.

Monday, January 4, 2010

Yeasted Lemon Poppy Seed Bread with Nutmeg Butter

A woman I know from church was cleaning out her mom's house and, knowing I like to cook, gave me a huge stack of old Taste of Home magazines. At first I paused - the covers were a bit 80's-country-cooking, and many of the dishes seemed heavily laden with mayonnaise. But I decided to go through them because you just never know where the gems are.

And now I have a big stack of ripped-out pages of recipes to try, and I've only gone through half the magazines. I've given the rejects to the girls for cutting and collage-making and they love it. And I will be working my way through the rest.

One of the magazines has the occasional bread machine feature so you know I'm all over that. Always looking to expand my options with that gift-from-heaven appliance. Let me just say that even if the bread in this post were crap, which it is NOT, it was all worth it for the discovery of Nutmeg Butter, which would be great on anything I can think of. It's the new best friend of my morning toast.

But in addition, this yeasted version of lemon poppy seed bread is genius! Slightly sweet, slightly lemony, it would be delicious to accompany either sweet or savory dishes or of course on its own. I just love throwing everything in and getting a loaf of bread 3 hours later. Especially a loaf like this one.
Yeasted Lemon Poppy Seed Bread
3/4 cup water (70 to 80 degrees)
1 egg
3 T lemon juice
3 T butter, softened
3 T sugar
1 T grated lemon peel (about 1 lemon)
3/4 tsp salt
3 cups bread flour
2 T poppy seeds
1/4 tsp ground nutmeg
2 1/4 tsp active dry yeast

In bread machine pan, place all ingredients in order suggested by manufacturer (mine says liquids first; dry on top.) Select basic bread setting. Choose crust color and loaf size if available (this is a 1.5 lb loaf.) Bake according to machine directions (check dough after 5 minutes of mixing; add 1 to 2 T of water or flour if needed.) Push Start!

Nutmeg Butter
1/2 cup butter, softened
1/2 cup confectioners' sugar
1/4 tsp ground nutmeg

In a small mixing bowl, combine butter, sugar and nutmeg; beat until blended. Allow to sit at room temperature if serving soon; if not, refrigerate until serving.Recipe from Taste of Home Quick Cooking, May/June 2002
Related Posts Plugin for WordPress, Blogger...