Pages

Tuesday, May 31, 2011

Rhubarb-Ginger Sorbet

Bargain shopping is a gamble. Like when I go to my favorite thrift store and buy a big pile of clothes for the kids...get them home and they don't all fit. But hey, they were cheap so who cares?

My grocery store has a big bargain bin over by the pharmacy aisles. It usually has dumb children's books or DVD's you have never heard of. And sometimes it has cookbooks. Which is when I slow down for a peek.

I'm getting pretty good at recognizing worthy recipes, so when I picked up Ice Cream! Delicious ice creams for all occasions, I looked past the unimpressive green cover and spiral binding to see what lay within. Be still my heart! Orange Poppyseed Sorbet! Banana Toffee Ice Cream! Mango & Basil Granita! Apricot & Cardamom Yogurt Ice Cream! Kaffir Lime and Coconut Ice Cream? Strawberry and Balsamic Vinegar Sorbet? Yes, please, where is the checkout? I nabbed that thing for probably $3 or $4 and placed it on the honored cookbook shelf until ice cream season.

Then for Mother's Day, Ed got me the KitchenAid Ice Cream Maker Attachment. Props to him, for sure. He is getting good. I'm all over that thing. I pulled my little book of treasures back out and made a list of all the ones I want to try first; it is 19 long, and that is just the first round. So, it being rhubarb season, and me being a rhubarb novice, I decided to start here.

Hello! Gorgeous! Fragrant! Sweet, cool, fruity, spicy! I looove this sorbet! Plus we had some friends over with wheat, egg and dairy restrictions, so sorbet was the perfect dessert. A warning: this only makes 2 1/2 cups, so you could easily double it or more for a 2-quart capacity bowl. Speaking of bowls, my new attachment? Works amazingly. Better, faster, and more frozen than my Krups machine, in less time. High reviews all around.

Rhubarb-Ginger Sorbet (print recipe)
1 lb. 3 1/2 oz. (600g) rhubarb cut into 1-inch pieces
Generous 1 cup (250g) sugar
1 1/4 cups water
1-inch piece of ginger root, peeled and finely grated
Juice of 1 lemon

1. Combine all the ingredients in a saucepan and bring to a boil. Cover and simmer until the rhubarb is tender, about 5 minutes. Leave to cool slightly before transferring to a food processor. Process until the mixture is combined but still has a little texture. Chill until cold.

2. Churn in an ice cream maker, according to manufacturer's instructions, until frozen. Transfer to a freezer container and cover the surface directly with waxed paper or foil. Freeze overnight.

3. Remove from the freezer 15 minutes before serving to allow it to soften slightly. Makes 2 1/2 cupsVariation:
Add 2 tsp cinnamon instead of the ginger root.

Recipe from Ice Cream! Delicious ice creams for all occasions by Pippa Cuthbert & Lindsay Cameron Wilson

Saturday, May 28, 2011

Caramel-Hazelnut Brownies

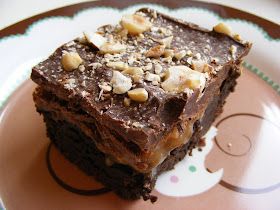
Definitely, definitely time for some chocolate. Maybe with a caramel-hazelnut layer on top. And then some more chocolate and chopped hazelnuts. Yeah, so...anyone out there not like where I'm going with this?Fudgy brownie, yummy chewy gooey caramel layer, toasty hazelnuts, dark chocolate...just cut the brownies small if you've got lightweights around. Because these are for serious brownie lovers only!
Caramel-Hazelnut Brownies (print recipe)
3 cups all-purpose flour
1 1/2 cups unsweetened cocoa powder
2 tsp baking powder
1 tsp salt
2 2/3 cups sugar
1 1/2 cups butter (3 sticks), melted
4 eggs
2 tsp vanilla
1 14-ounce package vanilla caramels, unwrapped
2 T milk
1 cup hazelnuts, toasted and chopped
2 T hazelnut liqueur, optional (I left out)
2 cups dark or bittersweet chocolate pieces

1. Preheat oven to 350. Line a 9x13 pan with foil, extending foil over edges of pan. Generously grease foil; set pan aside. In a large bowl stir together flour, cocoa powder, baking powder, and salt; set aside.

2. In an extra-large bowl combine sugar and melted butter. Beat with an electric mixer on low until well mixed. Beat in eggs and vanilla until combined. Add flour mixture, 1/2 cup at a time, beating well after each addition. Spread batter evenly in prepared baking pan.

3. In a large microwave-safe bowl combine caramels and milk. Microwave, uncovered, on high for 1 1/4 to 2 minutes or until caramels are melted, stirring every 30 seconds. Stir in 1/2 cup of the hazelnuts and the liqueur, if using. Drizzle caramel mixture over batter in pan.

4. Bake, uncovered, for 45 minutes. Remove from oven. Immediately sprinkle with chocolate pieces. Let stand about 2 minutes or until chocolate is softened. Spread chocolate evenly over brownies. Sprinkle with the remaining 1/2 cup hazelnuts.

5. Cool in pan on a wire rack. If necessary, chill until chocolate is set. Using edges of foil, lift brownies out of pan. Cut into bars. Makes 36 brownies.

Recipe from 9x13: The Perfect Fit Dish

Wednesday, May 25, 2011

Braided Lemon Bread

This bread is amaaaaazing. Do I say that too much? Need some new adjectives? I can't help it, it is delightful and delectable. Goes for breakfast, snack or dessert, don't you love things like that? AND it makes two loaves so you don't feel like it was a waste of time. Big loaves, did I mention? Look:
And it's really only faux-braiding so don't think you can't do it. You just lay the cream cheese and lemon curd fillings down the middle (I KNOW! Sounds great already!), then cut the dough on both sides into strips and lay them alternately across the filling so they overlap and look like a braid! Easy and beautiful, perfect combination. And did I mention you could make the dough in the bread machine? It's an option, see step 3.

It says to sprinkle sparkling sugar on the bread - you can totally use turbinado or any coarse sugar - I got this jar at Michael's by the sprinkles.
That filling! Well as you know anything with lemon curd is destined to be fabulous unless you seriously screw something up. But you won't. Because this recipe comes from King Arthur Flour and they have a trustworthy test kitchen. Plus I also tested it for you so you're all set. Yeasty, lemony, super comforting but also elegant. I can't think of a single occasion this wouldn't be good for, so whip it up and go impress someone.Braided Lemon Bread (print recipe)
Sponge:

3/4 cup warm water
2 tsp sugar
1 T instant SAF yeast or rapid-rise yeast
1/2 cup unbleached all-purpose flour

Dough:
all of the sponge
3/4 cup plain or vanilla yogurt
1/2 cup unsalted butter, softened
2 large eggs, beaten
1/2 cup sugar
2 tsp salt
2 tsp vanilla extract OR King Arthur Buttery Sweet Dough Flavor
5 cups unbleached all-purpose flour
egg wash for brushing braid
pearl sugar or sparkling white sugar for sprinkling on braid

Filling:
2/3 cup (5 oz.) cream cheese, softened
1/4 cup sugar
1/4 cup sour cream
2 tsp fresh lemon juice
1/4 cup unbleached all-purpose flour
1/2 cup prepared lemon curd, whisked smooth (store-bought or homemade, recipe follows)

1. In a small bowl combine the sponge ingredients. Stir well to combine, loosely cover with plastic wrap, and set aside to proof for 10 to 15 minutes.

2. (*If using a bread machine, skip to step 3a.) If mixing by hand, in the bowl of a stand mixer combine the sponge, yogurt, butter, eggs, sugar, salt and flavoring. Add 4 1/2 cups flour and mix with the paddle attachment until the dough is a rough, shaggy mass. Switch to the dough hook and knead on speed 2 until a soft, smooth dough forms, about 5 to 6 minutes, adding 1/2 to 1 cup more flour if needed to achieve the correct consistency.

3. Place the kneaded dough in a lightly greased bowl, cover with plastic wrap, and allow to rise for 60 to 90 minutes, until quite puffy and nearly doubled.

3a. If using a bread machine, place ingredients in the pan and set the machine on the dough cycle. Be sure to check the dough as it kneads and adjust the flour or water as needed to achieve a soft, supple consistency. Let the cycle complete itself.

4. While the dough is rising, prepare the filling. Combine all the filling ingredients except the lemon curd in a small bowl, mixing until smooth and lump-free. Reserve the filling and lemon curd until ready to fill the braids.

5. Gently deflate the dough and divide it in half. Cover half with plastic wrap and set aside as you roll out the first piece into a 10" x 15" rectangle. (Rolling on parchment paper makes moving the bread to the baking sheet much easier. I roll mine out, fold it in fourths, move to a parchment-covered baking sheet, unfold to full size, and continue with the braid on the baking sheet.) Lightly press two lines down the dough lengthwise to divide it into 3 equal sections. Spread half the cream cheese filling down the center section, and top with half the lemon curd, leaving 1" free on all sides of the filling.

6. To form the mock braid, cut 1" crosswise strips down the length of the outside sections, making sure you have about the same number on each side. It will kind of look like a centipede. Beginning on the left, life the dop dough strip and gently bring it across the filling diagonally. Repeat on the other side with the top dough strip, so that the two strips cross cross each other. Continue down the entire braid, alternating strips to form the loaf. Tuck ends into braid so filling won't spill out.

7. Repeat the rolling, filling, and braiding steps for the second piece of dough, using the remaining cream cheese filling and lemon curd. Set both loaves aside, lightly covered, to rise for about 60 minutes or until quite puffy.

8. Preheat oven to 375. Brush the loaves with egg wash (one lightly beaten egg, 2 tsp water and a pinch of salt), and sprinkle with coarse sparkling sugar. Bake for 22 to 30 minutes, or until the loaves are golden brown. Remove from oven and cool for 20 minutes before serving. Makes 2 loavesRecipe from KingArthurFlour.com

Lemon Curd

1/2 cup fresh lemon juice
2 tsp finely grated fresh lemon zest
1/2 cup sugar
3 large eggs
3/4 stick (6 T) unsalted butter, cut into bits

1. Whisk together juice, zest, sugar and eggs in a 2-quart saucepan. Stir in butter and cook over moderately low heat, whisking frequently, until curd is thick enough to hold marks of whisk and first bubble appears on surface, about 6 minutes.

2. Transfer lemon curd to a bowl and chill, its surface covered with plastic wrap, until cold, at least 1 hour. Makes about 1 1/3 cups

Sunday, May 22, 2011

Pure Pasty Co.: Handfuls of Heaven

Ever been to Cornwall? How about England, ever been there? Because if so, you just might be familiar with the important handful of goodness called a pasty. And that is like "PASS-tea", not like "pastry" minus the -r.

A pasty is basically a meat pie, but it looks like this, and that tells you more than my writing can:Look at that glistening pocket. A few months ago I read in the Washington Post about a new shop opening up called Pure Pasty Co., offering authentic Cornish pasties in Vienna (VA.) I knew I had to try them.

So a few weeks ago when my brother was visiting from Yorkshire, where he now lives with his family, it was the perfect time to try them. His is a discriminating palate, and he knows what to expect.
First of all, what an adorable shop. You can sit at the stools and watch the pasties being made, or get them to go for a picnic, which we did. There are a few stacks of specialty British goods for sale, like treacle syrup, Yorkie bars, or cans of mushy peas.

And this case of delectable golden goodness - the pasties! You can buy them cooked and room temperature, like this, or uncooked for a take-and-bake experience. They have several varieties and weekly specials, plus soups, salads and new pork pies, but the traditional is my favorite: beef, onion, potato & veggies.
Here's Dave happy at our picnic:
Since I know that if you live in the D.C. metro area, you will now be going here, a logistical note: they are a little tricky find - the address is Church St. which is one block off of Maple, but in reality it is on an unnamed little cross street that connects the two. So driving along Church you might not see it unless you realized where you have to turn. But don't be dissuaded - there is a great parking lot and you can find it if you know where to look! Go to their website and click on "How to Find Us" for a visual and detailed description. We didn't know any of that and still found it, on our third pass.Yay for Cornwall! Yay for meat pies! And yay for The Pure Pasty Co.!

Thursday, May 19, 2011

Family Circle Cinnamon Rolls

Four out of five of us at my house are not morning people. We're tired, we're grumpy, we're hungry. Only to face another bowl of cold cereal for our trouble. Sometimes muffins if I've been a busy bee. Once in a great while pancakes, if it's an open Saturday (or Pancake Week is coming up.) But almost never cinnamon rolls. They take 3 hours! And you know I'm not getting up any earlier than I have to because I am one of those four out of five people.

But I must not forget that cinnamon rolls can be done this way: make them in the evening - mix, rise, roll, fill, cut. Then let them second-rise in the fridge overnight while your poor mind and body collapse into exhausted oblivion that never lasts long enough.

When the cock crows, the baby cries, the enormous family of birds in your neighbor's tree goes to bickering, or your 4-year-old pads clumsily into your room, breathing heavily in your face hoping to be invited to snuggle, go preheat the oven and take the rolls out of the fridge to warm up a bit. When the oven's ready, toss them in, set the timer, and go catch a few more winks while they bake and fill your house with the kind of indescribably comforting aromas of yeast and cinnamon that could turn the grumpiest grouch into a morning person.

At least for one day.
Family Circle Cinnamon Rolls (print recipe)
Dough:
1 cup whole milk
1 envelope active dry yeast
1/4 cup warm water (100°F to 110°F)
3 T granulated sugar
2 eggs
1/4 cup unsalted butter, melted
4 1/2 to 5 cups all-purpose flour
1/2 tsp salt

Filling:
1/2 cup unsalted butter, softened
1/4 cup granulated sugar
1 cup packed light brown sugar
1 T cinnamon
1 cup coarsely chopped pecans
1 cup raisins

Glaze:
2 cups confectioners' sugar
1 to 3 T milk

1. Heat the milk in a small saucepan over medium heat until it just begins to boil. Remove from heat and let stand until cooled to room temperature.

2. Meanwhile, sprinkle the yeast over the warm water in a large bowl. Add 1 tablespoon of the sugar and let stand until foamy, about 5 minutes. Beat in the remaining 2 tablespoons sugar, eggs and butter. Beat in cooled milk.

3. Gradually add the flour and salt, scraping down side of bowl, until a soft dough forms. Turn dough onto a floured work surface and knead the remaining flour into the dough, adding more flour if too sticky. Knead for about 10 minutes until smooth. The dough will be soft.

4. Grease a large bowl. Place the dough in the bowl. Cover with plastic wrap and place in a warm spot until doubled in size, about 1-1/2 hours.

5. Coat two 9-inch round baking pans with nonstick cooking spray. Line bottoms with parchment paper; coat paper with spray. Prepare Filling: Mix butter, both kinds of sugar and cinnamon together in a medium-size bowl.

6. Punch down dough. Roll out dough on a lightly floured surface to an 18 x 12-inch rectangle. Spread the butter-sugar mixture over the dough. Sprinkle with nuts and raisins. Starting on one long side roll up jelly roll fashion and pinch seam to close.

7. Cut crosswise into 14 generous 1-inch pieces. Arrange 7 pieces, cut-side down, in each prepared pan. Cover with plastic wrap and let sit in a warm spot until buns double in size, about 30 to 45 minutes. Or cover tightly with plastic wrap and refrigerate until the following morning.

8. Heat oven to 350°F. Uncover pans and bake buns until they are golden-brown and bubbly, 30 to 40 minutes. Transfer to a wire rack and let cool 10 minutes.

9. Glaze: Mix confectioners sugar and 1 tablespoon of the milk, adding more milk as necessary, to make a smooth glaze. Invert buns to a serving platter. Drizzle glaze on top of buns (about 1/3 cup per pan). Serve warm. Recipe from Family Circle magazine, January 2011

Monday, May 16, 2011

Key Lime Bars in Coconut Crust

The weather starts warming up, and I start dreaming of the tropics. Pineapple. Mango. Coconut. Key limes. Yes, please.

Unfortunately these bars are as close as I am getting to a tropical vacation this year, maybe this decade. So I might as well enjoy this crunchy-chewy-smooth-sweet-tart-creamy consolation prize. The toasted coconut in the crust and topping adds that sweet nutty flavor as well as a crunchy texture, to make it perfectly balanced against the sweet-tart citrus filling. Enjoy!
Key Lime Bars in Coconut Crust (print recipe)
Crust:
2/3 cup brown sugar
1 3/4 cups unbleached all-purpose flour
3 cups shredded sweetened coconut, toasted
1/2 tsp salt
1/2 tsp coconut extract
1/2 cup unsalted butter, cut into cubes

Filling:
One 8-oz. package cream cheese, softened
1 3/4 cups sugar
Pinch of salt
3 T unbleached all-purpose flour
4 large eggs
1/3 to 1/2 cup Key lime juice, or fresh lime juice, to taste

Zest of one lime, optional

1. Preheat oven to 350. Lightly grease a 9x13 pan.

2. To make the crust: Combine all the crust ingredients in a medium-sized mixing bowl or in the bowl of a food processor. Mix or process until the mixture is crumbly. Set aside 1 cup of the crumbs, and press the remaining crumbs into the bottom of the prepared pan. Bake the crust for 16 to 18 minutes, until it's golden brown.

3. To make the filling: In a medium-sized bowl, beat the cream cheese until soft. Add the sugar and salt and beat until well blended. Stir in the flour, then beat in the eggs one at a time, beating well after each addition. Stir in the lime juice and zest, mixing until smooth. Pour the filling onto the crust.

4. Bake the bars for 15 minutes. Sprinkle the reserved crumbes adn bake an additional 10 minutes, or until set around the edges but still slightly wobbly in the middle. Remove from the oven and cool at room temperature for 1 hour. For easiest slicing, refrigerate for several hours.

Recipe from The King Arthur Flour Cookie Companion

Friday, May 13, 2011

Butterbeer Cupcakes

Any Harry Potter fans out there? Man, I am. I admit, I petered off there at the end and still haven't read book 7, but I sailed through the first four and they really helped me get through a tough semester of grad school. So easy, and so fun, to get lost in that magical world...and not the least intriguing detail was the food! Oh, yeah. Anyone hear of treacle tart before? You know where I'm going with this. Butterbeer. I imagine it as a cross between my Aunt Pat's buttermilk syrup, cream soda, and maybe a splash of apple cider. Amy over at AmyBites got to taste it recently firsthand at the Wizarding World of Harry Potter at Universal’s Islands of Adventure park in Orlando. And she loved it so much she came home and made it into a cupcake. Which my brother found on the internet and sent me the link for. THE DAY AFTER cupcake night at my house. Worst timing ever, but forgiven for such a great find.

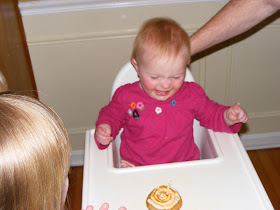
As soon as I read it through, I knew I had to make it as soon as I got some cream soda and butterscotch chips. Just so happened it was a few days before my daughter's birthday, so we had them for her family party. Luckily she's one and not calling the shots yet so I get to make what I want.(This being a public blog, not posting the naked-eating-cupcake pics, but they were sooo cute!)

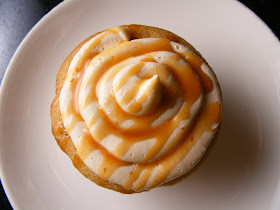
What do you think, are my pictures almost as pretty as Amy's? I didn't have the souvenir mug, bummer. But she didn't have a one-year-old so we're even.
A word about the butterscotch sauce filling technique. It's too thin to pipe with a pastry bag so go to Sally's Beauty Supply if you have one and get a color applicator bottle like this. Or something similar. Mine was $1.89, and doubles as great squirty fun in the bathtub or outside after it's done its butterscotch duty. Butterbeer Cupcakes (print recipe)
For the cupcakes:
2 cups flour
1 1/2 teaspoon baking powder
1/2 teaspoon baking soda
1/4 teaspoon salt
1/2 cup (1 stick) unsalted butter, softened
1/2 cup granulated sugar
1/2 cup dark brown sugar, packed
3 large eggs
1 1/2 teaspoon vanilla
1 teaspoon butter flavoring
1/2 cup buttermilk
1/2 cup cream soda

For the ganache:
1 11-oz. package butterscotch chips
1 cup heavy cream

For the buttercream frosting:
1/2 cup (1 stick) unsalted butter, softened
1/3 cup butterscotch ganache
1 teaspoon vanilla
1 teaspoon butter flavoring
1/8 teaspoon salt
1 16-oz. package powdered sugar
Splash of milk or cream (as needed)

For the cupcakes: Preheat the oven to 350 degrees and line cupcake pans with paper liners. Combine your flour, baking soda, baking powder, and salt in a bowl and set aside. In a large bowl, cream your butter until light and fluffy. Add your sugars and beat until well-combined. Beat in your eggs, one at a time, mixing well after each addition. Then beat in your vanilla and butter flavoring.

Alternate adding your buttermilk, cream soda, and dry ingredients in batches until all are well incorporated. Fill each cupcake liner 3/4 full, then bake for 15 to 17 minutes until a tester inserted into the center comes out clean and cake springs back to the touch. Cool completely on wire racks.

For butterscotch filling: In a double boiler (heat-proof bowl over a pot of simmering water on the stove), combine butterscotch chips and heavy cream and stir until completely combined and smooth. Cool to room temperature. Fill a squeeze bottle with ganache and insert into the center of each cupcake, squeezing until filling begins to overflow.

For buttercream frosting: Cream butter in a large bowl until fluffy. Add in ganache, vanilla, butter flavoring, and salt and mix until well combined. Beat in powdered sugar 1 cup at a time until reaching desired consistency. Add milk or cream by the Tablespoon as needed. Frost cupcakes and top with a drizzle of butterscotch ganache. Makes 18 cupcakes
Recipe from AmyBites.com

Tuesday, May 10, 2011

Russian Cream

So here is Dessert Club's winner for May. If you were to read the recipe without tasting it, you might wonder, "Really? There's nothing to it." And maybe that's the beauty of it - cream, sour cream, sugar, vanilla. And gelatin to give it form. So it's basically the most comforting comfort food ever - CREAM! - in a cool elegant presentation. Seriously, we all simply loved it. And you will, too.
Russian Cream (print recipe)
1 cup water
1 1/2 cup sugar
2 envelopes Knox gelatin
3 cups sour cream
2 teaspoons vanilla
2 cups whipping cream (unwhipped)

In a saucepan, mix gelatin and sugar. Add water and mix well. Let stand for 5 minutes. Bring mixture to a full rolling boil, stirring constantly. Remove from heat and pour in whipping cream. Mix sour cream and vanilla together. Whisk into whipping cream mixture until no lumps remain. Put mix into bowl or mold that has been sprayed with PAM. Cover and chill well in refrigerator until firm--overnight. Unmold (a tip from my mom was to put a steaming hot towl on the mold that has been turned onto a plate). Serve with fresh berries or berry puree.

Recipe from Dessert Club member A. M.'s Mom

Sunday, May 8, 2011

Dessert Club - "Mother"

Happy Mother's Day!!!
We had a special Dessert Club this month, at which we honored our mothers. Everyone made a dish that came from, or was inspired by, her Mom. Isn't that sweet?

Usually at DC, we dish up and chat while eating. This time we went around the circle and ate the same thing at the same time while the baker told a little about it. We joked that if you squeezed out a tear, you won by default, but miraculously no one cried. What we did manage was to capture and share a little piece of our Moms and childhood with each other. I would say it was definitely our most comforting Dessert Club to date. See for yourself.

Mom's Big Eat 'Em Today Cinnamon Rolls (recipe here), Lemon Ice Cream (recipe here)
Lemon Bars, Chocolate Chip Crunch Cake (mine - recipe here)

Mom's Shortbread, Carrot Cream Pies

Hot Fudge Pudding with Tahitian Vanilla Gelato, Almond Joy Bars
Mochi (Coconut) Balls, Perfect Plain Whole Wheat Cake (in strawberry shortcake)

And the winner of the evening was this gorgeous creamy confection called "Russian Cream." It looks and serves similar to panna cotta, but is even easier to make, and we drizzled ours with a fresh raspberry sauce. Of course. This was DC member A.M.'s favorite special dessert her Mom made when she was a child. This was the first time she'd ever made it herself, and even went out and bought a brioche mold for the occasion. Unmolding was a bit touch-and-go for a minute, but it came out beautifully!

Here's what one of our sampling plates looked like. You are going to die when you see next month's theme, hello delicousness! I know some of you out there have started your own cooking/dessert clubs - let's hear about them! How are they going? What themes have you used? What surprises have come up? It is the easiest thing in the world to start one - Evite a bunch of fellow foodies, pick a date, pick a theme, sweep your floor and wipe your counters that night and that's pretty much it. We usually serve milk, water and a bowl of pretzels for palate cleansing. And you don't have to, but we vote on our favorite - the winner receives a small gift that we take turns bringing (when I do it I like to have it go with the theme.) Summer is the perfect time to get one rolling!

Thursday, May 5, 2011

Crème-filled Chocolate Orange Cupcakes (vegan!)

Oh, yes, here it is. Someone asked for the vegan cupcakes. See, we at Dessert Club are highly tolerant confectioners and welcome any number of creative and alternative treats as long as they meet the theme and taste amazing. Chocolate also helps.

In these particular cupcakes, the POW of orange buttercream filling was a delightful surprise, and the cupcake's texture was so perfect I was frankly amazed they had no eggs. But I didn't miss them, not one bit. (By the way, how do you like my cupcake pedestal?)

Crème-filled Chocolate Orange Cupcakes (print recipe)
1 1/2 cups flour
1/2 cup cocoa powder
1 cup sugar
1 tsp baking powder
1/2 tsp baking soda
1/4 tsp salt
3/4 cup orange juice
1/2 cup canola oil
1 tsp vanilla
1 T orange zest
Orange Buttercream Filling (recipe follows)
Chocolate Ganache (recipe follows)

1. Preheat oven to 350 and line a 12-cup cupcake pan with paper liners.

2. In a large bowl, sift together flour, cocoa powder, sugar, baking powder, baking soda and salt.

3. In a separate bowl, whisk together orange juice, canola oil, vanilla, and orange zest. Pour wet ingredients into dry mixture and whisk until thoroughly combined.

4. Divide the batter evenly among the prepared cupcake liners until each cup is 2/3 full. Bake for about 17 to 20 minutes, or until an inserted toothpick comes out clean. Remove from oven and allow to cool on a wire rack.

5. Once cupcakes are completely cool, fill each cupcake with Orange Buttercream using a pastry bag with a narrow tip (from the top.) Spread Chocolate Ganache evenly over each cupcake and top with 2 slices of candied or fresh orange peel. Makes 12 cupcakes

Orange "Buttercream" Filling
4 cups powdered sugar
1/2 cup refined coconut oil at room temperature*
1 T orange zest
1/4 cup orange juice

In the bowl of a standard mixer, combined powdered sugar, coconut oil, and zest. Beat on medium-high speed until combined. With the mixer running, add 1 T of orange juice at a time, until the desired buttercream consistency is reached. (*If you don't have refined coconut oil, you can make it without - it will just be more glazey than buttercreamy. Increase the sugar a bit to make it thicker.)
Chocolate Ganache
1 cup semisweet chocolate chips
3 T almond milk
1 T refined coconut oil at room temperature

Using a double boiler or microwave, melt chocolate chips and almond milk in a medium bowl. Whisk in coconut oil until smooth.
Recipe from Chloe Coscarelli via VegNews.com and Dessert Club member A.J.

Monday, May 2, 2011

Boston Cream Pie Cupcakes

Still filling the Dessert Club - "Cupcakes" recipe requests! So glad there were so many you liked.

Boston Cream Pie is one heck of a yummy dessert; Boston Cream donuts are always my first pick. So these single servings fit right in on Kari's YUMMO list. Tender vanilla cupcake, smooth homemade vanilla cream, and a dribbling crown of rich chocolate ganache. Cupcake night wouldn't have been the same without them!

Boston Cream Pie Cupcakes (print recipe)
1 1/2 cups all-purpose flour, plus more for tins
1 1/2 tsp baking powder
1/2 tsp salt
1/2 cup whole milk
3 oz. (6 T) unsalted butter, softened, plus more for tins
3 large eggs
1 cup sugar
1 tsp vanilla extract
Vanilla Cream (recipe follows)
Chocolate Ganache Glaze (recipe follows)

1. Preheat oven to 350 degrees. Butter and flour standard muffin tins. Whisk together flour, baking powder, and salt in a small bowl. Warm milk and butter in a saucepan over low heat.

2. Beat eggs and sugar with a mixer on high speed until thick and pale, about 5 minutes. Beat in dry ingredients.

3. Bring milk and butter to a boil. With mixer on low speed, add milk mixture to batter, and beat until smooth. Add vanilla. Divide batter among muffin cups, filling each halfway. Bake cupcakes until light gold, about 15 minutes. Let cool in tins for 10 minutes, then transfer to wire racks. Let cool.

4. Using a serrated knife, cut each in half horizontally. Spread 1 T vanilla cream on each cupcake bottom. Sandwich with top. Spoon glaze over each, and serve immediately. Makes 18 cupcakes

Vanilla Cream
2 large egg yolks
1/4 cup sugar
2 T plus 1/2 tsp cornstarch
Pinch of salt
1 cup whole milk
1/2 tsp pure vanilla extract

1. Whisk yolks until smooth. Mix sugar, cornstarch, and salt in a medium saucepan over medium heat. Add milk in a slow, steady stream. Cook, stirring, until mixture begins to bubble and thicken, about 5 minutes.

2. Pour 1/3 of milk mixture into yolks, whisking constantly. Return mixture to saucepan, and cook over medium heat, stirring often, until thick, 2 to 4 mintues. Stir in vanilla.

3. Pass vanilla cream through a fine sieve into a bowl. Press plastic wrap directly on surface. Refrigerate until cold, at least 1 hour or up to 2 days.

Chocolate Ganache Glaze
2/3 cup heavy cream
6 oz. semisweet chocolate, finely chopped
1 T light corn syrup

Bring cream to a boil in a small saucepan. Remove from heat, and add chocolate and corn syrup. Let stand for 5 minutes. Whisk until smooth. Transfer to a bowl, and let cool, stirring often. Use immediately.

Recipe from Martha Stewart Living Magazine, February 2009 via Dessert Club member S.S.