ANNOUNCING: Change is part of life, and apparently, it's part of blogging, too. As of September 5, 2013, I'm merging The Virtual Goody Plate with Disco Mom Takes on the World and whatever else may henceforth spill from my fingertips (and kitchen), into one great new blog. I hope you'll join me there in exclaiming, "THIS IS AWESOMELAND."

Sunday, April 14, 2013

Lemon Ginger Muffins

Lately I've been craving my Tuscan Lemon Muffins, but I forgot to get ricotta cheese at the store, so the craving has been put on hold...like you can do that.  I've also been missing baking.  Which is ironic because it feels like I'm always in the kitchen, and I'm monumentally behind on this blog - like months behind on posting the things I've made.  But it's been a long time, probably almost two months, since I just baked to bake.  No Dessert Club, no birthday, no event, no dinner swap.  Just for the pleasure of the process and product. 

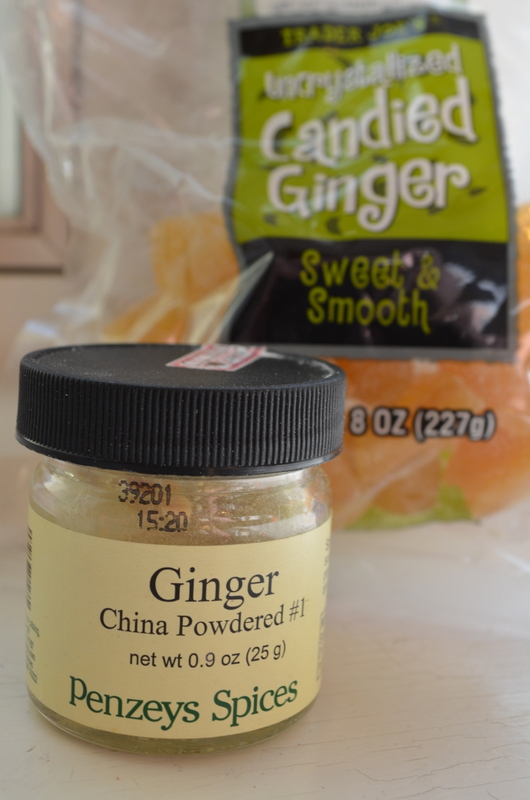
This morning, rummaging through the cupboards, I came across a bag of (admittedly, I don't know how old) candied ginger, and still on the vein of lemon muffins, I foodgawkered Lemon Ginger Muffins.  Breakfast is done.

Foodgawker is a two-headed beast.  The pictures, and associated recipes, are inspiring and saliva-inducing.  Then I click through to the blogs, and get depressed.  They have advertising.  How do they take such amazing pictures?  How do they have time to make that food?  The blog is so...sophisticated.  Et cetera.  Blog inferiority complex.  Can't really be helped, unless I don't look at them.  But once in awhile, I just can't help it.  What has foodgawker got for me today?

Today, it was just the thing.

Lemon Ginger Muffins (print recipe)
Makes 18 muffins

3 cups all-purpose flour
1 T baking powder
1 tsp baking soda
1/2 tsp ground ginger
1/2 tsp salt
1/2 cup unsalted butter, room temperature
1 cup granulated sugar
1/2 cup crystallized ginger, chopped
1 T lemon zest
2 T lemon juice
2 eggs
1 cup milk
2 T lemon juice for glaze
1 cup powdered sugar for glaze

1.  Preheat oven to 375.  Line muffin cups with paper liners.

2.  In a medium bowl whisk flour, baking powder, baking soda, ginger and salt; set aside.

3.  In a large bowl of an electric mixer, cream the butter and sugar until light and fluffy.  Add the crystallized ginger, lemon zest and lemon juice, then mix that in.  Add the eggs one at a time and beat until each is just incorporated.  Alternate the addition of the milk and dry ingredients  by thirds, making sure not to overmix each addition.

4.  Spoon the batter into the prepared muffin tin and fill each nearly to the brim of the liner.  Bake them for 15 to 18 minutes until the tops are a nice golden brown and a toothpick inserted into the middle comes out clean.  Transfer them to a cooling rack.

5.  While the muffins cool, mix together the reserved lemon juice and powdered sugar until there are no lumps.  Drizzle glaze over muffins.

Recipe from HotPolkaDot.com

Wednesday, April 10, 2013

Heaven & Hell Cake

People.  I am so far behind I feel like giving up.  The fact that today is the first 90-degree day of the year, and my air conditioning has broken, might also have something to do with it.  But I've got some cold raspberry-lime seltzer here, and the first couple of quiet hours to myself in over a month, so let's just keep on keeping on.

Heaven & Hell Cake - another one of my favs from Lit Night.  Apparently each component was a beast to master, and this cake's maker, one of Dessert Club's most skilled artisans, had to try several times to get it right.  So if you want to make it, good luck.

Heaven & Hell Cake (print recipe)
Serves 10 to 12

For the ganache:
2 lbs. milk chocolate, such as Valrhona, chopped
1 1/2 cups heavy cream

For the angel food cake:
1 1/2 cups confectioners' sugar
1 cup cake flour
1 1/2 cups egg whites
1 tsp. cream of tartar
1/8 tsp. kosher salt
1 cup sugar
2 tsp. vanilla
1 tsp. almond extract

For the devil's food cake:
1/2 cup vegetable shortening, plus more for pan
1 1/2 cups cake flour, plus more for pan
1 tsp. baking soda
3/4 tsp. kosher salt
1/4 tsp. baking powder
1 cup coffee
1/2 cup cocoa powder, sifted
1 1/2 cups sugar
1 tsp. vanilla
2 eggs

For the peanut butter mousse:
1 1/2 lbs. cream cheese, at room temperature
4 cups smooth peanut butter, at room temperature
3 1/2 cups confectioners' sugar, sifted
1 1/2 cups heavy cream

1. Make the ganache: Place the chocolate in a medium-size bowl. Bring cream to a boil in a 2-qt. saucepan; pour cream over the chocolate and let sit to melt for 5 minutes. Using a rubber spatula, combine the chocolate and cream. Cover with plastic wrap and set aside to let rest for 4 hours.

2. Make the angel food cake: Heat oven to 325°. Line bottom of a 10" round cake pan with ungreased parchment paper. In a medium bowl, sift together confectioners' sugar and flour; set flour mixture aside. In a large bowl, beat egg whites, cream of tartar, and salt with a handheld mixer on low speed until frothy. Increase mixer speed to medium, sprinkle in sugar, vanilla, and almond extract, and beat until stiff peaks form. Sprinkle half of the confectioners' sugar–flour mixture over egg whites; using a rubber spatula, fold until just combined. Repeat with remaining flour mixture. Pour batter into prepared cake pan and bake until top of cake springs back when touched, 45–50 minutes. Transfer cake to a rack and let cool.

3. Make the devil's food cake: Heat oven to 350°. Grease a 10" round cake pan with shortening and dust with flour to coat; shake out excess flour and set pan aside. In a medium bowl, whisk together cake flour, baking soda, salt, and baking powder; set flour mixture aside. In another medium bowl, whisk the coffee and cocoa powder until smooth; set coffee mixture aside. In a large bowl, beat the shortening, sugar, vanilla, and eggs with a handheld mixer on medium speed until pale and fluffy, 2 minutes. Alternately add the flour mixture and the coffee mixture to the bowl in 3 stages, beating to combine after each addition. Pour the batter into the prepared cake pan and bake until a toothpick inserted into cake comes out clean, 30–35 minutes; transfer to a rack and let cool completely.

4. Make the peanut butter mousse: In a large bowl, beat cream cheese, peanut butter, and confectioners' sugar with a handheld mixer on medium speed until smooth and fluffy, about 3 minutes. Put cream into a large bowl and beat on high speed until stiff peaks form. Using a rubber spatula, fold the whipped cream into the peanut butter mixture; set mousse aside in the refrigerator.

5. Assemble the cake: Using a serrated-blade knife, slice each cake horizontally into 2 layers. Place 1 layer of the devil's food cake on a cake stand and spread 1/3 of the peanut butter mousse over the top with a butter knife. Top mousse with a layer of the angel food cake and spread with half of the remaining mousse. Repeat with the remaining devil's food cake, mousse, and angel food cake. Wrap cake in plastic wrap and freeze for 2 hours. Stir ganache until smooth and spread evenly over the top and sides of the cake with a butter knife. Refrigerate the cake for 2 hours before slicing.

Recipe from Saveur.com and DC member J.B.

Tuesday, March 19, 2013

Bill Bryson's Dream-Fulfilling Lemon Pie

"Dessert was of course the highlight. Everyone on the trail dreams of something, usually sweet and gooey, and my sustaining vision had been an outsized slab of pie. It had occupied my thoughts for days, and when the waitress came to take our order I asked her, with beseeching eyes and a hand on her forearm, to bring me the largest piece she could slice without losing her job. She brought me a vast, viscous, canary-yellow wedge of lemon pie. It was a monument to food technology, yellow enough to give you a headache, sweet enough to make your eyeballs roll up into your head -- everything, in short, you could want in a pie so long as taste and quality didn’t enter into your requirements." 

Bill Bryson, A Walk in the Woods (chapter 5)
(From DC member Sheri)  

I combined/adapted three recipes from Cook's Country for my pie. The instructions for the creamy layer were written for a food processor and I just left them that way even though I don't have a food processor and used my blender and mixer. When I baked the crust I did it at a lower temp for longer time, but am going to try again at the higher temp for shorter time (that I listed here) and hopefully it won't be as chewy next time.

Remember folks, this was one of the winners at Dessert Club Lit Night.  Lemony heaven; perfect sweet-tart-creamy-crunchy love child.  Definitely got my vote.

Bill Bryson's Dream-Fulfilling Lemon Pie (print recipe)
Crust:
10 lemon sandwich cookies
8 whole graham crackers, broken into rough pieces
7 tablespoons unsalted butter, melted and cooled
3 tablespoons sugar

1 teaspoon lemon zest
¼ teaspoon salt

Preheat oven to 350 F. Add the cookies and crackers to the bowl of your food processor. Pulse until they are finely ground. Add the butter, sugar and lemon zest to the bowl, and continue pulsing until well combined - the mixture should start to clump just a little. Turn the mixture out into a 10-inch springform pan. Press into an even layer and half-way up the sides to form the crust. Bake for about 10-12 minutes, or until golden brown and set. Transfer the pan to a wire rack and allow the crust to cool completely, at least 30 minutes.

For The "Canary Yellow" Layer:
1 ¼ cups sugar
1 cup of lemon juice (from about 6 lemons)
½ cup water
¼ cup cornstarch
¼ tsp. salt
8 large egg yolks 
2 tbsp. grated lemon zest
3 tbsp. unsalted butter, softened and cut into pieces

Whisk sugar, lemon juice, water, cornstarch and salt together in a large non-reactive saucepan until cornstarch is dissolved. Bring to a simmer over medium heat, whisking occasionally until mixture is translucent and begins to thicken, about 5 minutes.

Whisk in yolks until combined. Stir in zest and butter. Bring to a simmer and stir constantly until mixture is thick enough to coat the back of a spoon, about 2 minutes.

Strain through fine mesh strainer into the baked and cooled pie shell and scrape off filling from the bottom of strainer. Reserve about 3 tbsp in a small dish for the decoration. Refrigerate while making creamy layer.

Creamy Filling Layer:
1 cup fresh lemon juice (about 6 lemons) and 1 tablespoon grated fresh lemon zest 
1 ¼ teaspoons unflavored gelatin
¼ cup sugar
1 (8‑ounce) package cream cheese, softened
1 (14‑ounce) can sweetened condensed milk
⅓ cup instant vanilla pudding mix
1 teaspoon vanilla extract
Stir ¼ cup of the lemon juice and gelatin together in a small bowl and let sit to soften.
Process the sugar and lemon zest together in a food processor until the sugar turns bright yellow, about 30 seconds. Add the cream cheese and continue to process until combined, about 30 seconds. Add the condensed milk and pudding mix and continue to process until smooth, about 30 seconds. Scrape down the sides of the work bowl.

Microwave the lemon juice mixed with gelatin until warm (just before bubbling), about 15-30 seconds. Stir to dissolve the gelatin.

With the food processor running, pour the warm gelatin mixture, remaining lemon juice, and vanilla through the feed tube and continue to process until thoroughly combined, about 30 seconds. Pour the creamy filling into the pie shell on top of yellow layer and smooth the top with a spatula. 

Transfer the reserved Canary Yellow filling to a small resealable plastic bag and snip one of the corners. Pipe thin, parallel lines of the Yellow filling onto the creamy layer, then drag a knife or spatula through the lines (perpendicular to them) to create a decorative pattern. 

Refrigerate the pie, uncovered, until chilled and set, about 6 hours. Serve chilled with whipped cream.

Sunday, March 3, 2013

Raspberry Jam and Apple-Tart for a Hobbit's Uninvited Guests

“What’s that? Tea! No thank you! A little red wine, I think for me.”
“And for me,” said Thorin.
“And raspberry jam and apple-tart,” said Bifur.
“And mince-pies and cheese,” said Bofur.
“And pork pie and salad,” said Bombur.
“And more cakes – and ale – and coffee, if you don’t mind,” called the other dwarves through the door.

“Put on a few eggs, there’s a good fellow!” Gandalf called after him, as the hobbit stumped off to the pantries. “And just bring out the cold chicken and pickles!”


~ The Hobbit by J.R. Tolkein

I had a couple favorites at Dessert Club Lit Night, and this was one of them.  As you can see, it's a simple, straightforward tart recipe.  Not too many ingredients.  But when they're awesome, like butter, sugar, and apples, you don't need much else.  

Poor Bilbo.  Dwarves showing up and making demands.  But you have to admit, they have good taste.  

Raspberry Jam and Apple-Tart (print recipe)
Serves 8

1 1/4 cups flour, plus more for dusting
12 tbsp. unsalted butter, cubed and chilled
1/4 tsp. kosher salt
7 Golden Delicious apples, peeled, cored, and halved
1/4 cup sugar
1/2 cup seedless raspberry jam
Whipped cream or vanilla ice cream, for serving


Combine flour, 8 tbsp. butter, and salt in a food processor and pulse until pea-size crumbles form, about 10 pulses. Drizzle in 3 tbsp. ice-cold water and pulse until dough is moistened, about 3—4 pulses. Transfer dough to a work surface and form into a flat disk; wrap in plastic wrap and refrigerate for 1 hour. Unwrap dough and transfer to a lightly floured work surface. Using a rolling pin, flatten dough into a 13″ circle and then transfer to a 11″ tart pan with a removable bottom; trim edges; chill for 1 hour.

Heat oven to 375º. Working with one apple half at a time, thinly slice into sections, keeping slices together. Press sliced apple half gently to fan it out; repeat with remaining apple halves. Place 1 fanned apple half on outer edge of the tart dough, pointing inward; repeat with 7 more apple halves. Separate remaining apple slices. Starting where the apple halves touch and working your way in, layer apples to create a tight rose pattern. Fill in any gaps with remaining apple. Sprinkle with sugar and then dot with remaining butter. Bake until golden brown, 60—70 minutes.

Meanwhile, heat apricot jam in a small saucepan until warmed and loose; pour through a fine strainer into a small bowl and set aside. Transfer tart to a wire rack; using a pastry brush, brush top of tart with jam. Let cool completely before slicing and serving with whipped cream.

Recipe from Sara Moulton via Saveur.com, and Dessert Club member A.M. 

Wednesday, February 27, 2013

Dessert Club - Lit Night

Because February is my birthday month, I get to pick the theme.  I've been wanting to do this one for awhile: a literature night.  Kinda book club-y.  Everyone chose a literary work (no cookbooks!) and brought a dessert mentioned in, or inspired by, their book.  It totally rocked. 

Now take a minute to think.  If you were going to a dessert lit night, what would you make?  What book inspires food for you?  My very first thought went to "Babette's Feast", which is a short story, and a French/Danish film.  But then I thought of a book I'd read more recently; an idea formed, and I couldn't move off of it.  A DC friend emailed me today; she is reading Night Circus, which I loved, and reminded me of all the fun foods that would inspire - d'oh, it would have been perfect!  It's OK, I have a feeling Lit Night is going to happen again. 

Here's what everyone made:

Heaven & Hell Cake
 
 Angels & Demons by Dan Brown

Mrs. Barry's Toothsome Raspberry Tarts
 ...and...
Browned Butter Raspberry Tart
 Anne of Green Gables by L.M. Montgomery

Orange Marmalade Cake
 At Home in Mitford by Jan Karon

Apple Tart with Raspberry Jam
 The Hobbit by J.R. Tolkein

Blackberry Mudslide Parfaits
 Where'd You Go, Bernadette? by Maria Semple
We had two winners this time:

Alice's "Eat Me" Custard Cake
Through the Looking Glass and What Alice Found There by Lewis Carroll

 Lemon Pie
A Walk in the Woods by Bill Bryson
 As you can see, and unfortunately for you, imagine, it was a spectacular Dessert night.  You might be wondering what some of those have to do with their books.  Others, you might be well aware.  I'm going to post some of these separately so you can find out...and of course, get the recipes.  Stay tuned for Dessert Club next month - the theme is cheese!!!


Thursday, February 21, 2013

Coffee Cake


A few months ago, my kindergartener came home exclaiming, "Mom!  My teacher made the most awesome snack for us today.  It was sooo good, you wouldn't believe it!"  OK, I'll bite.  "What was it?"

"It was called coffee cake.  But it didn't even have coffee in it.  People just eat it with coffee sometimes."

"Your teacher made you coffee cake?"  I had to admit, I was impressed.  And jealous.  I'd never made a good coffee cake, despite best efforts.  Something always went wrong.  And here, someone whose baking skills I was unable to critically evaluate (although I really like her), had introduced my daughter to this classic breakfast confection before I had.  It just didn't sit well.

"We can make coffee cake at home, you know."  It was my poker face.  I didn't actually know if we could, since I never had.  I started to realize how hard this might be.  "We can?!  Let's do it, let's do it!"

So we went home, and that weekend I made one sorry excuse for a coffee cake.  We all ate an obligatory piece, and tossed the rest.  It was dry on the edges, and kinda brown throughout, rather than high golden cake with a dark cinnamon ripple and crumbly sugar topping.  So I gave up for awhile.

Until I saw a picture in a cookbook of the perfect coffee cake, exactly how I would want mine to look.  I read the author's notes, and she said it was her rendition of her favorite cake from King Arthur Flour.  KAF!  Why hadn't I thought of that?!  Of course they will have a good one; their test kitchen actually tests recipes!  So I skipped this dubious variation and went straight to the source.

And this is what I got.

Tender, moist, vanilla yellow cake (I used my precious vanilla bean paste because I wanted it to be just really perfect.)  Cinnamon ripple, with a touch of cocoa (you barely taste it.)  Crunchy, crumbly cinnamon sugar topping (which has nothing wrong, but I may experiment with in future - nuts, oats, other spices, etc.  Now that the foundation is sure, embellishment comes next.)

Coffee cake perfection.  And yes, my little Ginger likes it, too.

Coffee Cake (print recipe)
Makes one 9x13 or two 9" round pans

Topping:
1 1/4 cups granulated sugar
1/4 tsp salt
1 1/2 cups all-purpose flour
1 T ground cinnamon
6 T unsalted butter, melted

Filling:

1 cup brown sugar
1 1/2 T ground cinnamon
1 tsp unsweetened cocoa powder

Cake:
3/4 cup unsalted butter, softened
1 1/4 tsp salt
1 1/2 cups granulated sugar
1/3 cup brown sugar
2 1/2 tsp baking powder
2 tsp vanilla extract or vanilla bean paste
3 large eggs
3/4 cup sour cream or plain yogurt (I used plain Greek)
1 1/4 cups milk (any; I used 2%)
3 3/4 cups all-purpose flour

1.  Preheat oven to 350°F. Lightly grease a 9" x 13" pan, or two 9" round cake pans.

2.  Make the topping by whisking together the sugar, salt, flour, and cinnamon. Add the melted butter, stirring till well combined. Set the topping aside.

3.  Make the filling by mixing together the brown sugar, cinnamon, and cocoa powder. Note that the cocoa powder is used strictly for color, not flavor; leave it out if you like. Set it aside.

4.  To make the cake: In a large bowl, beat together the butter, salt, sugars, baking powder, and vanilla until well combined and smooth.  Add the eggs one at a time, beating well after each addition.  In a separate bowl, whisk together the sour cream or yogurt and milk till well combined. You don't need to whisk out all the lumps.  Add the flour to the butter mixture alternately with the milk/sour cream mixture, beating gently to combine.

5.  Pour/spread half the batter (a scant 3 cups or 28 ounces) into the prepared pan(s), spreading all the way to the edges. If you're using two 9" round pans, spread 1 1/3 cups (14 ounces) batter in each pan.  Sprinkle the filling evenly atop the batter.  Spread the remaining batter atop the filling (this is most easily done with a rubber spatula dipped in water.) Use a table knife to gently swirl the filling into the batter, as though you were making a marble cake. Don't combine filling and batter thoroughly; just swirl the filling through the batter. Sprinkle the topping over the batter in the pan.

6.  Bake the cake until it's a dark golden brown around the edges; medium-golden with no light patches showing on top, and a toothpick or cake tester inserted into the center comes out clean, about 55 to 60 minutes for the 9" x 13" pan, 50 to 55 minutes for the 9" round pans. When pressed gently in the middle, the cake should spring back.  Remove the cake from the oven and allow it to cool for 20 minutes before cutting and serving. Serve cake right from the pan.

Recipe from King Arthur Flour

Monday, February 18, 2013

Cocoa Dutch Baby

I've been thinking.  Maybe Pancake Week should go on forever.  And ever and ever.  I know my family wouldn't mind. 

Seriously, this is probably the last one.  We've had a really great week this year.  I made this Cocoa Dutch Baby for my family Valentine's morning, served with strawberries and whipped cream; orange juice, and turkey sausage on the side. 

I prepped the dry ingredients the night before, just to hurry things along in the morning, but it was seriously fast and easy to whip up in the food processor.  Pour it in the pan, pop it in the oven.  The longest part is waiting for the oven to preheat (mine is a slowpoke!)
Rave reviews all around.

Cocoa Dutch Baby (print recipe)
Serves 4 to 6
3/4 cup whole milk
3 large eggs
1/3 cup all-purpose flour
1/4 cup unsweetened cocoa powder, sifted
1/4 tsp coarse salt
1/2 tsp pure vanilla extract
1/4 cup granulated sugar
2 T unsalted butter
3 T confectioners' sugar, for dusting

Preheat oven to 425 degrees. In a blender, combine milk, eggs, flour, cocoa powder, salt, vanilla, and granulated sugar. Blend until foamy, 1 minute. In a 10-inch cast-iron skillet*, melt butter over medium. Pour batter into skillet and immediately transfer to oven. Bake until puffed and set, 20 minutes. Dust with confectioners' sugar and serve immediately.

*If you don't have a 10-inch cast iron skillet, you can also use a 9-inch round cake pan.
Recipe from Everyday Food

Sunday, February 17, 2013

Banana Oatmeal Pancakes with (American) Clotted Cream

Are we having a good Pancake Week?  I am.  My friend Sheri had us over for breakfast the other day, and served us these pancakes of her own invention - a melding of her family's secret pancake recipe, and her favorite banana oatmeal cookies.  And the proverbial cherry on top?  Her homemade faux clotted cream.

Real clotted cream is a sinfully awesome British product - a thick cream made by indirectly heating full-cream cow's milk using steam or a water bath and then leaving it in shallow pans to cool slowly. During this time, the cream content rises to the surface and forms 'clots' or 'clouts'.  I likey.  So does Sheri and her family.  So she figured out how to best imitate it using stuff we have in America.  It's pretty awesome on these pancakes.  And pretty much everything else in the whole world.  Add jam as necessary.

Or in my case, I just drizzled on some leftover eggnog syrup.  Divine.
Banana Oatmeal Pancakes (print recipe)

1 1/2 cup milk
1 cup quick cooking oats
3 eggs, separated
1/2 cup sugar
1/3 cup oil
1 or 2 very ripe bananas
1/4 tsp baking soda
2 tsp baking powder3/4 tsp cinnamon
1/4 tsp nutmeg
1/8 tsp ground cardamom
1/2 tsp salt
1 3/4 cup all-purpose flour

1.  Combine milk and oats in a bowl and set aside to soak. 

2.  Beat egg whites until stiff peaks form, set aside. Cream together sugar and oil. Add egg yolks and bananas (one at a time) until well blended. Add baking soda, baking powder,  cinnamon, nutmeg, cardamom and salt, and mix until incorporated. Slowly add milk and oats then flour and mix until just combined with no large lumps. Gently fold in egg whites.

3.  Heat a large skillet or griddle over medium-low heat, and coat with cooking spray. Pour 1/4 cupfuls of batter onto the skillet, and cook until large bubbles appear and then pop. Flip with a spatula, and cook until browned on the other side.
"Clotted Cream"
8 ounces cream cheese
1 cup whipping cream
2 T confectioners' sugar
1 tsp vanilla extract

Combine all ingredients in a blender or food processor and blend until smooth.  Refrigerate until ready to use.

Recipes from Sheri Wadman

Saturday, February 16, 2013

Lemon Ricotta Pancakes with Lemon Curd and Fresh Raspberries

Heaven!  Simply heaven!  Shanna's family unanimously voted these as their very favorites, of all the pancakes she tried.  What could be better than light, fluffy, and oh-so-lemony pancakes?  Unless you also drizzle with lemon curd, that's the only way they could be better

Lemon Ricotta Pancakes (print recipe)

Makes 4 to 6 pancakes

3/4 cup all-purpose flour
1 tablespoon baking powder
1/2 teaspoon ground nutmeg
1/4 teaspoon salt
2 tablespoons sugar
1 cup ricotta cheese
2 eggs
2/3 cup milk
1 lemon, zested and juiced
Butter, for griddle
1 (11-ounce) jar prepared lemon curd
Fresh raspberries, for garnish
Confectioners' sugar, for garnish

1.  Preheat a nonstick griddle.

2.  Combine flour, baking powder, nutmeg, salt, and sugar in a small bowl. Whisk together the cheese, eggs, milk, lemon juice and zest in a large bowl. Whisk the flour mixture into the wet ingredients until just combined. Brush the hot griddle with butter. For each pancake, pour approximately 1/4 cup measure of the batter on the griddle and cook on both sides until light golden brown. Repeat until no batter remains.

3.  Empty the contents of the lemon curd into a small saucepan and warm over low heat. Alternatively, remove the lid and place in a microwave oven on 50 percent power for 2 minutes, stopping after 1 minute to stir the curd. Drizzle a few tablespoons of the curd over the pancakes, top with fresh raspberries, and sprinkle with confectioners' s sugar.

Recipe from Bobby Flay and tested by Shanna Stratton

Friday, February 15, 2013

Oatmeal Cookie Pancakes with Marshmallow Honey Butter


 You're dying, right?  I know!  These pankies are pretty outrageously good.  And I'm picky about raisins.  But in these, they shine...without outshining. 

If you've paid any attention to my sources, you might be saying, wow, she's really cooking a lot from Joy the Baker.  It's true, I'm in love with her cookbook, and we're still having a good honeymoon.  But this week especially, because her first chapter is called pancakes pancakes pancakes...and lesser breakfast items.  How could that not show heavily during Pancake Week?

Then there's the butter.  Dessert Club member Sheri made some killer Marshmallow Honey Butter to fill her winning Russian Rose Bread, and I just had to try it.  What better palate than pancakes?

Also.  My 6-year-old has really terrible allergies in the spring.  Someone told me if you eat local honey it helps reduce allergic reactions to pollen, so I bought some at the market where we got our Halloween pumpkins.  Couldn't hurt, I figured.  Turns out, she doesn't even like honey.  But we've been having a good time using it up anyway, and if she happens to ingest any, well, we'll take any help we can get.  She did like this honey butter, at least. 
 Oatmeal Cookie Pancakes (print recipe)

Makes about 3 dozen small pancakes

1 1/2 cups all-purpose flour
3/4 cup old-fashioned oats
2 T packed brown sugar
2 tsp baking powder
1 tsp baking soda
1 tsp salt
3/4 tsp ground cinnamon
Big pinch freshly ground nutmeg
2 large eggs
2 cups buttermilk
1 T pure maple syrup
1/4 cup butter, melted and cooled plus more for the griddle
1/3 cup golden raisins

1.  Place a rack in the center of the oven and preheat to 200 degrees F.  This will help keep the cooked pancakes warm while you finish the entire batch.

2.  In a large bowl, whisk together flour, oats, brown sugar, baking powder, baking soda, salt, and spices.  Set aside.

3.  In a medium bowl, whisk together eggs, buttermilk, maple syrup, and melted butter.  Add the buttermilk mixture, all at once, to the flour mixture and fold together with a spatula until all of the flour is incorporated.  Fold in the raisins.  Let stand for 5 minutes.

4.  Heat griddle over medium heat and add a touch of butter to melt.  Spoon or pour batter onto the hot griddle.  Heat until the bottom is browned and the top is bubbly.  Flip and cook through, about 2 minutes on each side.  Place on a heatproof plate in the oven to rest until ready to serve. 

Recipe from Joy the Baker by Joy Wilson


 Marshmallow Honey Butter
Makes 1 cup

1/2 cup butter (I used salted), softened
1/4 c honey
1/4 c marshmallow fluff

In an electric mixer on medium speed, whip ingredients until fluffy and well-combined.  Serve with pancakes or pretty much anything in the world. 

Recipe from Dessert Club member Sheri Wadman

Thursday, February 14, 2013

Black Forest Pancakes


Here's a nice one for Valentine's Day (Happy, by the way.)  Chocolate, cherries, and plenty of whipped cream; you can hardly go wrong. 

Black Forest Pancakes (print recipe)

Makes 2 servings

1 cup flour
1/4 cup unsweetened cocoa powder
1/4 cup sugar
1/2 tsp baking powder
1/2 tsp salt
1 cup milk
1 egg
2 T butter, melted
2 cups cherries, pitted and halved
2 T sugar
2 tsp cornstarch
1/4 cup water
1/2 cup whipping cream
2 T sugar

1.  Mix the flour, cocoa powder, 1/4 cup sugar, baking powder, and salt in a large bowl.  Mix the milk, egg, and butter in another large bowl.  Mix the wet ingredients into the dry ingredients. 

2.  Heat a pan over medium heat and melt a touch of butter in it.  Pour 1/4 cup of the mixture into the pan and cook until the surface starts to bubble and the bottom is golden brown, about 2 to 3 minutes.  Flip the pancake and cook the other side until the bottom is golden brown, about 1 to 2 minutes.  Repeat for the remaining batter.

3.  Meanwhile, simmer the cherries, 2 T sugar, cornstarch, and water over medium heat until the sauce thickens, about 5 minutes.  Whip the cream and 2 T sugar until soft peaks form.  Stack the pancakes, layering with cherry sauce and whipped cream.  Garnish with fresh cherries and/or chocolate shavings.

Recipe from Closet Cooking (love that guy) and tested by Shanna Stratton

Wednesday, February 13, 2013

Bacon Black Pepper Waffles

 As far as I'm concerned, waffles are honorary pancakes.  I do not judge these breakfast sisters by their shape; I embrace their likenesses, while respecting their differences.  The main thing is that they are hot, comforting...and freakin' good with maple syrup. 
 And if there happens to be bacon and black pepper in them, all the better.  And all the more embracing that will be taking place.  My kids only thought these were so-so, but keep in mind they are accustomed to toaster waffles with artificial "blueberry" bits in them; I have no one to blame but myself.  I, however, lo-o-o-o-o-ved these waffles; I froze the leftovers and ate them for breakfast all week, savoring every sweet-salty-smoky-spicy-buttery bite.  Can't wait to make them again.

Bacon Black Pepper Waffles (print recipe)
Makes 16 waffles
10 slices bacon
2 1/2 tsp fresh, coarsely cracked black pepper, divided
3 cups all-purpose flour
1 T baking powder
1 tsp baking soda
1 tsp salt
1/4 cup packed brown sugar
4 large eggs
2/3 cup canola or vegetable oil
2 tsp pure vanilla extract
2 1/2 cups buttermilk

1.  To make the bacon: position a rack in the upper third of the oven and preheat to 375 degrees F.  Line a baking sheet with foil and arrange bacon slices in a single layer across the sheet.  Sprinkle generously with 2 tsp black pepper.  Place in the oven to bake until bacon is brown and crispy, 10 to 15 minutes.  Remove from the oven and place bacon slices on a plate lined with paper towels.  Once cool enough to handle, chop bacon into bite-size chunks and set aside while you prepare the waffle batter.  


2.  Set your waffle iron on a level, clean surface and turn on to preheat.

3.  To make waffles: in a large bowl, whisk together flour, baking powder, baking soda, salt, 1/2 tsp pepper, and brown sugar.  In a medium bowl, whisk together eggs, oil, vanilla, and buttermilk.  Add the buttermilk mixture, all at once, to the flour mixture.  Stir until just incorporated.  Fold in the bacon.  Try not to overmix the batter.  If a few lumps remain, that's OK.  Cook according to your waffle iron instructions.  Serve with warm maple syrup - heaven!

Variation: If you don't eat bacon, or just want to try it a different way, subtract the bacon and black pepper and add 1/4 tsp freshly grated nutmeg and 3/4 tsp ground cinnamon to the batter!

Recipe from Joy the Baker by Joy Wilson

Tuesday, February 12, 2013

Eggnog Pancakes with Eggnong Syrup

I asked my Dessert Club colleagues if anyone would like to help me try, and write up, recipes for Pancake Week.  I got a range of responses - some silent, some saying they have no good pancake recipes, and some saying, "Heck, yeah, sounds like fun!"  My friend Shanna in particular really embraced the challenge of Pancake Week, gathering and testing numerous recipes on her family of seven, and I think we've all come out winners because of it.

She said these eggnog pancakes and eggnog syrup really taste deliciously like eggnog, amazingly so.  But, she said, in the future, she would probably have the pancakes with a maple or buttermilk syrup, and serve the eggnog syrup over plain pancakes.  Together, they were too much.  But each with a simpler partner, perfection.

Eggnog Pancakes (print recipe)

1 cup flour
1 tsp baking powder
1/2 tsp salt
1 T sugar
1 cup eggnog
1 egg, lightly beaten
1/4 cup oil or melted butter
1/4 cup milk, optional

1.  In a medium mixing bowl, combine flour, baking powder, salt and sugar.  In another small bowl, mix eggnog, egg, and oil.  Add the wet mixture to the dry mixture and stir just until blended.  (At this point, you may need to add the milk, depending on how thick or runny you want your pancakes to be.  I like mine thinner.) 

2.  Preheat griddle to medium high and grease with oil or butter.  Pour approximately 1/4 cup batter on hot griddle for each pancake.  Cook for 2 to 3 minutes until bubbles begin to form and edges are set.  Flip and cook for 1 to 2 minutes on other side, until golden and center is no longer runny.

Eggnog Syrup
1 1/2 cups sugar
3/4 cup eggnog
1/4 cup milk
1/2 cup butter
2 T corn syrup
1 tsp baking soda
2 tsp vanilla extract
Whipped topping, optional

In a medium saucepan, combine the sugar, eggnog, milk, butter, corn syrup, and baking soda.  Bring to a boil and boil for 5 minutes.  Remove from heat and stir in vanilla.  Pour warm syrup over hot pancakes and top with whipped topping.

Recipe from High Heels and Grills, tested by Shanna Stratton

And as a BONUS, hello, I am giving you Shanna's own recipe for homemade eggnog, in case you want to make these during the other eleven months, when eggnog is harder to come by.  This eggnog is amazing and delicious and makes the whole fridge smell like heaven!

Shanna's Homemade Eggnog
Makes a ton

6 eggs
3/4 cup cream or evaporated milk
1 small pkg instant vanilla pudding
1/2 cup sugar
8 cups milk
1 tsp rum extract
2 tsp vanilla extract
1/4 tsp nutmeg

Beat eggs for 5 minutes (I use an immersion blender).  Add cream and pudding.  Mix well.  Add sugar, 4 cups milk, vanilla, rum flavoring and nutmeg.  Mix for 3 minutes.  Add remaining 4 cups milk.  Mix another 3-5 minutes.  Best if made a day ahead!
  
Related Posts Plugin for WordPress, Blogger...